HOWTO: Scan for Installed Chocolatey Packages on a Server
When a critical bug or vulnerability is discovered in a package, it is important to know which servers are using the affected package. ProGet’s Package Usage Scanning feature provides valuable information about which packages are installed on which servers.
This guide shows you how to use Otter to scan servers for installed Chocolatey packages and integrate ProGet with Otter to see which Chocolatey packages are installed on which server.
Using Otter to Scan Servers for Installed Packages.
Otter helps you automatically provision, manage and configure your servers. You can define reusable sets of configurations called roles, and then scale your infrastructure by simply assigning those roles to any number of servers.
Scanning your server for installed packages is a feature available in the free version!
Step 1: Connect Otter to Your Server
If you haven't yet installed and configured Otter, you must do so first. You can install Otter on the same server that hosts ProGet, or on a server of your choice. Otter can then scan other servers that you have set up.
Otter can be installed on any supported version of Windows. Simply download the installer and click through to get Otter up and running in minutes. Otter can also be installed on Linux with Docker.
After Otter is installed, you'll need to connect Otter to the servers you want to browse for Chocolatey packages. For details on how to add your server to Otter, read our installation guide.
Step 2: Install Chocolatey Extension in Otter
Before Otter can scan your server for Chocolatey packages, the Chocolatey extension must be installed.
Navigate to "Administration Overview" > "Software System & Configuration" > "Extensions" > "Available Extensions" > "Chocolatey".
Step 3: Setup Configuration Drift
Otter can be set to monitor configuration drift and detect when the desired configuration and the current configuration do not match. Read our docs to learn how to create and automate drift remediation jobs.
To check your server for installed Chocolatey packages, configuration drift can be set at Verify/report only.
Navigate to "Servers" > "Server" > "Overview" > "Details" > "Configuration Drift"
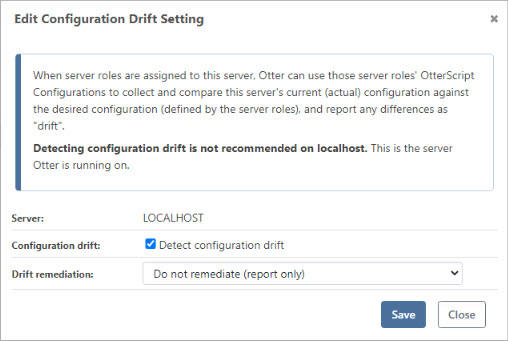
Check the box next to Configuration drift and select Do not remediate (report only). These are the minimum settings Otter needs to detect your Chocolatey packages, however, the other Drift remediation options will work as well.

Under the Overview tab, you can view and update your configuration drift settings.
Step 4: Configure Package Scanning
Next, the package check must be configured to tell Otter which packages to look for.
Navigate to "Servers" > "Server" > "Installed Packages & Containers" > "Configure" and check the box next to "Collect Chocolatey Packages".
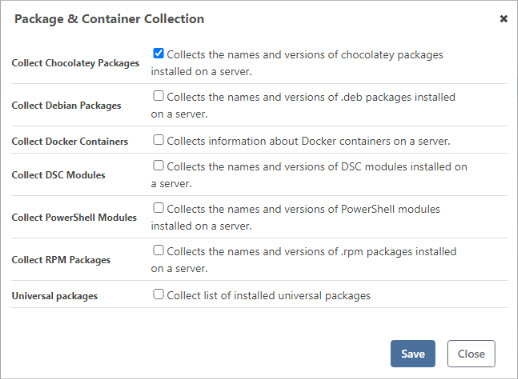
After saving, you should see your installed Chocolatey packages.
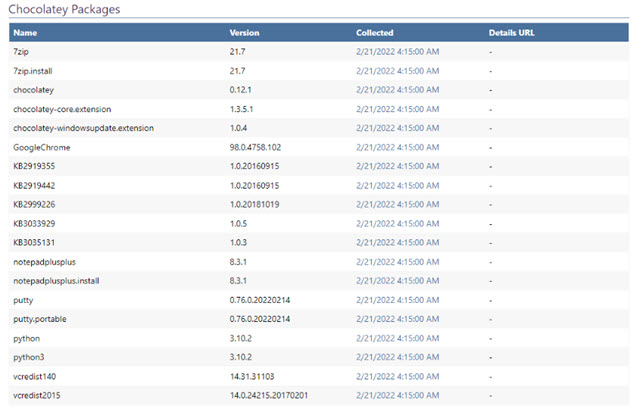
If you do not see your Chocolatey packages at this point, skip to the troubleshooting section.
Step 5: Create an API Key
To integrate Otter with ProGet, you need to create an API key in Otter.
In Otter, navigate to Administration Overview > Security & Authentication > API Keys & Access Logs. Click Create API Key and enter the appropriate information.
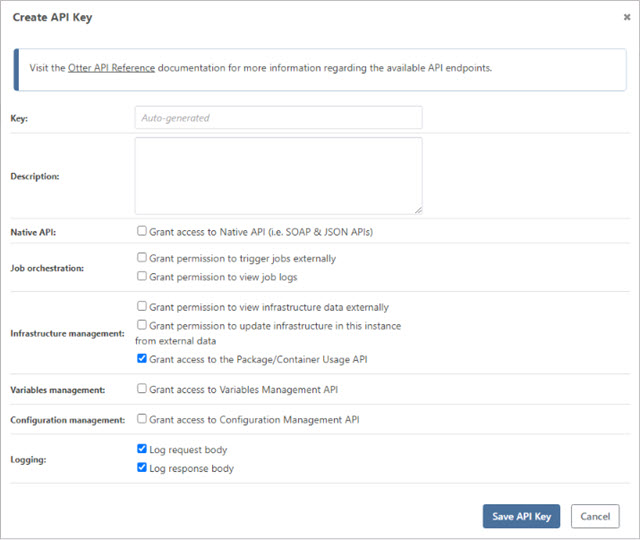
For the purpose of this guide, the only required setting for the API key is to grant access to the Package/Container Usage API.
Integrating ProGet with Otter for Package Usage Scanning
Now that Otter is set up, it can be integrated with ProGet to show which Chocolatey packages are being used in which servers. Package Usage Scanning works with remote packages, so it's not necessary to have packages local or cached.
Step 1: Create a Chocolatey Feed in ProGet
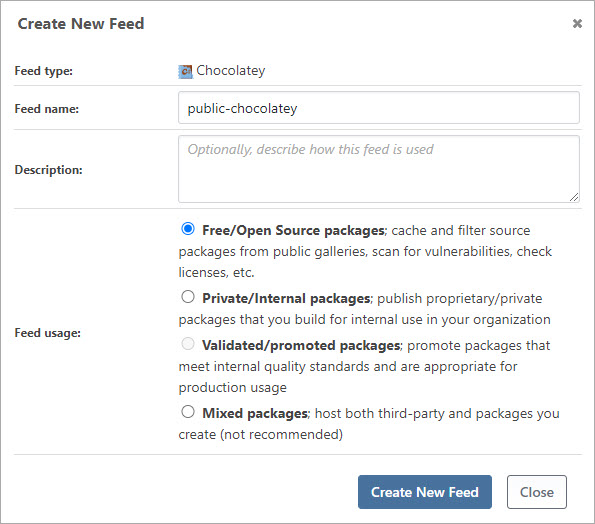
You will need to create a Chocolatey feed in ProGet if you do not already have one. To create a new feed, navigate to the banner at the top of the page and click Feeds. Then select Create New Feed.

Since this feed will be used for Chocolatey packages, create a Chocolatey feed.
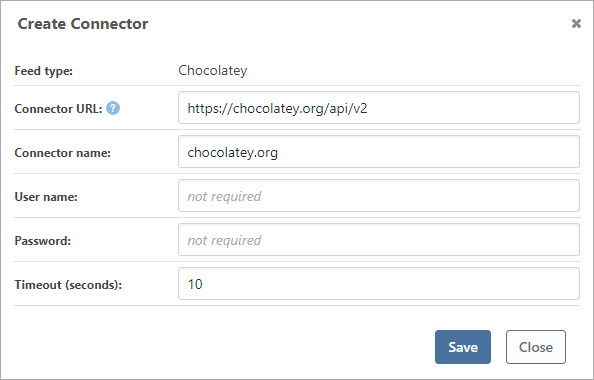
Now that your feed is created it will need to be connected to chocolatey.org. Click on "add connector" and fill in the relevant information.
Step 2: Connect Chocolatey Feed to Otter
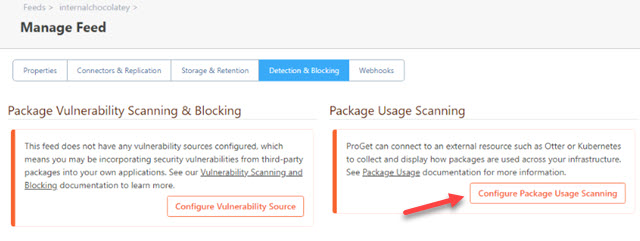
In ProGet, navigate to "Feeds" > (The Chocolatey feed) > "Manage Feed" > "Detection & Blocking" > “Configure Package Usage Scanning”.
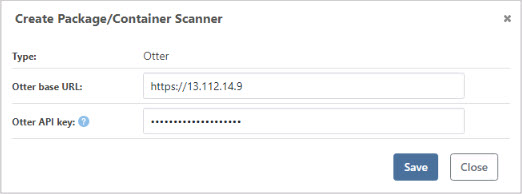
Enter in the API key you created in Otter and your Otter base URL.
Step 3: Run Package/Container Scanning
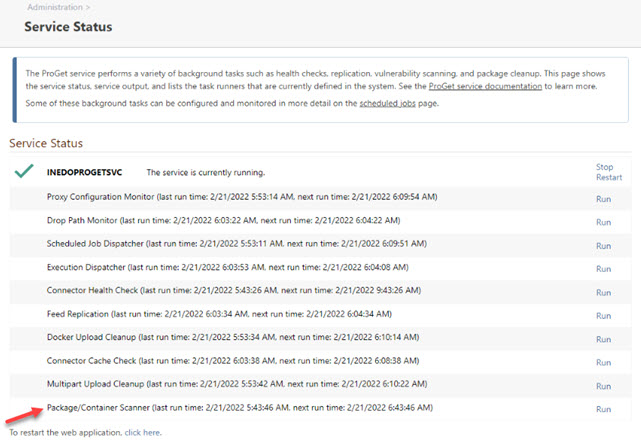
To see your scanned Chocolatey packages immediately, you need to run the package/container scanner manually.
Navigate to "Administration Overview" > "ProGet Server Status" > "Manage Service" > "Service Statu"s > "Package/Container Scanner" > "Run"
Step 4: Check Package Usage Scanning
Now that everything is set up, the Package Usage Scanning feature can be used!
First, navigate to your preferred package in ProGet. Once you have selected the package, navigate to Usage & Statistics and you can see the package usage details under Package Usage.

Troubleshooting
Chocolatey packages are not showing up in Otter
If you have configured the package scan to collect Chocolatey packages, but you still do not see them, you may need to manually restart Otter to get the Chocolatey packages scanned.
Navigate to Administration Overview > "Otter Service Status" > "Manage Service" > "Restart".
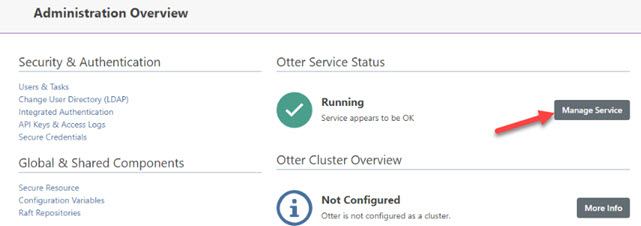
After the reboot is complete, navigate back to Installed Packages & Containers on your server and you should see your installed Chocolatey packages.
In this article
- Using Otter to Scan Servers for Installed Packages.
- Step 1: Connect Otter to Your Server
- Step 2: Install Chocolatey Extension in Otter
- Step 3: Setup Configuration Drift
- Step 4: Configure Package Scanning
- Step 5: Create an API Key
- Integrating ProGet with Otter for Package Usage Scanning
- Step 1: Create a Chocolatey Feed in ProGet
- Step 2: Connect Chocolatey Feed to Otter
- Step 3: Run Package/Container Scanning
- Step 4: Check Package Usage Scanning
- Troubleshooting

