HOWTO: Set Up a Private Chocolatey Repository
Chocolatey is a system package manager for Windows that helps you configure computers quickly and automatically by installing applications and tools with Chocolatey packages.
ProGet can be configured as a private Chocolatey repository and host all your Chocolatey packages! If you want to download third-party Chocolatey packages, a ProGet feed can be used to directly connect to chocolatey.org. Alternatively, if you want to use internalized packages exclusively, a separate feed that hosts internalized Chocolatey packages can be created.
For more information on how it works, along with an explanation, see Chocolatey Privatization and Internalization. However, in this article, we will explain how to set up both a public and an internalized feed in ProGet to act as a private Chocolatey repository.
Setting Up a Private Chocolatey Repository with a Public Feed
Using a public feed allows you to connect and pull packages from chocolatey.org and host them in ProGet.
Hosting your Chocolatey packages in ProGet allows you to bypass Chocolatey's rate-limiting policies, especially if you enable metadata caching and internalize your packages.
Step 1: Create a public feed in Proget
First, you need to create a public feed that contains all your packages from chocolatey.org.
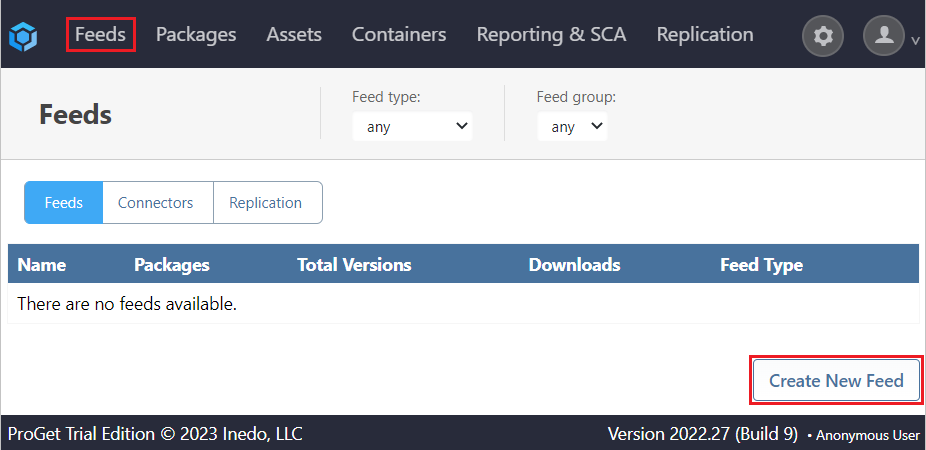
Start by navigating to Feed and selecting [Create New Feed].
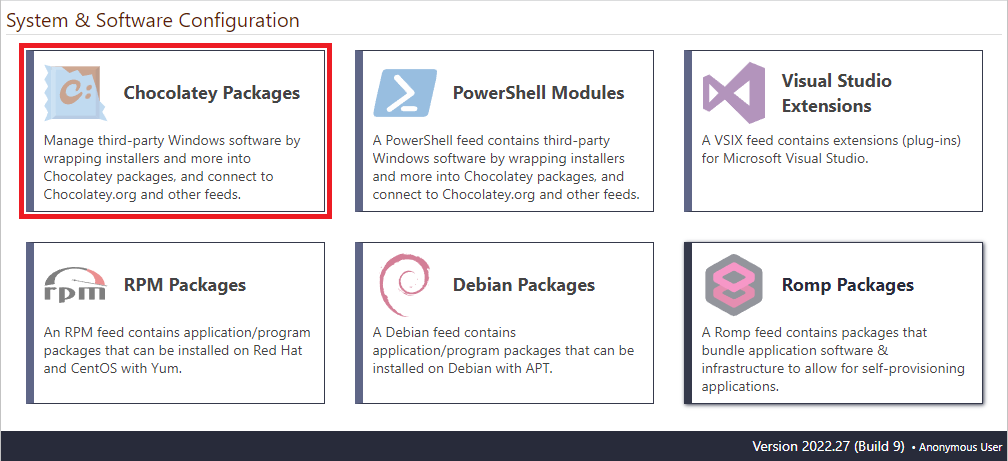
From here, select Chocolately Packages from the list, under the System & Software Configuration heading.
Step 2: Configure feed
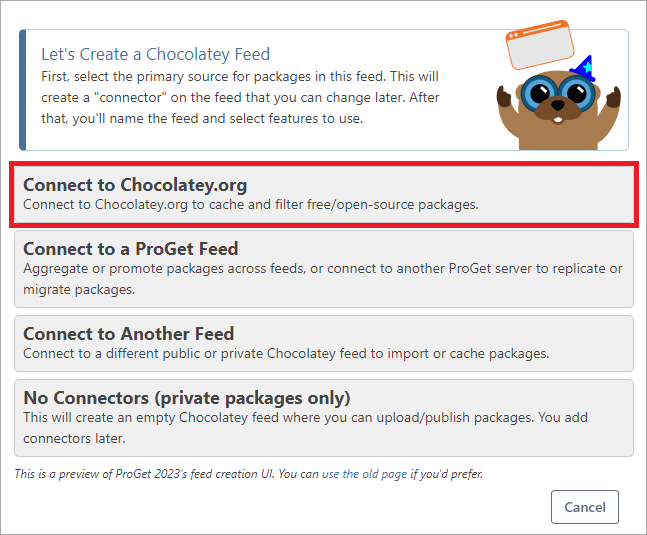
After selecting the feed type, specify that the feed will connect directly to "Chocolatey.org" by selecting "Connect to Chocolatey.org".
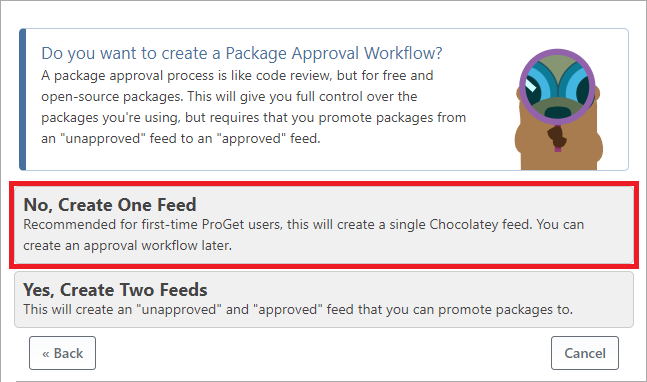
It is usually recommended to create two feeds, for unapproved and approved packages respectively. However, for now, create just the one by selecting "No, Create One Feed".
Step 3: Name feed
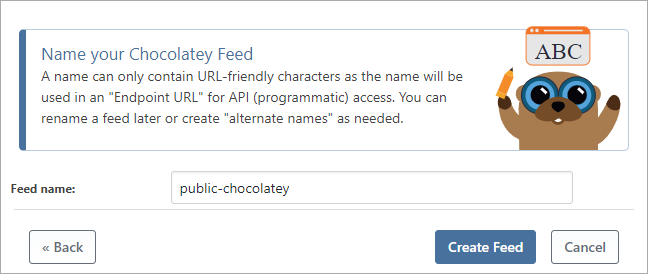
Next, name your feed. public-chocolatey would be appropriate in this case as it clearly indicates that this feed contains public Chocolatey packages. Then select [Create Feeds].
This will then present us with options that we can select. For more information, refer to the Vulnerability Scanning and Blocking documentation.
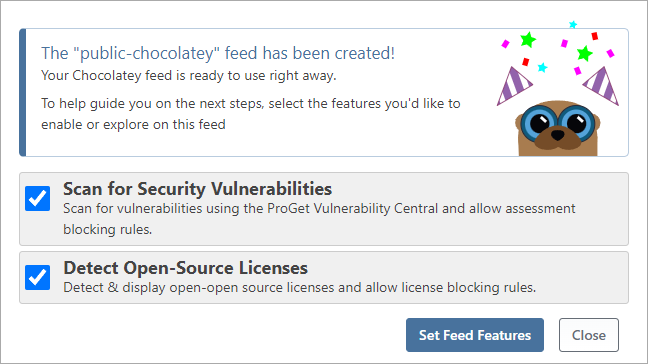
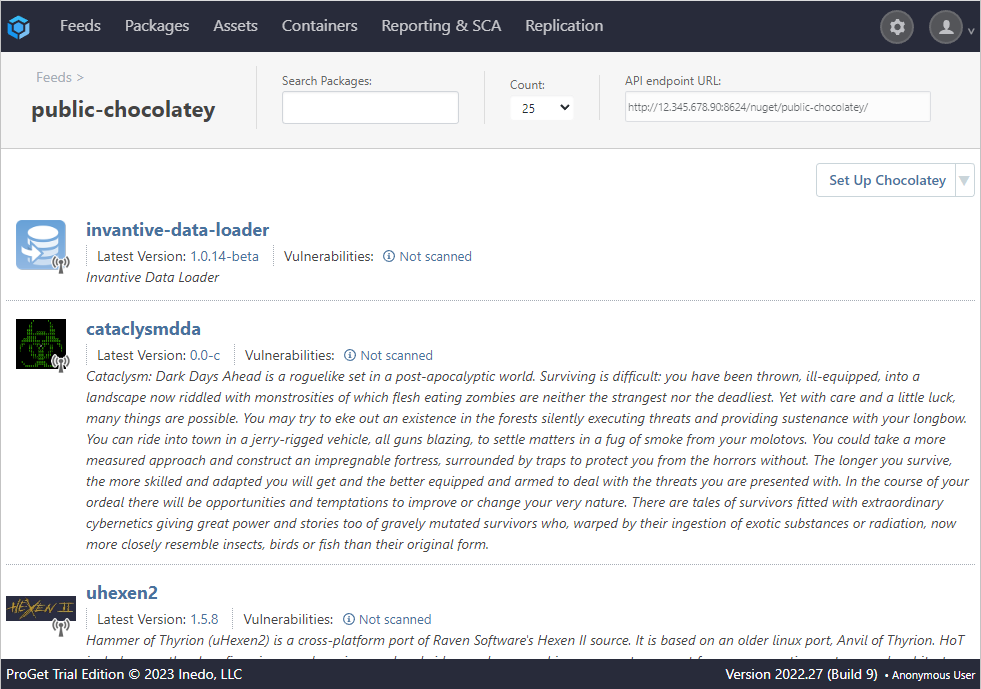
Finally, select [Set Feed Features], which will create the feeds and redirect you to the public-chocolatey feed, populated with packages from Chocolatey.org.
Step 4: Enable Metadata Caching
Although not required, we recommend enabling metadata caching, which will significantly reduce the number of times ProGet must forward queries to "chocolatey" and avoid rate limiting.
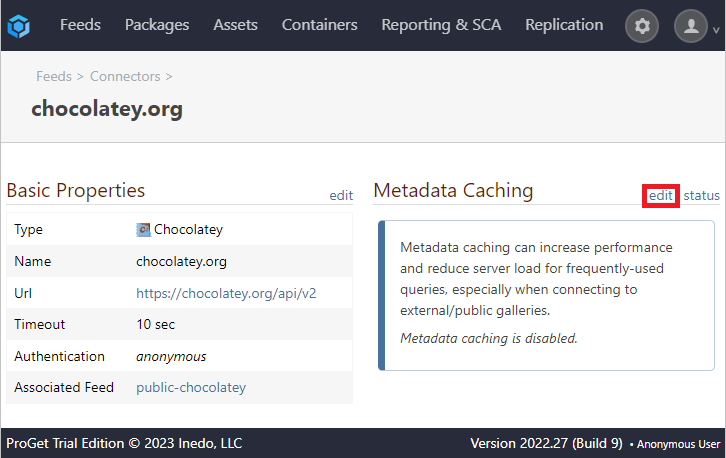
To enable metadata caching, navigate to "Feeds" > "Connectors", and select "chocolatey.org".
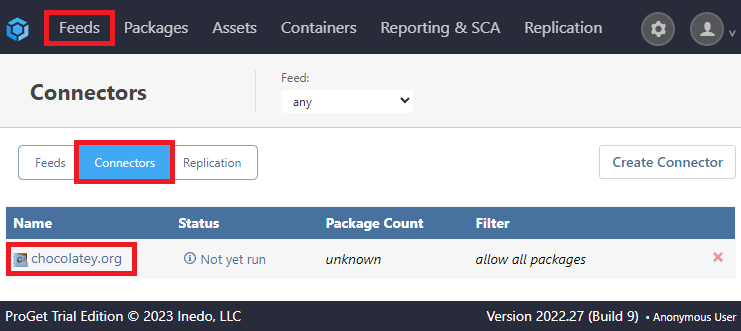
From here, locate "Metadata Caching" on the right side, and select "edit".
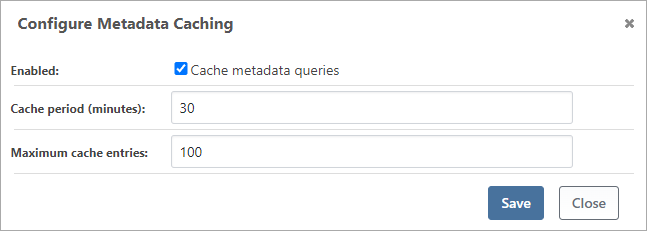
This will bring up a dialog box. Click the checkbox next to "Cache metadata queries". Doing so will bring up two options, "Cache period (minutes)" and "Minimum cache entries" that can be set at your discretion. We recommend keeping them to the default values.
Finally, click [Save].
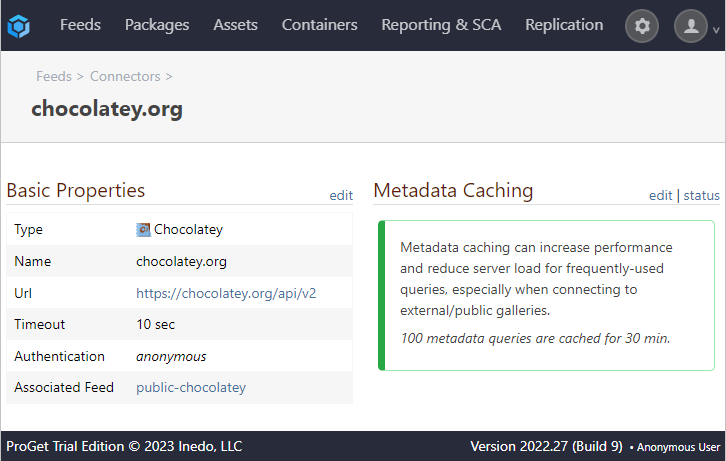
The changes will now be reflected on the "Connectors" page.
Setting Up a Private Chocolatey Repository with an Internalized Feed
Chocolatey packages shine especially when they are completely independent of external factors such as an internet connection or web address changes. This can be achieved by internalizing Chocolatey packages.
When internalizing a package, all embedded/internal resources are "internalized" so that the installation logic can be reused without having to run a script that downloads an installer from the Internet.
Step 1: Internalize Packages
Chocolatey packages must be internalized before they can be uploaded to a private ProGet feed. Chocolatey’s package internalizer can internalize packages automatically or you can do it yourself:
- Download and unpack the existing package as a .zip file.
- Download the resources that the package has and add them to the package.
- Edit the installation script to point to the internal software.
- Package it back up.
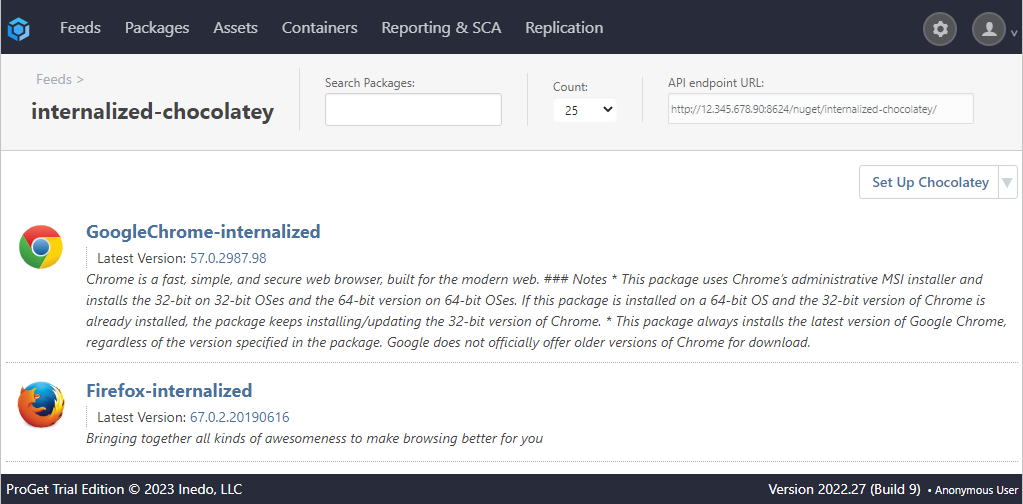
Be sure to change the title or edit the description of your internalized packages before uploading them to ProGet, as internalized packages look externally identical to normal packages. To avoid confusion, we recommend slightly changing the name of the internalized package, for example, change "Firefox" to "Firefox-internalized".
Step 2: Create an Internalized Feed in ProGet
Now that your packages are internalized, a separate feed should be created exclusively for approved internalized Chocolatey packages.
As with creating a public feed, start by navigating to "Feed", selecting [Create New Feed] and selecting "Chocolatey Packages" from the list.
Step 3: Configure feed
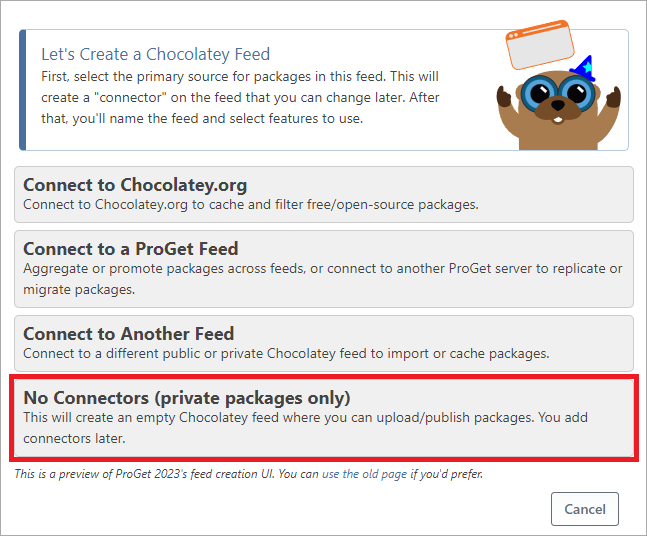
After selecting the feed type, specify that the feed will be for internalized packages by selecting "No Connectors (private packages only)".
Step 4: Name feed
Now, name the feed. As this feed is only for approved internalized packages, internalized-chocolatey would be an appropriate name.
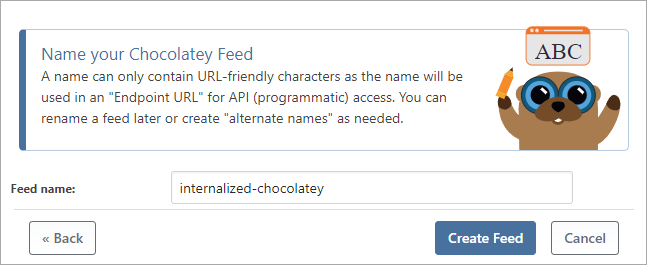
As with creating public feeds, a choice of options will be offered, this time disabled by default. Configure as necessary and then select [Set Feed Features].
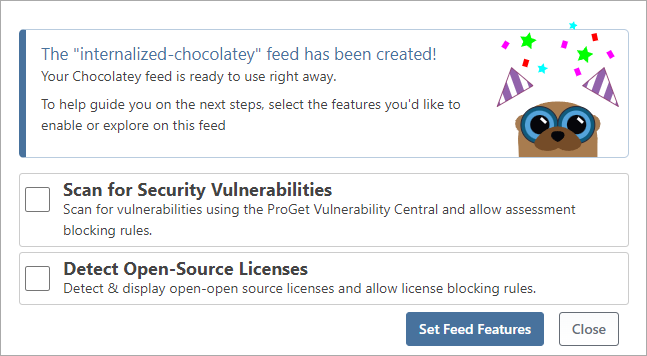
You will then be directed to the new private feed, with no packages uploaded as of yet.

Step 5: Upload Packages to Internalized Feed
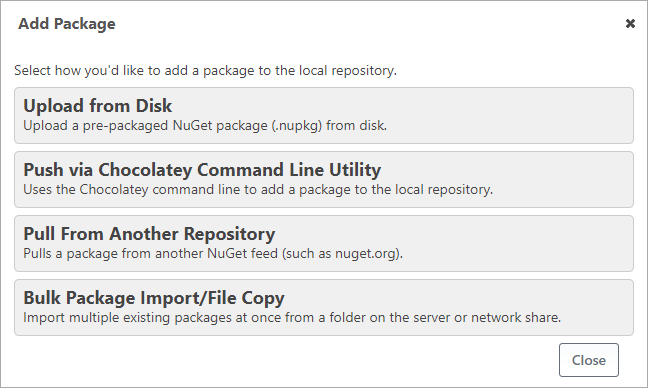
Now that you have a private internalized feed setup, you can upload your internalized packages to it. From the internalized-chocolatey feed, select "Add Package" from the drop-down menu on the right.

From here you will be presented with various methods to add your packages.
That’s it! You now have a private Chocolatey repository that takes full advantage of internalized packages.
In this article
- Setting Up a Private Chocolatey Repository with a Public Feed
- Step 1: Create a public feed in Proget
- Step 2: Configure feed
- Step 3: Name feed
- Step 4: Enable Metadata Caching
- Setting Up a Private Chocolatey Repository with an Internalized Feed
- Step 1: Internalize Packages
- Step 2: Create an Internalized Feed in ProGet
- Step 3: Configure feed
- Step 4: Name feed
- Step 5: Upload Packages to Internalized Feed

