HOWTO: Proxy Packages from NuGet.org in Visual Studio or CLI
Connecting ProGet with Visual Studio or integrating it into dotnet is a great way to increase the security of the most widely used integrated development environment for Windows developers. ProGet acts as a NuGet Package Manager, as it can detect package licenses, scan packages for vulnerabilities, and control promotion between feeds.
ProGet can create a "Feed" to proxy NuGet packages from NuGet.org so that teams can consume them in their projects just as they would if pulling directly from the OSS repository. Using this feed will let you cache packages, which is useful when Nuget.org is experiencing issues. It also lets you easily see which packages are being downloaded and used frequently.
In this article, we'll explain how to proxy NuGet packages from NuGet.org to a feed in ProGet, and then connect it to Visual Studio or other clients such as the NuGet CLI, VS Code, and JetBrains Rider and set up authentication. We’ll also look at how to set up a private repository for using internal NuGet packages, as well as how to establish a package approval process to manage which packages your team can utilize in production.
Step 1: Create and Name a NuGet Feed
We'll first create a NuGet feed to proxy packages from NuGet.org. You can read more on creating feeds by reading Creating and Managing Feeds
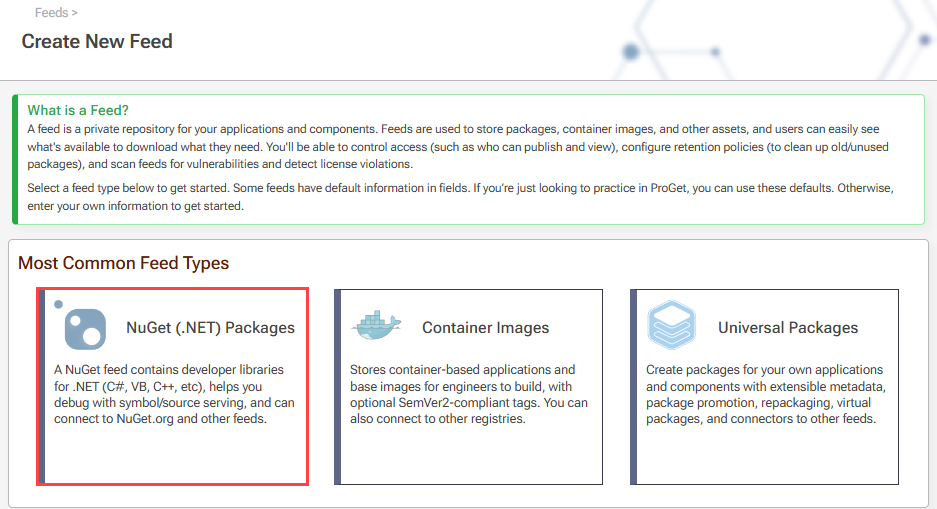
In your ProGet instance, select "Feeds" and "Create New Feed", and select "NuGet (.NET) Packages".
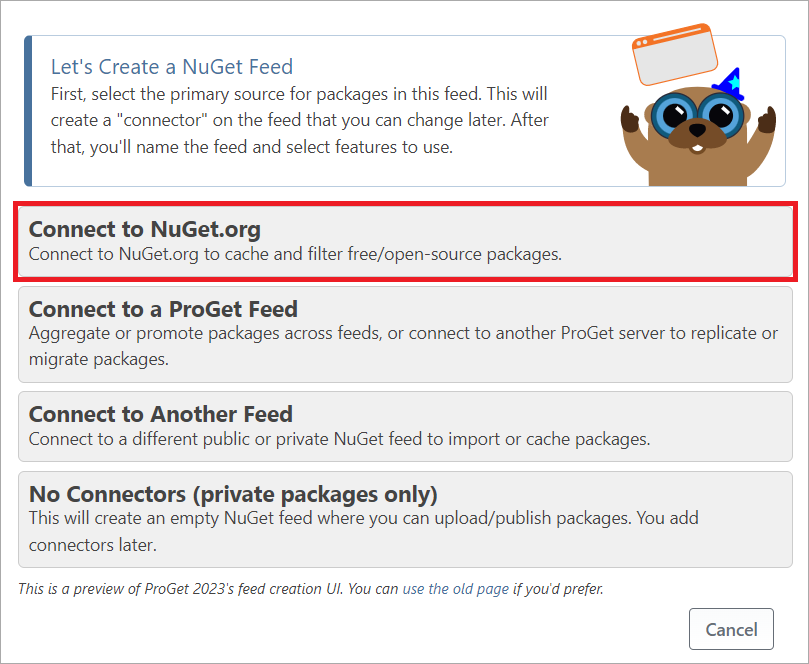
Then select "Connect to NuGet.org" which will allow us to proxy and cache packages from NuGet.org.
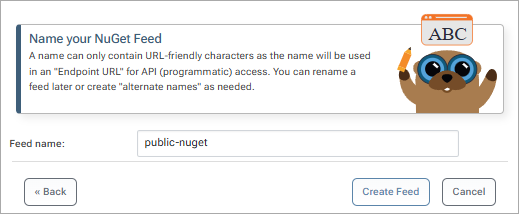
Now you will need to name the feed. For this example, we will name it public-nuget, and then click "Create New Feed".
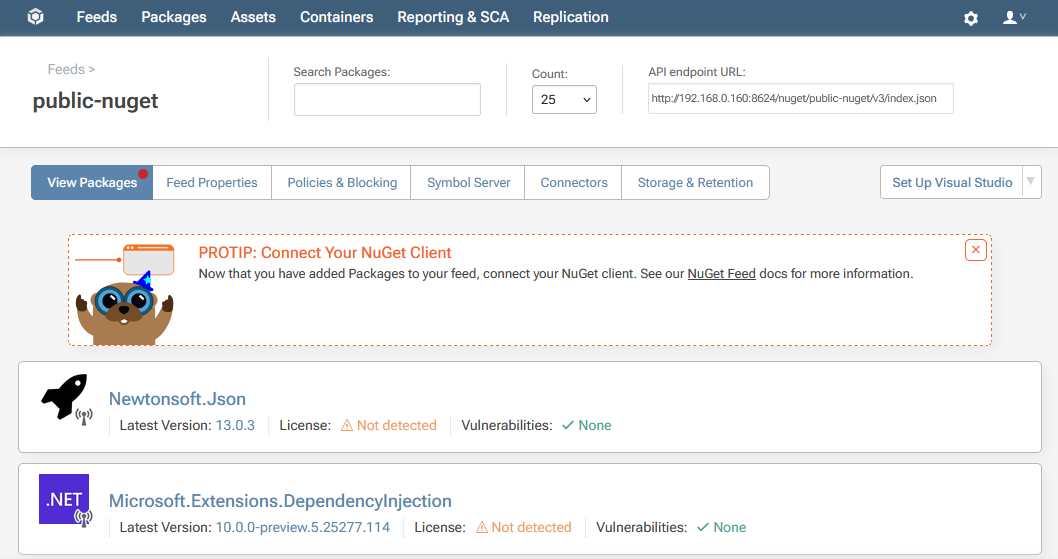
ProGet will create the public-nuget feed, which will now be populated with packages proxied from NuGet.org.
Step 2: Adding ProGet As A Source
To add your public-nuget feed as a source, you will need the feed URL. This is found on the top right of the feed page:

To add your feed as a Package Manager in Visual Studio, navigate to "Tools" > "NuGet Package Manager" > "Package Manager Settings" > "Package Sources". Then uncheck the box to the left of nuget.org
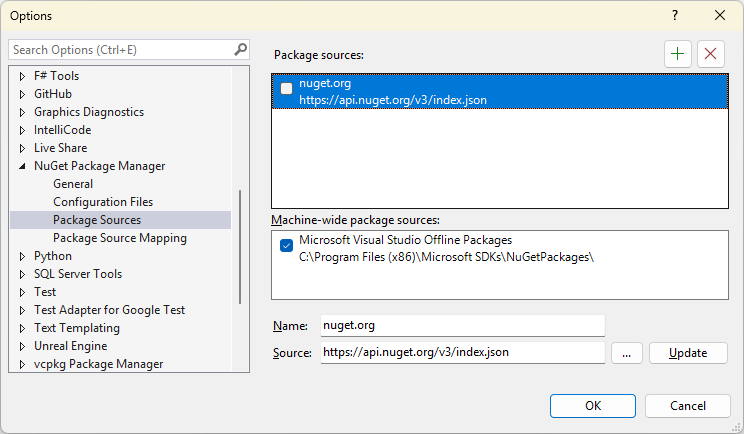
This prevents Visual Studio from scanning both NuGet.org and ProGet for packages. If you configure Visual Studio to search only ProGet instead of NuGet.org and ProGet, you avoid problems such as bad licenses, vulnerable packages, and dependency confusion in your packages when you use multiple sources.
Now you will need to create a new package source. Click the green + in the top right of the window, and then name the new package source. Then paste in your public-nuget feed URL. Now, click the "Update" button, followed by the "OK" button.
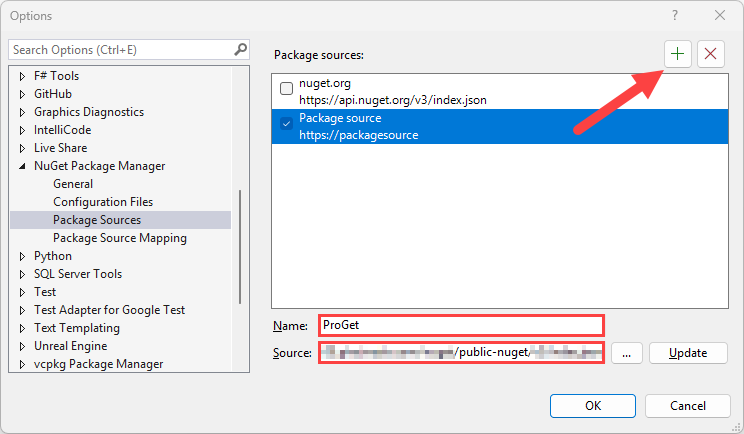
Visual Studio and ProGet are now connected.
If you click "OK" without clicking "Update" your package source configuration will not be saved in Visual Studio.
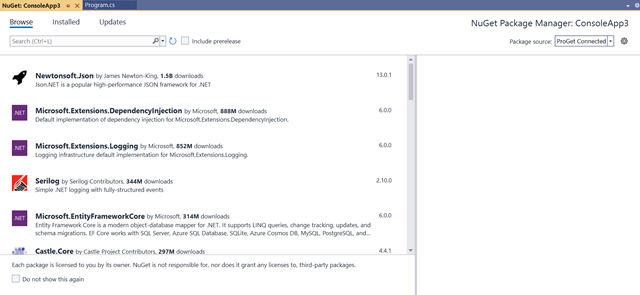
To confirm the connection in Visual Studio, right-click on a project in the Solution Explorer and select “Manage NuGet Packages…” from the menu. In the Package Manager window under "Browse", your should see a window populated with packages from the public-nuget feed.
Adding the Feed to Other NuGet Clients
ProGet can be added as a source in a number of other popular clients, including the NuGet CLI, VS Code, and JetBrains Rider. To learn how to do this, read Integrating NuGet Client Tools with ProGet.
Step 3: Installing NuGet Packages
Once you have created your public-nuget feed and configured it with either Visual Studio or CLI, you can install packages. For Visual Studio you can do this from the "NuGet Package Manager" by navigating to "Tools" > "NuGet Package Manager" > "Manage NuGet Packages for Solution".
Alternatively, you can use the dotnet nuget install command in the NuGet CLI:
$ dotnet nuget install «package-name» -Source public-nuget
Step 4: (Optional) Authenticating to Your NuGet Feed
By default your public-nuget feed does not need to be authenticated to. However, you may want to make your repository private and authenticate to it, in which case you'll need to configure an authenticated source when adding the feed.
Instead of using your ProGet username/password for a NuGet feed, we recommend Creating a ProGet API Key to authenticate. You can enter api as the username and your key as the password.
To learn how to authenticate to your NuGet feed, read Authenticating to NuGet Feeds
(Optional) Creating a Package Approval Flow
In this guide, we covered how to proxy packages from NuGet.org. However, this lets developers to use any OSS package from this OSS repository without oversight. In organizations, it's recommended that you include some form of approval to make sure only compliant packages are used in production.
This can be achieved by introducing a "Package Approval Flow". To set up a package approval flow, refer to HOWTO: Approve and Promote Open-source Packages.
After creating your "Unapproved" and "Approved" feeds, add your "Approved" feed to either Visual Studio or CLI to add the "Approved" feed (e.g. approved-nuget) as a custom repository.
Troubleshooting
Authentication Error
An error may occur when trying to browse the authenticated NuGet feed in Visual Studio.

The window does not fill with packages and the error list says "API Key ... does not exist"
There may have been an error entering the personal API key while connecting to the server, or the API key may have been deleted in ProGet.
To resolve, in Visual Studio, close all your instances.
Then, in Windows, open Control Panel and navigate to Credential Manager.

Under Windows Credentials, delete the one named as the ProGet host (in this demonstration, 3.144.230.132)
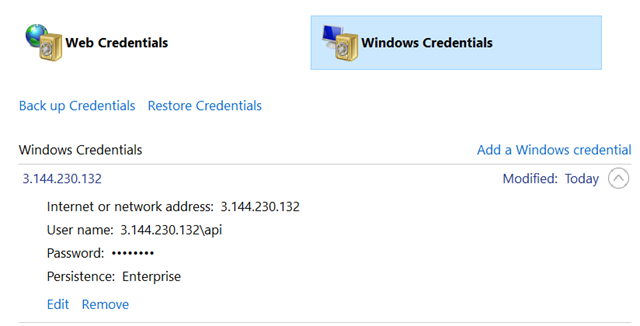
Under Generic Credentials, find and remove the one named “VSCredentials_
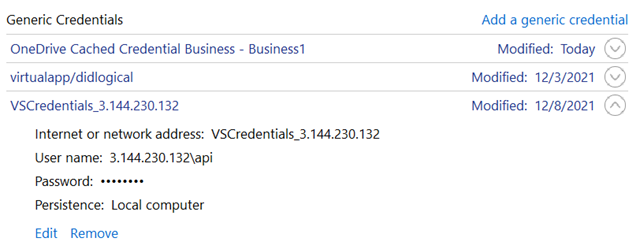
Now, In Visual Studio open your instance and navigate to the Package Manager again as in Step 6.
You will be prompted again to enter a Personal API key, as in Step C.
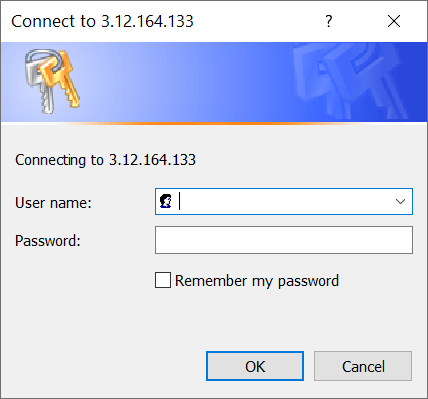
Repeat Step C to reconnect to the authenticated NuGet feed.

