HOWTO: Configure IIS as a Reverse Proxy for the Integrated Web Server

Following Microsoft's guidance to no longer use IIS for modern .NET applications, we no longer recommend using IIS to directly host modern versions (2022+) of our products and beginning in version 2025+, IIS is no longer a supported installation option. IIS may still be used as a proxy for the Integrated Web Server, but you can no longer select that as an installation option. This guide walks you through configuring IIS as a reverse proxy to the integrated web server.
Prerequisites
To configure IIS as a reverse proxy, you will need to have ProGet configured to use the Integrated Web Server and install the following:
- IIS 7 or Above with the ASP.NET role service enabled
- URL Rewrite version 2.1 or higher
- Application Request Routing (ARR) version 3.0 or higher
TIP: Installing URL Rewrite or ARR require restarting the entire server before they're available for use
Create a new Web Site in IIS
Once you have all the required components installed, you will then need to create a new web site in IIS.
Step 1: Create a new folder
Create a new folder for your reverse proxy configuration. This can be anywhere on your server, but a common location is C:\inetpub\proget-proxy.
Step 2: Create a new Website in IIS
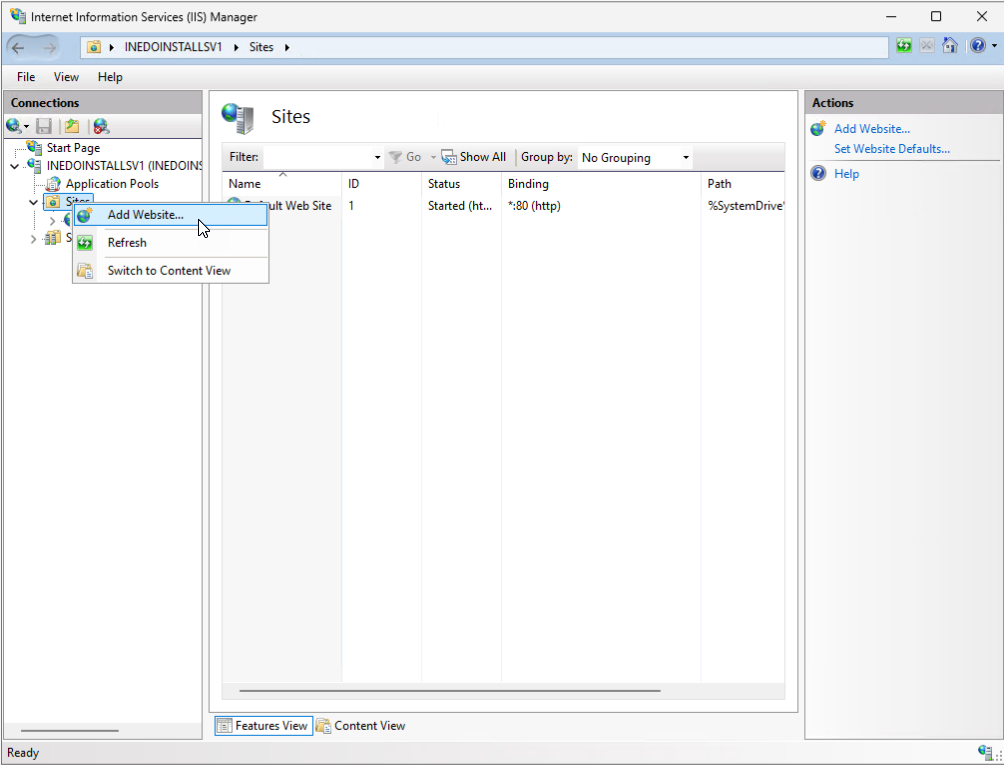
Open IIS Manager, navigate to the Sites folder, then right-click and select "Add Website...".
Step 3: Configure the new Website
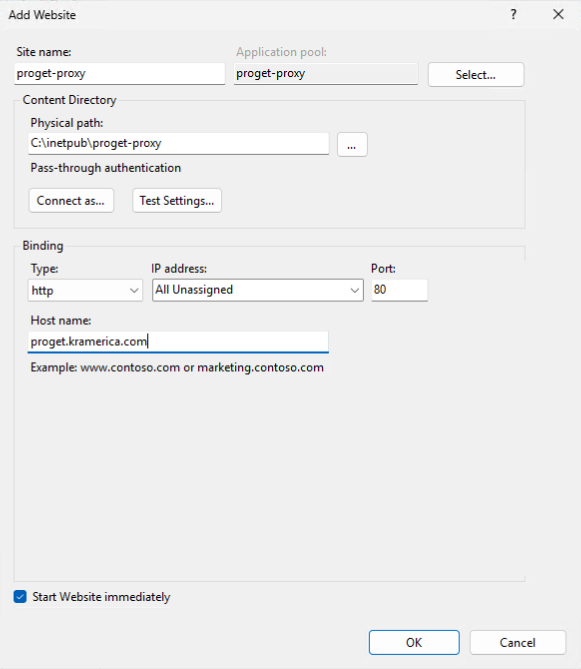
Then enter the site name (ex: ProGet-Proxy), physical path for the proxy configuration (ex: C:\inetpub\proget-proxy), and hostname (SSL can be added later).
Step 4: Configure the Application Pool
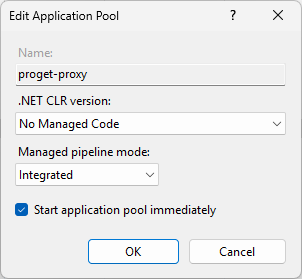
Next, you will need to configure the application pool. In IIS Manage, navigate to Application Pools, right-click the newly created application pool (ex: ProGet-Proxy), and select "Basic Settings...". Then set the ".NET CLR Version" to "No Managed Code" and the "Managed Pipeline Mode" to "Integrated".
Configure Microsoft Application Request Routing (ARR)
Step 1: Enable the ARR Proxy
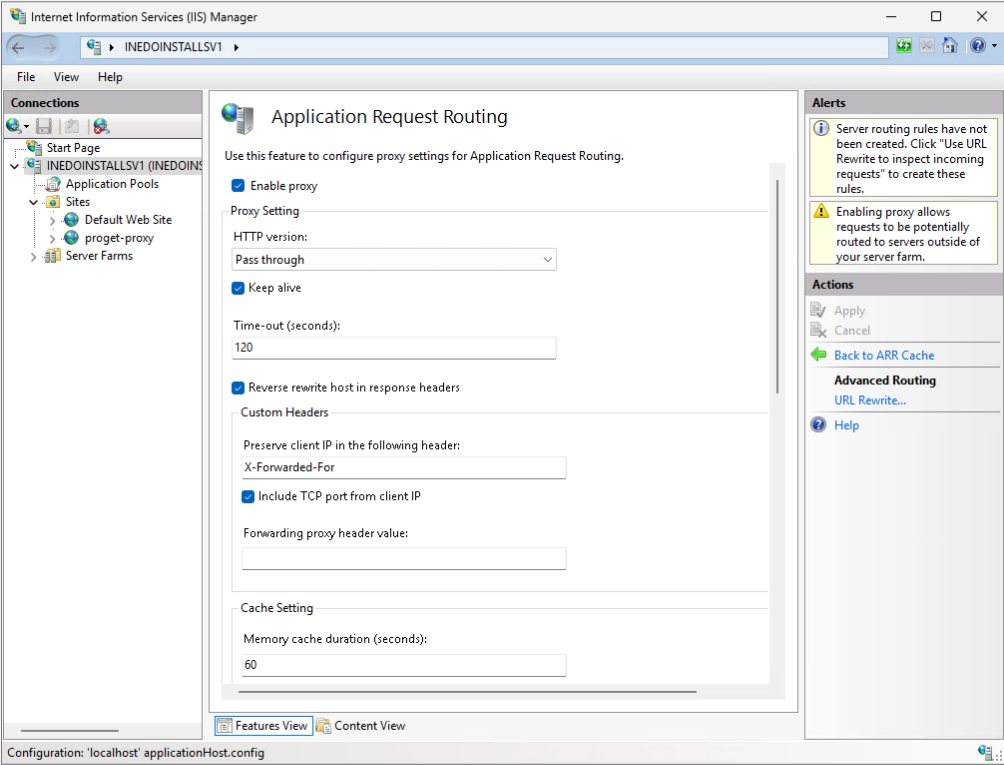
To configure IIS as a reverse proxy, you will need to enable the Application Request Routing (ARR) feature in IIS. Navigate to the server node in IIS Manager, select "Application Request Routing Cache" from the features view, and then click "Server Proxy Settings..." on the right side. On the settings screen, check "Enable Proxy" and click "Apply".
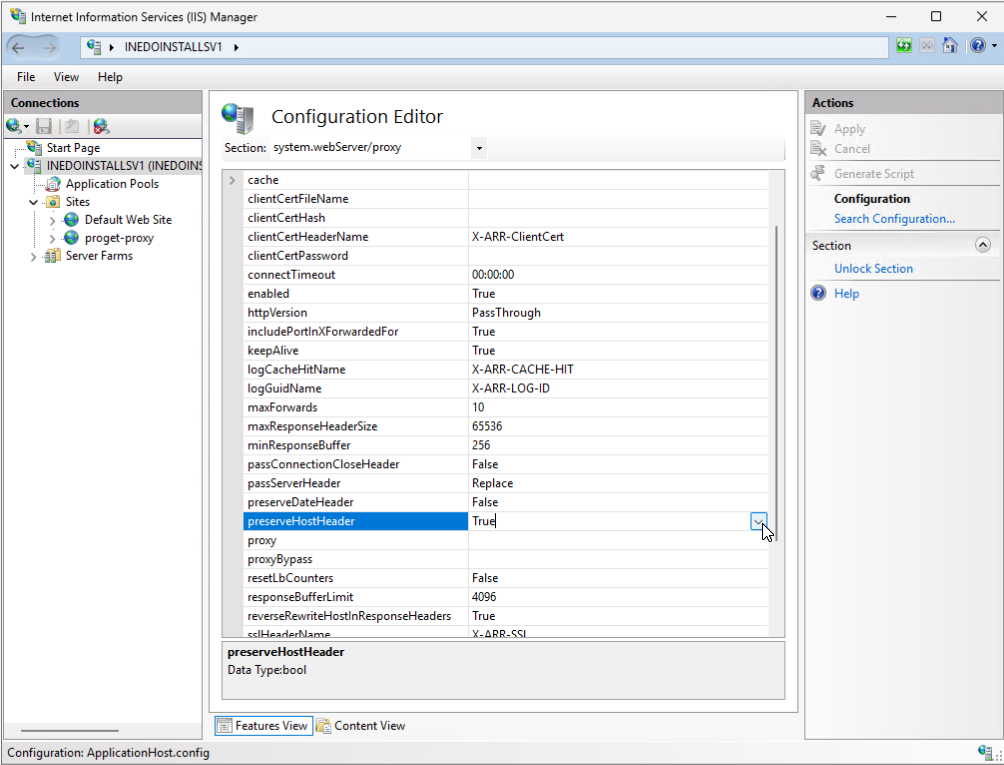
Step 2: Enabled Preserve Host Header
You will need to ensure that the "preserveHostHeader" setting is enabled. This allows the reverse proxy to forward the original host header for host, protocol, etc... to the integrated web server. Next, select your server node again, then select "Configuration Editor" from the features view, and change the section to system.webServer/proxy. Locate the "preserveHostHeader" setting and change it to True. Then click "Apply".
Configure Your Site as a Reverse Proxy
Step 1: Create URL Rewrite Rules
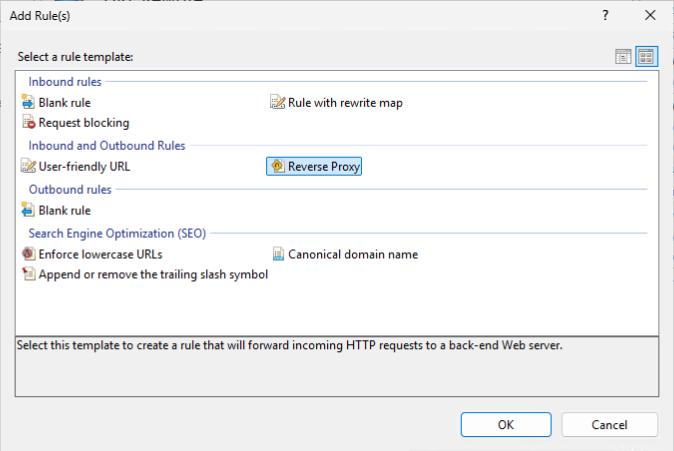
To configure your site as a reverse proxy, you will need to create a URL Rewrite rule that forwards requests to the integrated web server. First, navigate to your newly created website in IIS Manager, then select "URL Rewrite" from the features view, click "Add Rule(s) ..." on the right, select "Reverse Proxy" and click OK.
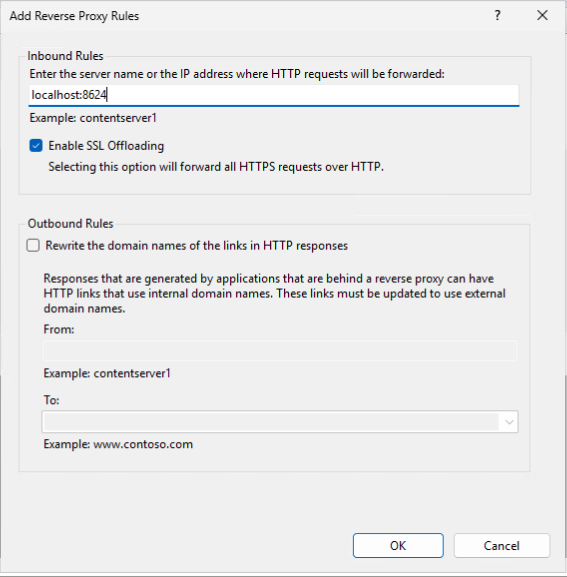
On the Add Reverse Proxy Rules screen, you will need to enter the URL (excluding the protocol) for the integrated web server. This is typically localhost:8624 for ProGet, localhost:8622 for BuildMaster, and localhost:8626 for Otter depending on your configuration.
Once you have configured that, you should be able to load the site using the URL you configured in IIS. From here, you can add other bindings for SSL connections.
Step 2: Configure Request Limitations
Once you have created the reverse proxy rule, a Web.config file will be created in the root of your reverse proxy site. You will need to adjust the request limits in this file to allow larger requests to be proxied. Navigate to your site in IIS Manager and click Explore on the right side. Then, edit your Web.config file and add the following right before the close the <system.webServer> section of the Web.config file:
<security>
    <requestFiltering allowDoubleEscaping="true">
        <requestLimits maxAllowedContentLength="4294967295" maxUrl="1048576" maxQueryString="1048576" />
        <fileExtensions allowUnlisted="true">
            <clear />
        </fileExtensions>
        <hiddenSegments>
            <remove segment="bin" />
        </hiddenSegments>
    </requestFiltering>
</security>
Finally, save the Web.config file and restart the IIS site.
Example: Web.config File for a Reverse Proxy Site to ProGet
<?xml version="1.0" encoding="UTF-8"?>
<configuration>
    <system.webServer>
        <rewrite>
            <rules>
                <rule name="ReverseProxyInboundRule1" stopProcessing="true">
                    <match url="(.*)" />
                    <action type="Rewrite" url="http://localhost:8624/{R:1}" logRewrittenUrl="true" />
                </rule>
            </rules>
        </rewrite>
		<security>
			<requestFiltering allowDoubleEscaping="true">
				<requestLimits maxAllowedContentLength="4294967295" maxUrl="1048576" maxQueryString="1048576" />
                <fileExtensions allowUnlisted="true">
                    <clear />
                </fileExtensions>
                <hiddenSegments>
                    <remove segment="bin" />
                </hiddenSegments>
			</requestFiltering>
		</security>
    </system.webServer>
</configuration>
Advanced Configuration: Integrated Windows Authentication
Since IIS is acting as a reverse proxy, all IWA requests will be forwarded to the integrated web server. This means you only need to configure IWA in your Inedo product, not in IIS.