HOWTO: Create and Upload Nuget Packages to a Private Repository in ProGet
ProGet let's you set up private NuGet repositories that will allow you to publish, store and share your internal NuGet packages within your organization.
This guide will walk you through the process of setting up a NuGet "Feed" in ProGet as a private, custom repository. We'll also cover how to create, push, and install NuGet packages from this repository.
Step 1: Create and Name a NuGet Feed
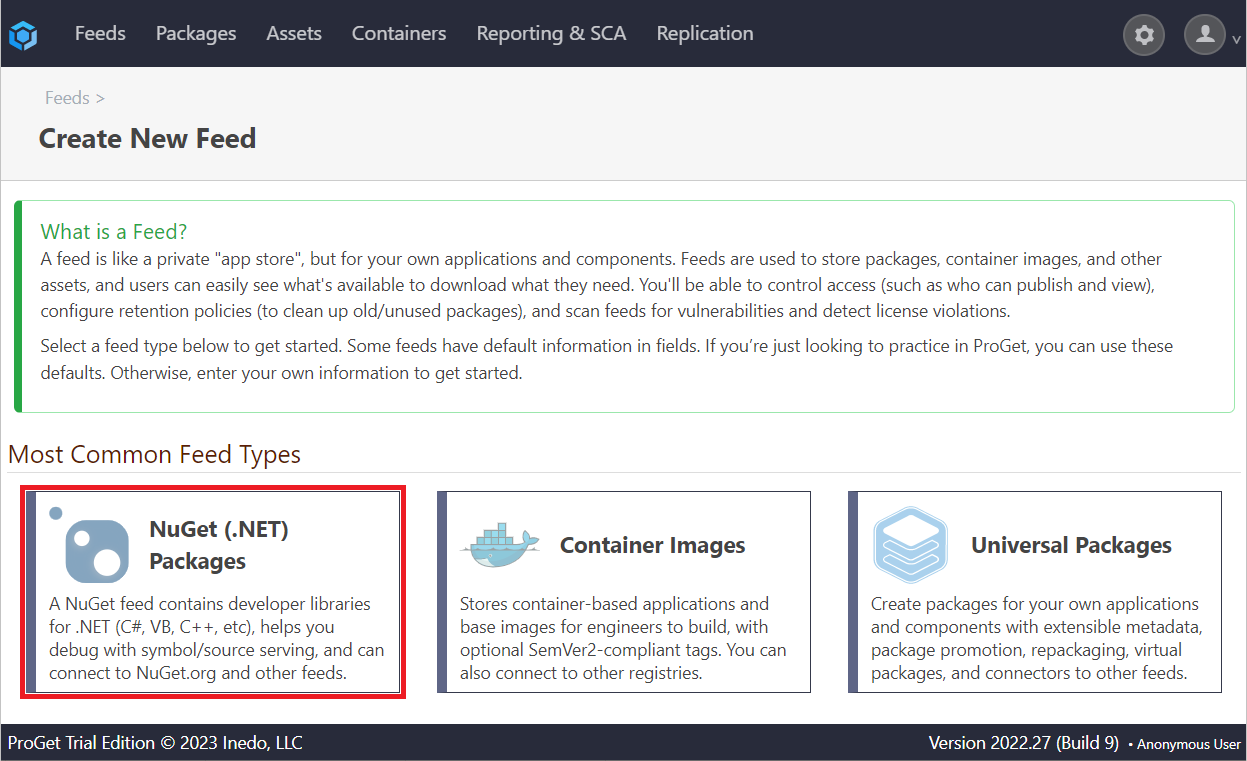
Start by creating a NuGet feed to host your internal packages. Navigate to "Feeds" and "Create New Feed". Then select "NuGet (.NET) Packages".

Now select "No Connectors (Private packages only)" as this feed will be intended to host private packages.

From here, we name our feed. For this example, we will call it internal-nuget, and then click "Create Feed".

You'll then see several options related to ProGet's Vulnerability Scanning and Blocking features. These are only for users looking to use third-party OSS packages. Leave these boxes unchecked, and select "Set Feed Features". You will then be directed to the new internal-proget feed, currently empty.

Step 2: Create a NuGet Package
If you are using Visual Studio, you can create a NuGet package by following these steps:
- Create a class library project in Visual Studio by selecting the Class Library template, choosing a suitable framework, then building the project to ensure it's set up correctly.
- Configure the NuGet package properties by accessing project settings, ensuring the Package ID is unique and other details are filled out.
- Use the Pack command in Release configuration to generate a
.nupkgfile, checking the Output window for its location
For more detail you can read Microsoft's Official Documentation.
In this guide we will cover creating a project in dotnet as it is easier to demonstrate, and also lets us cover the individual files that make up a NuGet package. To start, create the project in dotnet CLI by entering:
$ dotnet new classlib -n MyPackage
$ cd MyPackage
In the project folder, create a .nuspec file, that will contain the package metadata. For example:
<?xml version="1.0"?>
<package >
  <metadata>
    <id>MyPackage</id>
    <version>1.0.0</version>
    <authors>Your Name</authors>
    <owners>Your Organization</owners>
    <description>A simple example NuGet package.</description>
    <language>en-US</language>
    <tags>example</tags>
  </metadata>
</package>
Then run the following to create the package:
$ dotnet pack --configuration Release
For more on best practices for managing your internal NuGet packages you can read our article on the Inedo blog.
Step 3: Adding the Feed as a Source
To add your internal-nuget feed to Visual Studio, the NuGet CLI, or other clients such as VS Code and JetBrains Rider, you will need the feed URL. This is found on the top right of the feed page:

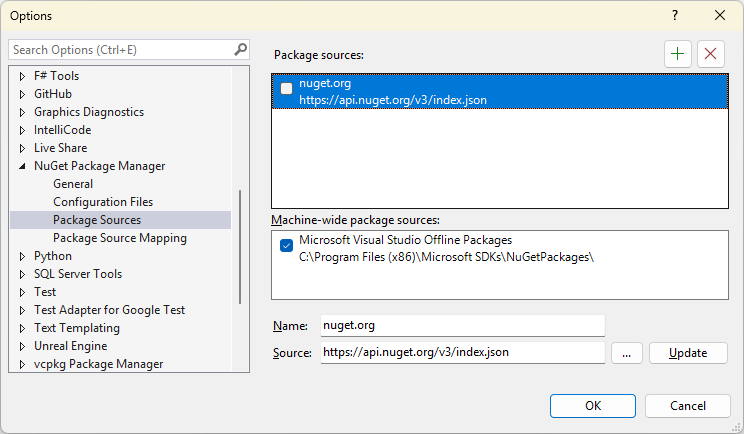
To add your feed as a Package Manager in Visual Studio, navigate to "Tools" > "NuGet Package Manager" > "Package Manager Settings". Then uncheck the box to the left of nuget.org

This prevents Visual Studio from scanning both NuGet.org and ProGet for packages. If you configure Visual Studio to search only ProGet instead of NuGet.org and ProGet, you avoid problems such as bad licenses, vulnerable packages, and dependency confusion in your packages when you use multiple sources.
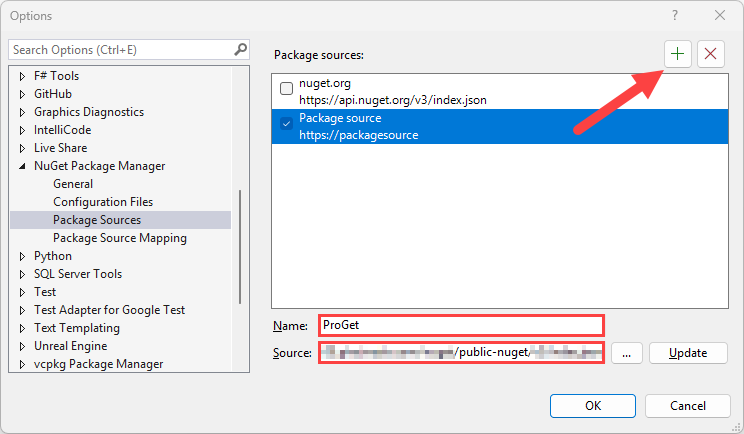
Now you will need to create a new package source. Click the green + in the top right of the window, and then name the new package source. Then paste in your internal-nuget feed URL.

Now, click the "Update" button, followed by the "OK" button.

Visual Studio and ProGet are now connected.
If you click "OK" without clicking "Update" your package source configuration will not be saved in Visual Studio.
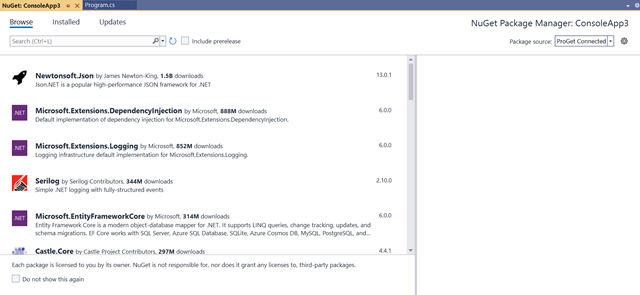
To confirm the connection in Visual Studio, right-click on a project in the Solution Explorer and select “Manage NuGet Packages…” from the menu. In the Package Manager window under "Browse", your should see a window populated with packages from the internal-nuget feed.

Using Other NuGet Clients
ProGet can be added as a source in a number of other popular clients, including the NuGet CLI, VS Code, and JetBrains Rider. To learn how to do this, read Integrating NuGet Client Tools with ProGet.
Step 4: Setting Up Authentication to Your NuGet Feed.
To push packages to a feed you will need to configure authentication using a "NuGet API Key".
Instead of using your ProGet username/password for a NuGet feed, we recommend Creating a ProGet API Key to authenticate. You can enter api as the username and your key as the password.
To learn how to authenticate to your NuGet feed to push packages to it, read Authentication for Publishing Packages
Step 5: Pushing Your Package to Your NuGet Feed
You can push your NuGet package to your NuGet feed in either Visual Studio or NuGet CLI. First make sure you have added the feed as a source with authentication.
To push your NuGet package using Visual Studio, open the Package Manager Console by navigating to "Tools" > "NuGet Package Manager" > "Package Manager Console". Then. run the following Push command:
$ nuget push «path-to-package» --api-key «api-key» --source «source-name»
Pushing the package MyPackage to a configured source named internal-nuget, you would enter:
$ nuget push bin\Release\MyPackage.1.0.0.nupkg --api-key abc12345 --source internal-nuget
Your package will then be uploaded and appear in your NuGet feed.

Pushing a Package with NuGet CLI
To push a NuGet package to ProGet in NuGet CLI, use the dotnet nuget push command:
$ dotnet nuget push «package-name» --api-key «api-key» --source «source-name»
For example, to push the MyNuGetPackage.nupkg to our ProGet instance we would use:
$ dotnet nuget push MyNuGetPackage.nupkg --api-key 70f875c2593ef93d0b21400d5f94ea1d8ed519d0 --source https://proget.corp.local/nuget/MyNuGetFeed
(Optional) Repackaging NuGet Packages in CI/CD
After publishing your NuGet packages, you might want to improve your CI/CD workflow by repackaging pre-release versions into production-ready packages. This step allows you to create stable versions while maintaining an audit trail of the original pre-release versions, including details on who performed the operation and when. To learn more about repackaging your NuGet packages you can read Repackaging NuGet Packages.

