
- BuildMaster
- Getting Started with BuildMaster
- Builds and Continuous Integration
- What is a "Build" in BuildMaster?
- Git and Source Control
- Git Pipelines and Workflows
- Build Scripts & Templates
- Packages & Dependencies
- Build Artifacts
- Automated Testing & Verification
- Deployment & Continuous Delivery
- What is a “Pipeline” in BuildMaster?
- CI Server (Jenkins, TeamCity, etc.) Integration
- Deployment Scripts & Templates
- Automatic Checks & Approval Gates
- Manual Deployment Steps and Tasks
- Databases
- Configuration Files
- Rollbacks
- Advanced CD Patterns
- Applications & Releases
- Connecting to your Servers with BuildMaster
- Scripting in BuildMaster
- Configuring for Your Team
- Docker/Containers
- Development Platforms
- Deployment Targets
- Tools & Service Integrations
- Reference
- BuildMaster API Endpoints & Methods
- Extending BuildMaster
- Built-in Functions & Variables
- Applications
- Builds
- Configuration Files
- Containers
- Credentials
- Databases
- DotNet
- Environments
- Executions
- Files
- General
- Jira
- JSON
- Linux
- Lists
- Maps
- Math
- Nuget
- Packages
- Pipelines
- PowerShell
- Python
- Releases
- Servers
- Strings
- Windows
- XML
- Built-in Operations
- Batch
- BuildMaster
- Configuration Files
- Databases
- DotNet
- Files
- Firewall
- General
- Apply-Template
- Attach Package
- Concatenate-Files
- Copy-Files
- Create-Directory
- Create-File
- Create-Package
- Create-ZipFile
- Delete-Files
- Download-Asset
- Download-Http
- Ensure-Directory
- Ensure-File
- Ensure-HostsEntry
- Ensure-Metadata
- Ensure-Package
- Exec
- Get-Http
- Install-Package
- OSCall
- OSExec
- Post-Http
- Push-PackageFile
- Query-Package
- Remediate-Drift
- Rename-File
- Repackage
- Replace-Text
- Send-Email
- Set-FileAttributes
- Set-Variable
- Sleep
- Transfer-Files
- Upload-Assets
- Upload-Http
- Git
- GitHub
- IIS
- Jira
- Nuget
- PowerShell
- ProGet
- Python
- Registry
- Scripting
- Servers
- Services
- Shell
- Windows
- Administration
- Installation & Upgrading
- ProGet
- Getting Started with ProGet
- Packages: Managing & Tracking
- Feeds Types & Third-Party Packages
- What is a "Feed" in ProGet?
- What is a "Connector" in ProGet?
- NuGet (.NET)
- Universal Feeds & Packages
- PowerShell
- Chocolatey (Windows/Machine)
- RubyGems (ruby)
- Open VSX Extension (vscode)
- Visual Studio Extension (.vsix)
- Maven (Java)
- npm (Node.js)
- Bower (JavaScript)
- Debian (Apt)
- Helm (Kubernetes)
- PyPI (Python)
- Conda (Python)
- RPM (Yum)
- Alpine (APK)
- CRAN (R)
- pub (Dart/Flutter)
- Cargo (Rust)
- Terraform Modules
- Conan (C++)
- Composer (PHP)
- Other Feed Types
- Asset Directories & File Storage
- Docker and Containers
- Replication & Feed Mirroring
- Software Composition Analysis (SCA)
- Security and Access Controls
- Cloud Storage
- Administration
- Installation & Upgrading
- API Methods and CLI Commands
- Otter
- Getting Started with Otter
- Orchestration & Server Automation
- Connecting to your Servers with Otter
- Collecting & Verifying Configuration
- Drift Remediation / Configuration as Code
- Scripting in Otter
- Configuring for Your Team
- Installation & Upgrading
- Administration & Maintenance
- Reference
- Otter API Reference
- OtterScript Reference
- Built-in Functions & Variables
- Executions
- Files
- General
- JSON
- Linux
- Lists
- Maps
- Math
- PowerShell
- Python
- Servers
- Strings
- XML
- Built-in Operations
- Batch
- Docker
- DotNet
- Files
- Firewall
- General
- Apply-Template
- Collect Debian Packages
- Collect RPM Packages
- Collect-InstalledPackages
- Concatenate-Files
- Copy-Files
- Create-Directory
- Create-File
- Create-Package
- Create-ZipFile
- Delete-Files
- Download-Asset
- Download-Http
- Ensure-Directory
- Ensure-File
- Ensure-HostsEntry
- Ensure-Metadata
- Ensure-Package
- Exec
- Execute Python Script
- Get-Http
- Install-Package
- OSCall
- OSExec
- Post-Http
- Push-PackageFile
- PYCall
- PYEnsure
- Query-Package
- Remediate-Drift
- Rename-File
- Repackage
- Replace-Text
- Send-Email
- Set-FileAttributes
- Set-Variable
- SHEnsure
- Sleep
- Transfer-Files
- Upload-Assets
- Upload-Http
- IIS
- Otter
- PowerShell
- ProGet
- Python
- Registry
- Servers
- Services
- Shell
- Windows
- Installation & Maintenance
- Windows (Inedo Hub)
- Linux (Docker)
- High Availability & Load Balancing
- User Directories & Domains (LDAP)
- Logging & Analytics
- SAML Authentication
- When to Upgrade your Inedo Product
- Managing Agents and Servers
- Backing Up & Restoring
- Installation Configuration Files
- PostgreSQL & Inedo Products
- SQL Server & Inedo Products
- Inedo Agent
- What is the Inedo Agent?
- Installation & Upgrading
- Downloads & Release Notes
- Maintenance & Configuration
- Internal Architecture
- MyInedo
- OtterScript (Execution Engine)
- Reference
- OtterScript
- Inedo Execution Engine
- Romp (Discontinued)
- Using Romp
- Installing, Configuring, and Maintaining
- Romp CLI Reference
- Package Layout
- Downloads & Source Code
- Extensibility
- Inedo SDK
HOWTO: Publish npm Packages to a Private Registry in ProGet

ProGet lets you easily set up private registries for your npm packages, so you can publish, store, and share them internally.
This article will show you how to create a "Feed" in ProGet to act as a private npm package Registry. We'll also look at how to create, publish, and install packages from this feed.
In this guide we create a package that is scoped to @my-organization. A scoped package in npm is a package that is grouped under a "namespace". Scoped packages are useful for organizing related packages, such as when public registries are added, and helps to reduce dependency confusion attacks.
Scoped packages are prefixed with an @, followed by the namespace, e.g., @my-organization/my-package.
Step 1: Create a New Feed
First, we will create a feed to host your npm packages. Start by selecting "Feeds" and "Create New Feed". Next, select "npm Packages".
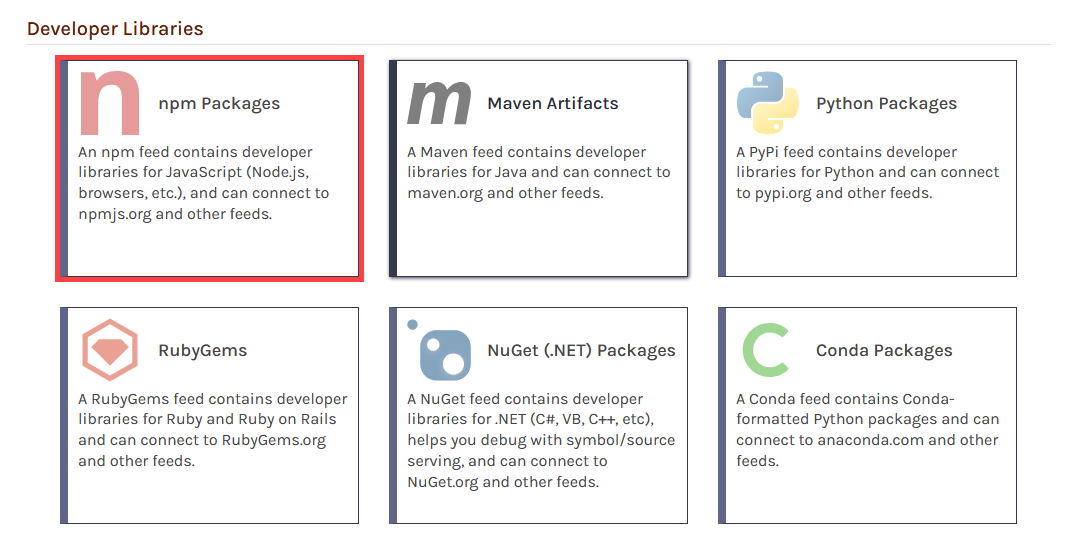
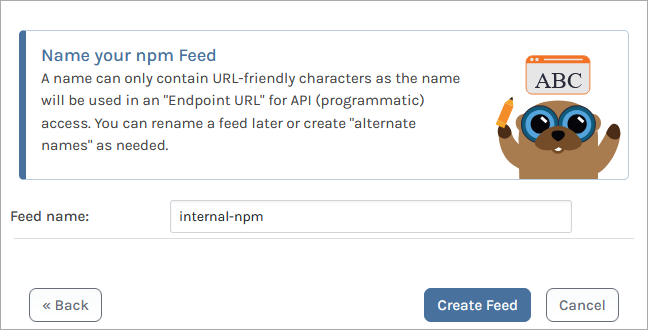
Then select "Private/Internal npm Packages" as we will be creating a private feed. From here, we will give our feed a name. For this article, we will call it internal-npm, and then click "Create Feed".
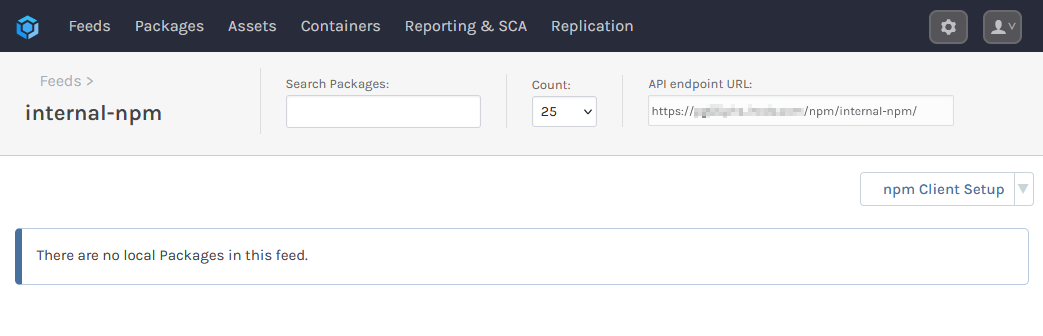
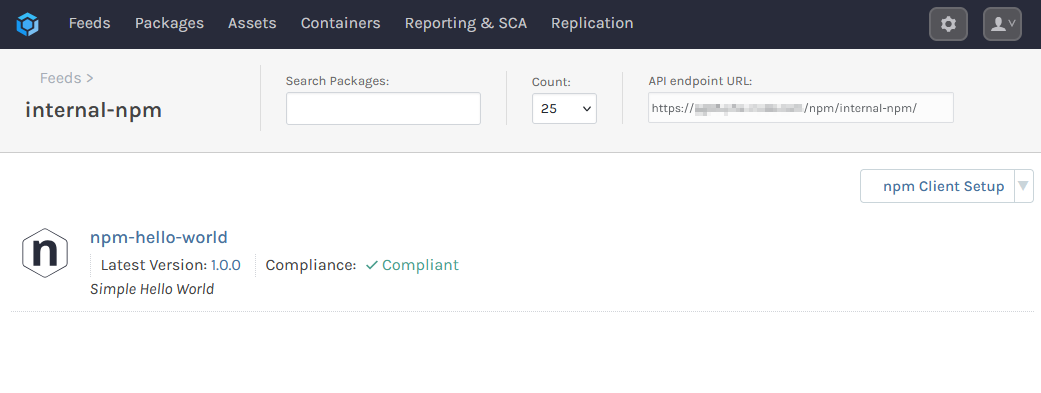
You will then be redirected to your new internal-npm feed, currently empty.
Step 2: Build Your Package
To create a package, navigate to the directory you wish to create it in and initialize a new package.json scoped to the namespace @my-organization by running running the npm init command:
$ npm init --scope=@my-organization
For Yarn, the command is similar:
$ yarn init --scope=@my-organization
Note: if you do not want to scope your package, omit --scope=@my-organization.
You will be asked for details of the project name, version, etc. After this you will need the URL of your internal-npm feed, which can be found on the feed page.
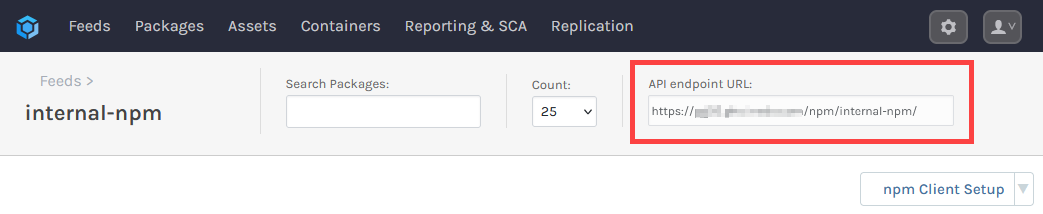
Once you have the URL, edit your package.json and add a publishConfig field, adding the internal-npm URL. This will also scope the package to the namespace @my-organization:
{
  "name": "@my-organization/npm-hello-world",
  "version": "1.0.0",
  "description": "Simple Hello World",
  "main": "index.js",
  "publishConfig": {
    "@my-organization:registry": "https:/proget.corp.local/npm/internal-npm/"
  },
  "scripts": {
    "test": "echo \"Error: no test specified\" && exit 1"
  },
  "author": "Inedo",
  "license": "MIT",
  "dependencies": {
    "npm-hello-world": "^1.0.0"
  }
}
If you do not want to add a scope to your package, you can edit the name and publishConfig fields as follows:
 "name": "npm-hello-world",
...
  "publishConfig": {
    "registry": "https:/proget.corp.local/npm/internal-npm/"
  },
Step 3: Authenticate to your npm Feed
Next you will need to authenticate to your internal-npm feed creating an _auth token and then configuring it in your npm client.
Step 4: Publish Your Package to ProGet
To publish your package to your internal-npm feed, you will need to run the npm publish:
$ npm publish --registry=https://«proget-url»/npm/internal-npm/
Or in Yarn using the yarn publish command:
$ yarn publish --registry=https://«proget-url»/npm/internal-npm/
Your package should then be uploaded to your internal-npm feed.
Step 5: Add the Feed to npm Clients
To install packages from the internal-npm feed, you'll need to add it as a source in your npm client using npm config:
$ npm config set registry http://«proget-url»/npm/«feed-name»
Or in Yarn using yarn config:
$ yarn config set registry http://«proget-url»/npm/«feed-name»
You can confirm that the feed has been set correctly by using npm get registry for npm, yarn config get registry for Yarn.