Create Support Video

In some cases, using a screen recording tool can be a helpful way to provide visual context to any issues you may be experiencing. It can help us better understand what's happening on your screen, making troubleshooting more smooth and reducing the need for live assistance.
This article covers recommended screen recording tools and how to set them up and use them. It’ll also provide guidelines for recording and submitting with support tickets. To see how to submit a ticket, see Support Tickets.
Guidelines for Recording and Submitting Videos
Following these guidelines will help us in understanding and resolving your issue:
- Keep it short and focused by highlighting the key actions instead of capturing an entire workflow.
- If needed, narrate the issue for added context. This could provide clarity by capturing the steps that lead to the issue.
- Edit and trim the footage to remove any unnecessary length.
- Customize the recording area to exclude excess space, ensuring privacy by avoiding the display of sensitive information.
- Keep file sizes to a minimum. High-resolution or lengthy videos are typically not needed, as videos of lower quality are perfectly fine.
For submitting recordings with tickets or emails, share with the file-sharing service of your choice or use one of the following:
These services support secure and anonymous sharing, but if you prefer to use a password-protected zip file, you can upload it to one of the above services and include the password in your support ticket.
Recording a Video with VokoscreenNG (Windows and Linux)
We recommend using VokoscreenNG to capture your screen when submitting tickets for issues. It's lightweight, open-source, runs on both Windows and Linux, and requires only minimal setup.
Download and Install
Go to VokoscreenNG, then choose the version for your operating system to download.
Then just run the setup file (e.g. vokoscreenNG-4.5.0-win64.exe) to install it locally on your machine.
How to Screen Record
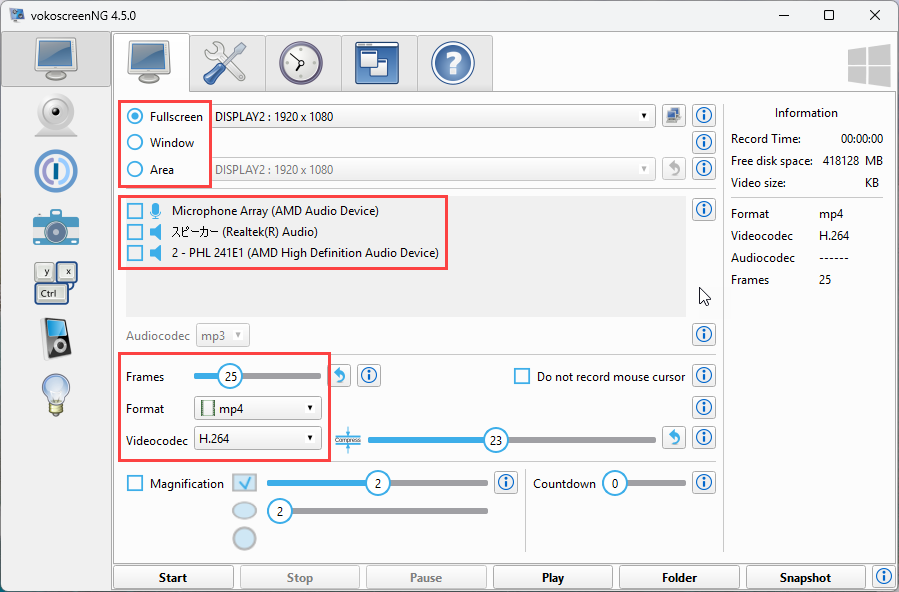
Before you start recording, you’ll need to configure a few simple settings like the recording area (fullscreen, window, or area), audio (microphone, system audio, or both), and video preferences such as framerate, format, and codec.
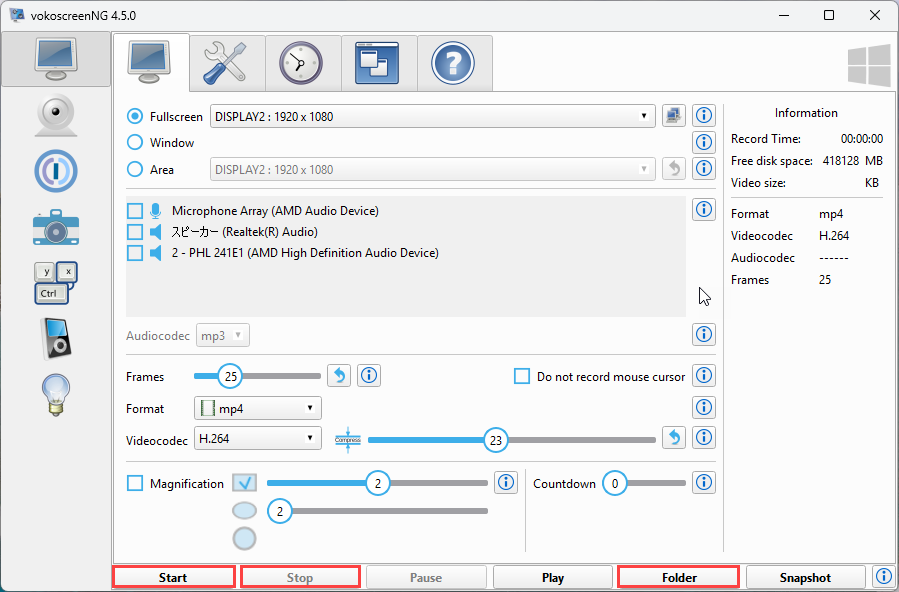
To begin recording, press the start button. Once you're done, press the stop button to end the recording. You can then review the saved video by clicking the folder button, which allows you to access the designated save folder.
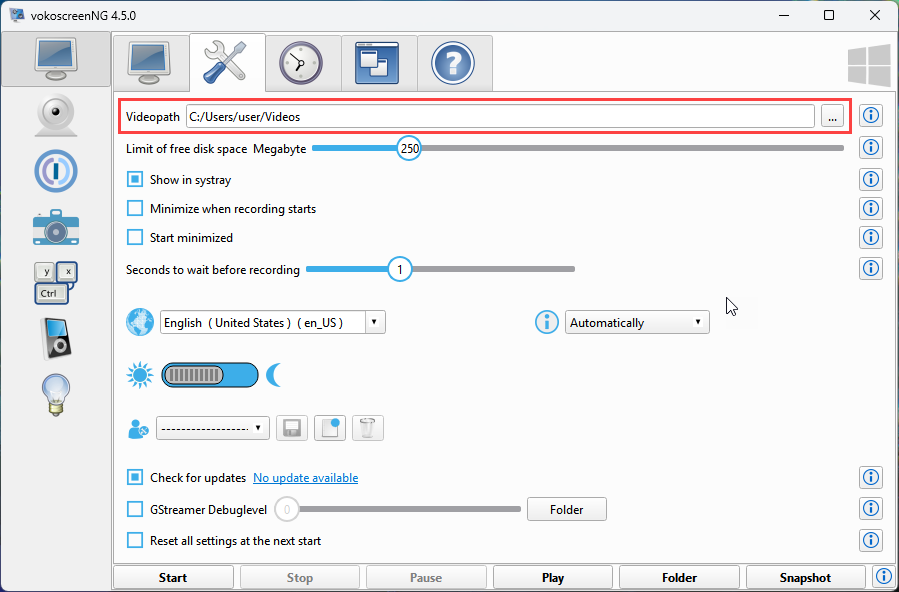
The designated save folder location can be changed in the settings.
Alternative Screen Recording Tools
In the case VokoscreenNG isn't available for your operating system, or you prefer not to download and install additional software, there are several screen recording tools for users on specific versions of Windows or macOS. These tools are already integrated into your system and require no additional setup.
Game Bar (Windows 10 and 11)
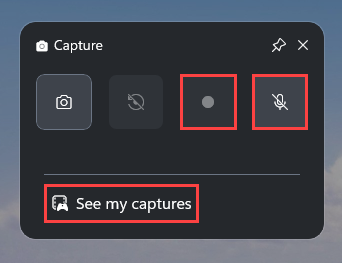
Game Bar is a Windows screen recording tool that can be launched by pressing the Windows logo key + G. From there, click the record button in the capture window to start recording. You can click the mic button to turn your microphone on or off if needed. When you're done, click stop, then click on “See my captures” to review your saved recording.
Quicktime Player (macOS)
Quicktime Player is a screen recording tool available on macOS. Before you start recording, you’ll need to set a few things up. Go to "File" and choose "New Screen Recording."
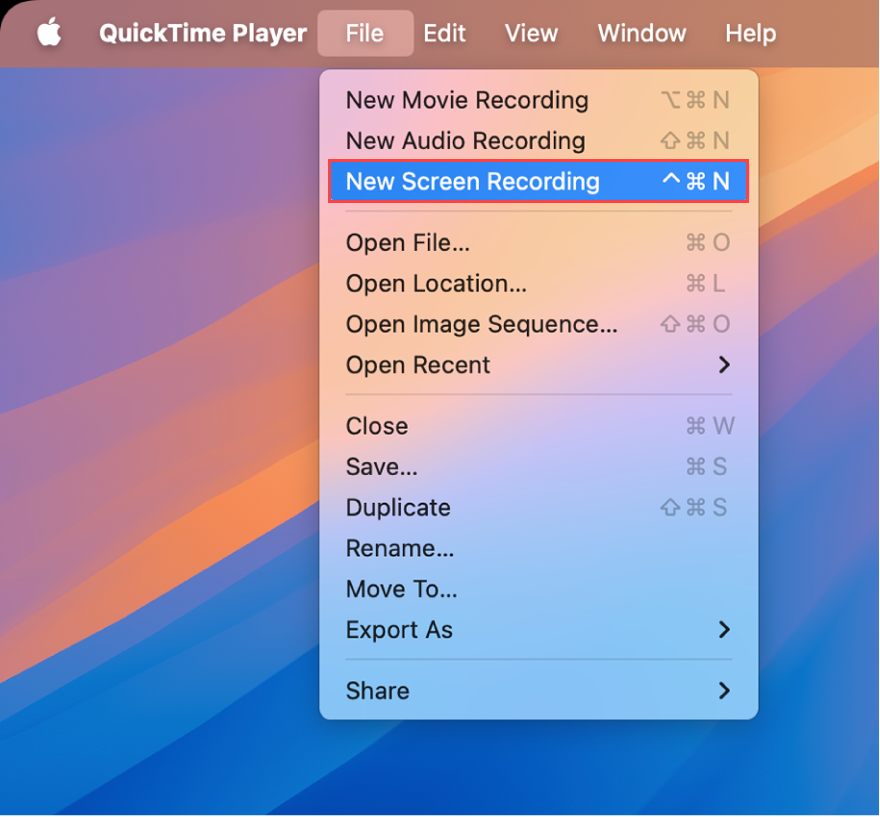
From there, use the toolbar to set the recording area and configure audio settings. Click "Record" to begin, and “Stop” when finished. Review the recording, make any edits needed, and save your file.
