Deploy Artifacts to File Share Script Template
A script template is a simple, no-code solution for performing common build or deployment operations, and can be converted to OtterScript at any time.
The Deploy Artifacts to File Share script template will:
- Deploy artifact files to file share, which will synchronize the contents of the artifacts file and target directory by performing an incremental transfer
- optionally Deploy an application configuration file, which can be either a built-in configuration file or a configuration transform
This article will detail the options for these steps, as well as how they're performed.
Using this Script Template
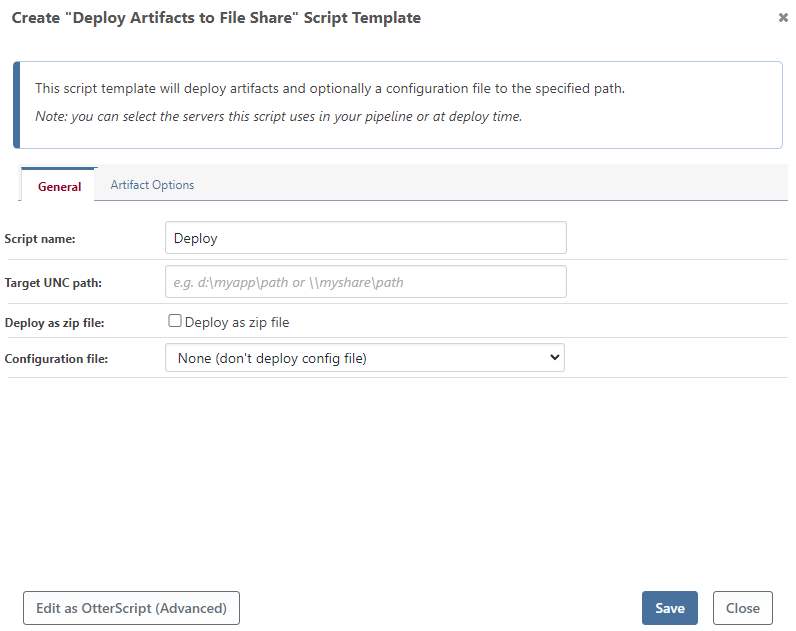
To add this script template to your application, navigate to Scripts, click "Add Script", and then select "Deploy Artifacts to File Share" from the list of Build Script Templates. After doing so, you'll see a dialog like this:

This article will discuss how these options work in the deployment process.
Deploying Artifact
First, the script template will deploy an artifact to the specified path, such as C:\Apps\MyApp or /var/Apps/MyApp. To reduce deployment time, an incremental deployment approach will copy only the files that changed. A file is considered to be changed if the file size or last-modified-on date is different. To learn more, see Build Artifacts for more details.
Deploying as as Zip file
If you check the "Deploy as zip file" option, the artifact files can be deployed as a zip file instead. You can specify a name if you'd like, such as MyApp-$ReleaseNumber.$BuildNumber.zip. This option is particularly useful when archiving releases on a share drive for deployment with another tool, sending to end-users, etc.
Additional Artifact Options
On the "Artifact options" tab, there are two fields you can set:
- Artifact name is the name of the artifacts file attached to your build; the default name for this file is Default, but you may have named it something different when creating it
- Transfer all files will not use the incremental deployment method, and instead transfer all files; this may be helpful if your file has thousands of small files , and it's simply quicker to deploy them all instead of compare them
The Deploy-Artifact operation will be run with the target path as the To parameter, and other parameters based on the options selected.
Deploying Config Files
If you selected an option for the "Configuration file" field, the script template will deploy or transform a configuration file.
Deploy BuildMaster Configuration File
If "Deploy BuildMaster Configuration File" is selected, you must have first created a configuration file in your BuildMaster application. You may select this configuration file from the Config File Options tab to include it as part of your deployment.
The Deploy-ConfigFile operation will be run with the ConfigFile parameter set as the selected configuration file, the Instance parameter set as the selected instance, and the To parameter as the target path.
Transform Config File
If "Transform config file" is selected, the script template will use the Microsoft web.config transformation process to create a configuration file from a "base config file" and a "transform config file". Both the base and transform config files should be included in the artifact that was already deployed.
This feature can be used for any files that follow the Microsoft's transformation format, even those that are not web.config files.
The DotNet::Transform-Config operation will be run with the BaseConfig and TransformConfig parameters set to the values you specify. The ConfigType and Target parameters will also match the values you specify.

