HOWTO: Use SemVer and Repackaging in Your CI/CD Pipelines
ProGet's repackaging feature helps you create stable packages from a pre-release as part of your CI/CD pipeline. This is done by creating a new package from an existing package with completely identical content, changing the version number and tracking the change.
This is done with Semantic Versioning's pre-release labels. For example, a continuous integration (CI) server would create build 8 of a package as 1.0.0-ci.8. This would then be tested, approved, and eventually repackaged as a release candidate as 1.0.0-rc.8. After that package is tested, a stable version, 1.0.0, will be created for use in production applications.
This article will walk you through a common scenario of repackaging an in-house NuGet package. Although much of this process should be automated with a CI/CD tool like BuildMaster, we'll demonstrate the concepts manually.
Step 1: Create a -ci Package
A "-ci package" is created through continuous integration, and is the first stage of a package. You can create any package you like but for the purposes of this example, we'll create a NuGet package manually using the NuGet package explorer (NPE).
This step should be automated by your build/CI server.
Once we have the Package Explorer open, we select "Create New Package", add our content, and enter any applicable or appropriate details and metadata.

Note that the version has -ci.8 at the end. The - signifies the package is a "pre-release package", -ci means it's from a CI server, and -ci.8 means it's the 8th CI build. The 8 could just as easily be a timestamp, or whatever is easiest for your build server to generate.
To finish creating our package, we'll click on File > Save
Step 2: Upload/Push
Now that we have a pre-release package, we can upload it to our ProGet feed. This step would normally be done by your CI server as well. However, since we created the package manually, we will also upload it manually.
This step should be automated by your build/CI server.
To upload your package, navigate to your feed and click "Add a Package". A popup window will appear where you can select how you want to add the package. In this example, we'll upload the files via the browser, as this is the easiest method.

Step 3: Test and Verify Your -ci Package
Now that we’ve uploaded our -ci package, it needs to go through testing. Testing will vary from team to team. In general, however, this round of testing will focus solely on the package in question and ensure that the package meets specifications.
-ci and -rc the prerelease tags we generally recommend, but you're free to use any naming convention that works for you. By simply adding a - to your version number, Semantic Version will treat that package as a pre-release. While naming convention can be whatever you’d like, we suggest your pipeline follows alphabetical sorting eg: Alpha > Beta > QA > Technical Preview
ProGet and most other systems sort alphabetically in ascending order, and teams usually want the newest package at the top.
After your tests are complete and your package is ready for the next environment, you can repackage it.
Step 4: Repackage to an -rc Package
Now that we have verified our -ci package, we can repackage it into a release candidate (-rc). This step is often automated as part of the CI/CD pipeline, but for this example we will do it manually.
This step may be automated by a CI/CD tool. See the Repackaging API for more details.
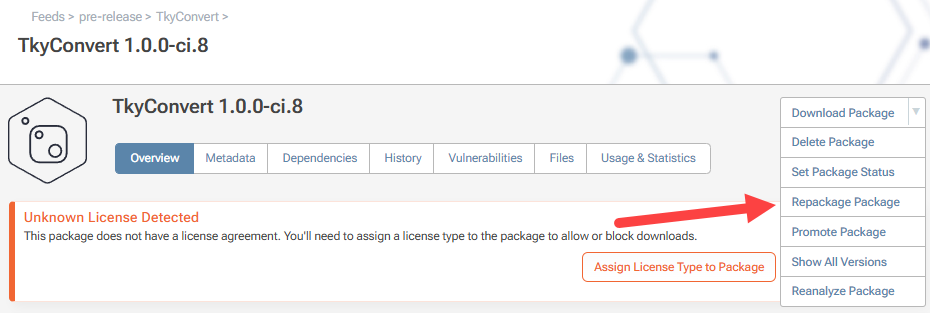
To repackage, simply navigate to the package and click "repackage"

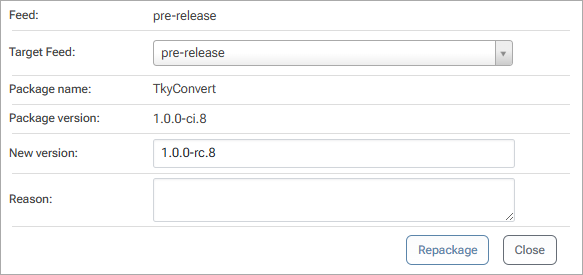
In the popup, we can select our target feed. While it’s possible to repackage to a separate feed (promoting your package at the same time), for this example, we’ll repackage to the same feed and simply change the version to: 1.0.0-rc.8.

Step 5: Test and Verify -rc
An -rc (or release candidate) package is the last stage before a package reaches production. Here, packages are tested much more thoroughly. These tests will also vary from team to team.
Not every -ci package is converted to an -rc package, and only one -rc package can become stable. It's not uncommon for teams to have to repeat steps 1 through 5 several times before getting to step 6.
After the package passes your regression tests, scenario tests, etc., it's ready for production. To create a stable package that is ready for production, we need to repackage the package one last time.
Step 6: Repackage to Release
Now that we’ve confirmed our -rc package is ready for production, we need to repackage it one more time to remove the pre-release tag.
This step may be automated by a CI/CD tool. See the Repackaging API for more details.
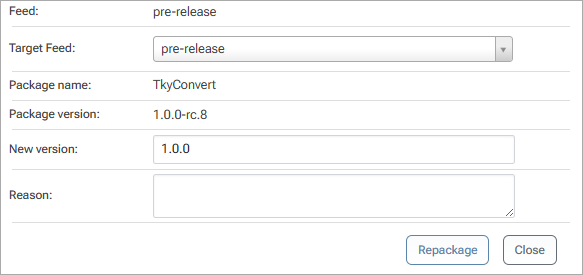
After successfully repackaging TkyConvert 1.0.0-rc.8 in the exact same way as step 4, you'll have a stable version of the package.

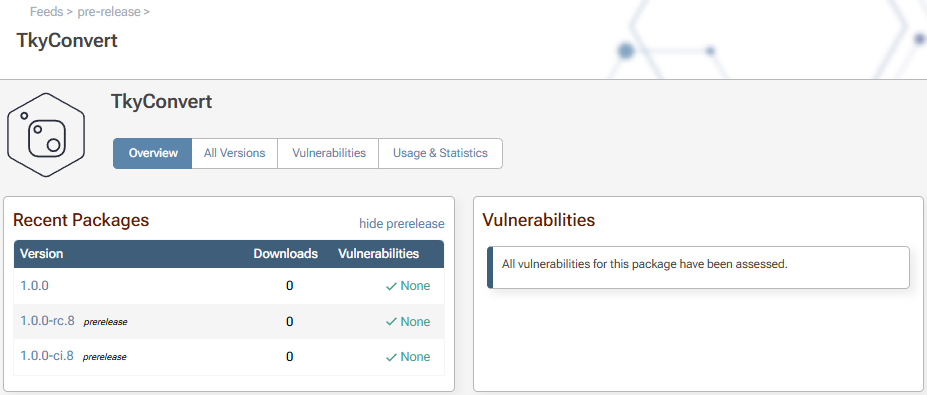
This stable package is ready for use in your production environments! Reviewing the package overview page will reveal that the package is no longer considered a pre-release.

(Optional) Step 7: Review History
ProGet Annual and Enterprise users are able to see a package history that outlines what actions were taken by whom.
To view this history, navigate to the "History" tab on the package:
 g
g
Free users can only see the action performed and the date, NOT the user and the place to/from which the package was promoted to/from.
Advanced: Promotion
You can also use package promotion with pre-release packages and repackaging. This is best for stable packages that you want to keep separate from pre-release packages. You can also use package-promote to create a package approval workflow to ensure that only approved and verified packages are used in the right environments.

