HOWTO: Migrate from a Network Share
Migrating from a network share to hosted files in an asset directory could be a smart move for teams that:
- Work with restricted Internet access but do not want to use a network share.
- Would like to host and access files without the need for a VPN.
- Would like to leverage Replication and High Availability in ProGet for the uses of Edge Computing, Federated Development, and Disaster Recovery.
- Need to easily hyperlink to web-based files versus network shares.
Regardless of the use case, the ability to share files internally is a huge benefit for many teams. The biggest question these teams face when migrating is how to migrate thousands of files spread across hundreds of folders.
Using ProGet as a web-based file host makes it easy to transfer files.
In this article, we'll walk through a typical scenario of a company, Kramerica, that wants to migrate some of its files from a network share to hosted files in an asset directory.
Step 1: Plan What Files/Folders You Want to Move to Asset Directory
In ProGet, your asset directory works very much like a file share. Folders in your asset directory can be easily shared with many users, files can be downloaded and updated.
However, unlike file sharing services, documents cannot be edited directly. This means that a user must download a file, edit it, save it, and then upload a new version to edit it. While this makes editing more difficult, it also makes it less likely that files will be accidentally overwritten. ProGet is an ideal place to store and share files that are rarely changed. But not an ideal place for work in progress.
It's important to know that users who have access to an asset directory in ProGet also have access to all subfolders within it. Therefore, organizations that require multiple levels of security must create separate asset directories with the appropriate permissions and restrictions.
In our example, Kramerica plans to transfer 2 folders:
| Folder | Access |
|---|---|
| Sales Assets: Including PDF’s presentations, pricing guides, etc. | Sales Team |
| HR Guides: Including the employee handbook, dress codes, etc. | Everyone |
Step 2: (Optional) Integrate ProGet with Active Directory
This step is optional, but recommended.
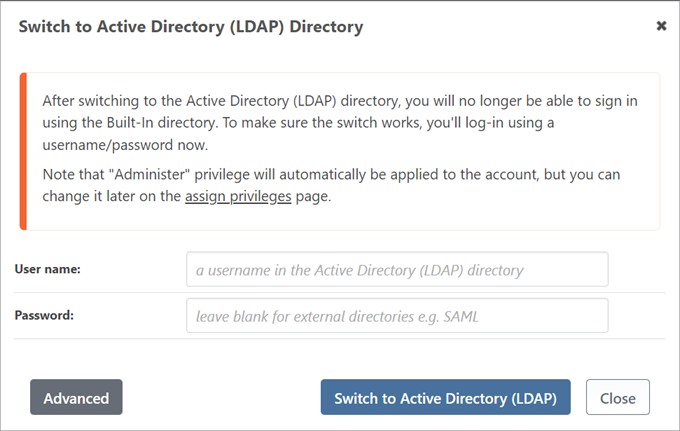
Organizations can integrate AD with ProGet and use preset groups and permissions. To do this, navigate to Settings > "Security & Authentication" > "Manage Security" > "Domains/User Directories" > "Active Directory v4 (New)" > "enable".
Step 3: Create HR-Guides Asset Directory
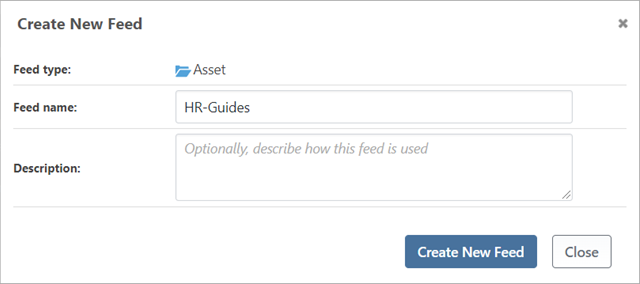
We’ll now create our first asset directory: HR-Guides
To do this, navigate to “Assets” > “Create New Asset Directory” > and fill in the popup with a name.
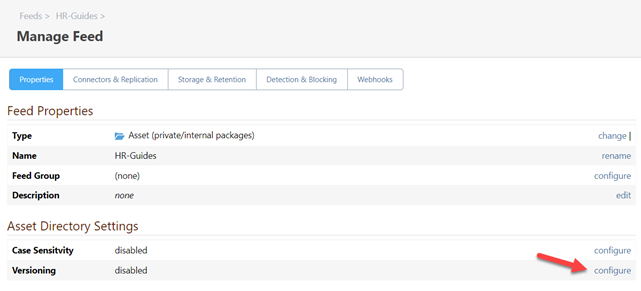
Now that our feed is created, we want to enable versioning. To do this, navigate to “Manage Directory” > "Overview & Properties" > "Asset Directory Settings" > "Versioning" > "configure".
Once versioning is enabled, old versions of files will be retained after they are overwritten.
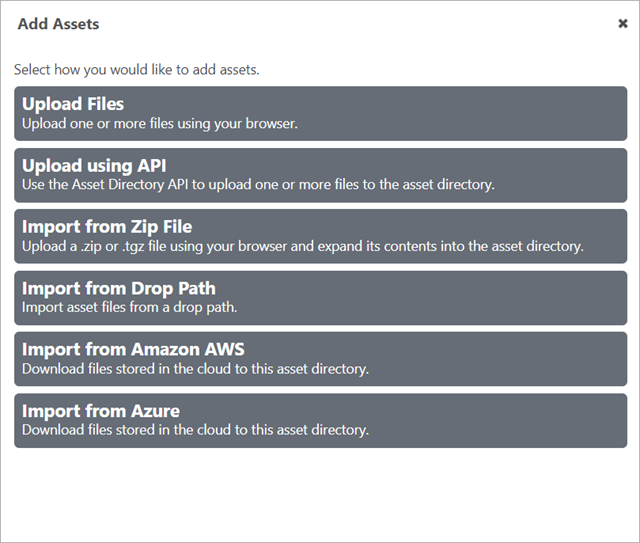
Now that our asset directory is configured, we can begin uploading HR files and folders. Simply navigate to the asset directory and click on "Add/Upload Files". A popup window will allow you to select how you want to add an asset.
In this example, we'll choose "Upload Files" via the browser, as this is the easiest way.
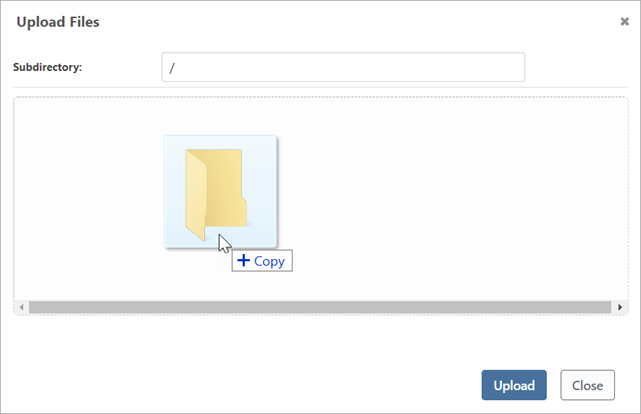
After locating the desired folder, we will drag and drop files into the asset directory.
Step 4: Grant Permissions
Now that our “HR-Guide” asset directory is created, we must make sure that users have access to it. By default, all groups in ProGet have zero permissions.
Tasks and permissions can get very granular and organizations with complex team structures might take longer to set up than others. Fortunately, the permissions for the asset directory in ProGet are simple. Users have either read permissions, write permissions, or no permissions.
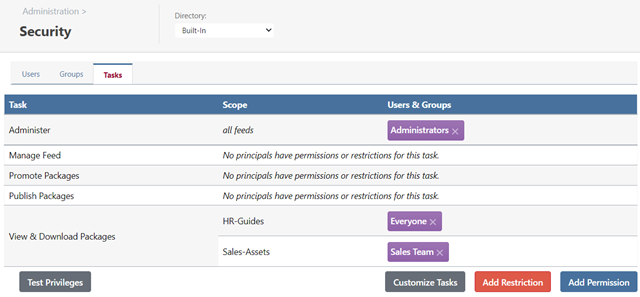
Kramerica wants the pseudo-group "Everyone" (all users) built into ProGet to have access to "View & Download Packages" from the asset directory "HR -Guides".
To do this, we navigate to Settings > "Security & Authentication" > "Manage Security" > "Tasks/Permissions" > "add permission".
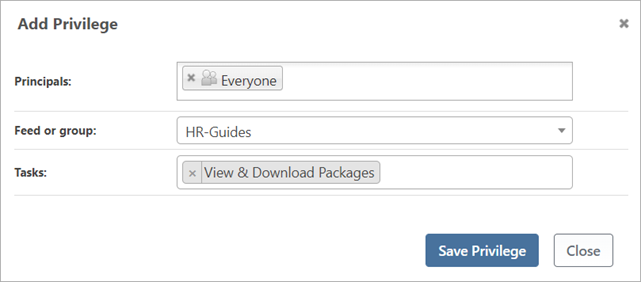
Now all Kramerica’s ProGet users can view and download all “HR-Guides” documents.
Step 5: Create Sales-Assets Active Directory
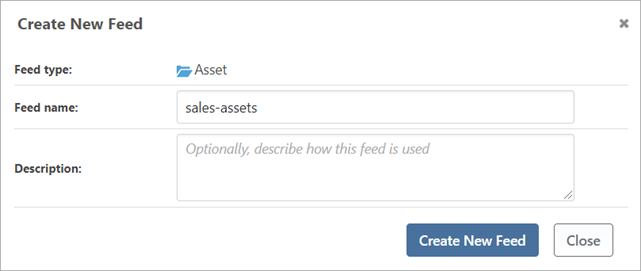
Next, we’ll create another active directory: Sales-Assets.
We’ll do this by repeating the same thing we did in Step 3.
Step 6: Give Sales Group Permission
In ProGet, it is easy to restrict Active Directory permissions to individual groups. In our example, only members of the sales team should have access to the active directory "sales-assets".
To set this up, navigate to Settings > "Security & Authentication" > "Manage Security" > "Tasks/Permissions" > "add permission" and grant Kramerica's "Sales Team" permission to "View & Download Packages" from "Sales-Assets". After we set this up, our task overview page looks like this:
