
HOWTO: Set Up Multi-Cadence Releases in BuildMaster

A Lean Platforms multi-release cadence splits your releases into two parallel tracks so that routine, low-risk changes can ship on a predictable schedule, independent of larger, riskier work:
Major Release Track: Major releases cover high-risk changes such as large features or significant updates, and ship on a flexible schedule driven by readiness rather than the calendar.
Routine Release Track: Routine releases cover low-risk changes such as bug fixes and minor updates, and ship on a predictable, fixed cadence (e.g. every two weeks).
Once you have adopted a multi-released cadence, delayed major releases no longer hold up the small changes stakeholders are waiting on, allowing you to ship regular updates more predictably. For a more detailed look at the concept of multi-cadence releases you can read our article Eliminate Delays and Disruptions in Software Releases.
This page will walk you through setting up a multi-cadence release in BuildMaster. It will cover how to connect your toolchain, create Routine and Major pipelines, automate routine release dates and track everything through BuildMaster's calendar.
Prerequisites
This guide assumes that you have already:
- Created your application in BuildMaster and connected it to source control (e.g., GitHub), so that branches and commits are visible on each build.
- Connected the rest of your toolchain to the application, so BuildMaster can show what’s inside each build. For example, connecting an issue tracker (e.g., Jira) lets issues be associated with builds and releases.
Step 1: Create a Major Release Pipeline
In this first step we will create a Major Release Pipeline. As major releases carry high risk, their pipelines typically include more stages, multiple manual approvals, and several date windows that map out the run-up to release. Builds are typically promoted manually once the required sign-offs are done.
Creating The Pipeline
For our Major release pipeline we recommend including Build, Integration, Testing, Staging, and Production stages. Integration confirms the build works with everything else, Testing covers QA, and Staging mirrors production before the final deployment.
To create a pipeline for your major releases, navigate to "Settings" > "Pipelines" then select "Create Pipeline". Then select "Show all" and choose "Main/Release Branch".
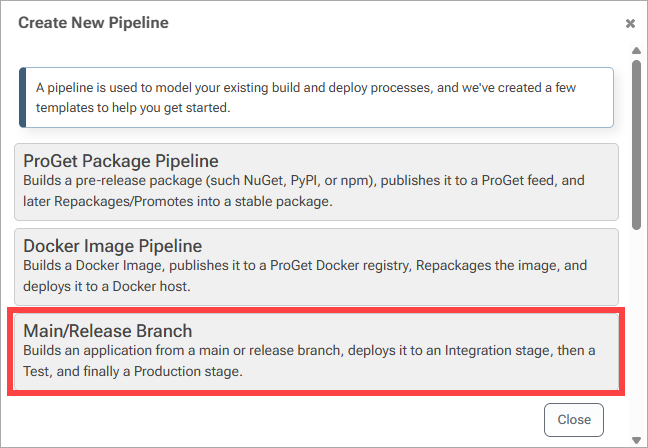
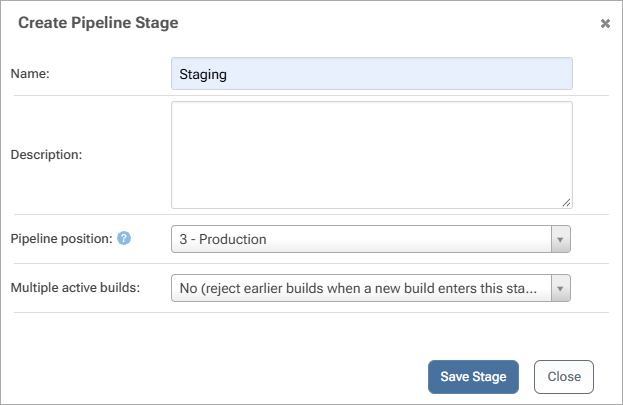
BuildMaster's default Main Pipeline already includes Build, Integration, Testing and Production. To add Staging, scroll down to Testing and then select "add stage".

Next, name the stage "Staging", and select "3. Production" for the "Pipeline Position". Then select "Save Stage".
Finally, select "Create Pipeline".

Creating Date prompts
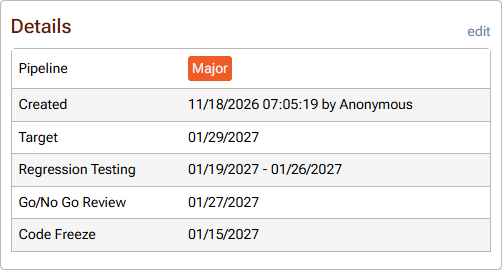
Beyond the release target date, you can add extra dates to a pipeline, set relative to that target. These are useful for milestones that happen on the way to a release. For your Major Release pipeline, a realistic set might include a code freeze (14 days before), a regression testing window (10 days before, lasting 7 days), and a go/no-go review (2 days before). These give everyone a shared view of what happens when.
To set these up, navigate to your Major Release pipeline, select "Edit Details" under "Pipeline Details", and then selecting "Manage Date Prompts".
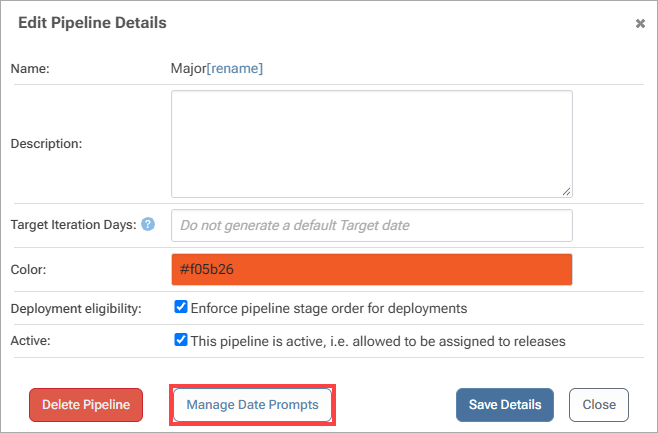
Then select "Add Date Prompt".
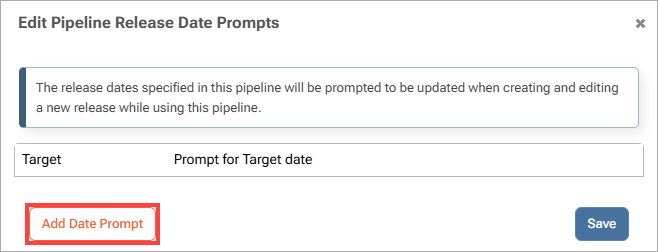
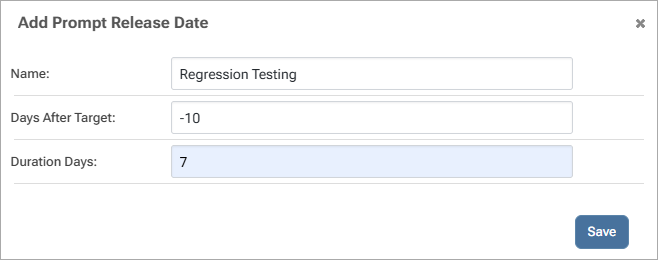
From here you will be able to name the date, how many days after the release target date it will be scheduled, (or before, by entering a negative number, e.g. -3) and the duration that this prompt will last.
Repeat these steps to create:
- Code Freeze (-14 days)
- Regression Testing (-10 days, 7 day duration)
- Go/No-go Review (-2 days)
These will then be pre-populated when creating a new release.
Step 2: Configure the Major Release Pipeline Stage Requirements
Pipeline stage requirements are gates that control what must be true before a build can move to the next stage of a pipeline. Because Major Releases carry high risk, we recommend combining automated requirements with those that require manual sign-off.
Setting Up Automated Stage Requirements
Automated requirements stop a build from moving forward until it meets certain criteria, without anyone having to remember to check. For Major Releases we recommend blocking builds that contain noncompliant packages or prerelease dependencies at the build stage, and requiring that all issues in the release are resolved in your issue tracker at the Production stage.
To configure these, navigate to your Major Release pipeline, scroll down to the Build stage and select "add stage requirement".

From here, select "Edit Packages/Dependencies", check both checkboxes and select "Save". This will prevent builds containing packages that break compliance rules or unstable (prerelease) dependencies from moving forward.

Next, at the Production stage, we'll add a requirement that all issues must be resolved before the release can be deployed to this stage, and another to ensure that the build deployed to this stage was built from the master branch.
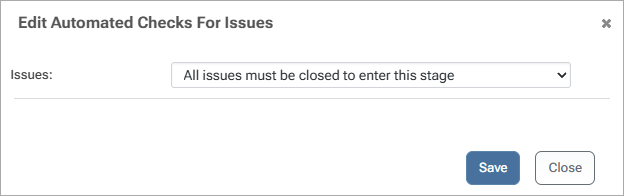
Scroll down to Production, select "add stage requirement" and select "Edit Issues/Status Requirements". From here select "All issues must be closed to enter this stage" and select "Save".
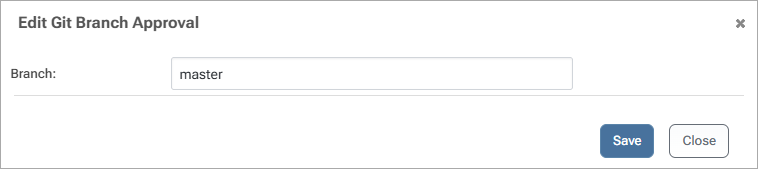
Now select add, select "Add "Git Branch" requirement, enter "master" and select "Save".
Finally, make sure you scroll up to the top of the pipeline page and select "Commit Changes".
Setting Up Manual Gating
Some checks need human judgment, so we also recommend manual requirements for Major Releases. We recommend adding two manual approvals at the Testing stage and one at the Production stage.
The two Testing stage approvals confirm that the release notes and test coverage are ready and that the testing environment is correctly configured, so testers don't spend a cycle on a build that isn't ready to be tested. The Production stage approval makes sure a release manager, or another accountable person, has signed off on the deployment before it reaches Production.
To configure these, navigate to your Major Release pipeline, scroll down to the Testing stage and select "add stage requirement". Then select "Add Manual Approval". From here select the user or group responsible for signing off on the approval, and add the description "Release notes accurate and build has test coverage prepared". Then select "Save".
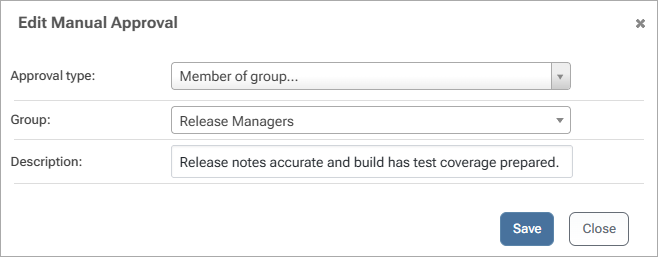
Repeat these steps to add the second approval, with the description "Testing environment configuration and dependencies are ready for build".

Next, scroll down and repeat this at Production stage, selecting the user responsible for signing off on the deployment, and add a short description. Then select "Save".
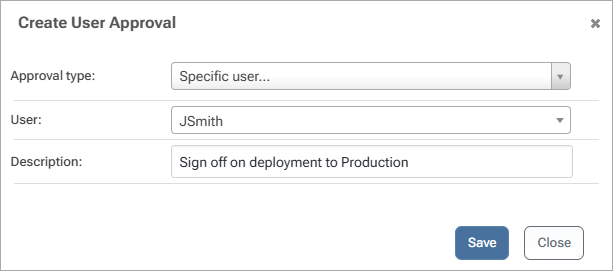
Finally, make sure you scroll up to the top of the pipeline page and select "Commit Changes".
Step 3: Create a Routine Release Pipeline
In this next step we will create a pipeline that will be used for your Routine Releases. As routine releases carry low risk and ship on a fixed cadence, their pipelines typically include fewer stages, fewer checks, and a handful of date prompts. Because the cadence is fixed, builds can also have their promotions scheduled to land on the release date.
Creating The Pipeline
We recommend keeping Routine Releases pipelines short: Build, Integration, Testing, and Production. Fewer stages means small changes reach production quickly without waiting on unnecessary checks.
As with creating a Major release pipeline, start by navigating to "Settings" > "Pipelines" then select "Create Pipeline". Then select "Show all" and choose "Main/Release Branch". By default this will already include all stages recommended for routine releases. Select "Create Pipeline".

Setting Target Iteration Dates
To keep routine releases predictable, you can set Target Iteration Dates on a pipeline to define when its releases are meant to go out, setting a fixed cadence for your routine releases (e.g., every two weeks on a Friday). BuildMaster then projects upcoming release dates for you.
To set these up, navigate to your Routine pipeline and then select "edit details" under "Pipeline Details". From here set the target iteration dates (e.g., "7" would set a one week cadence for routine releases):
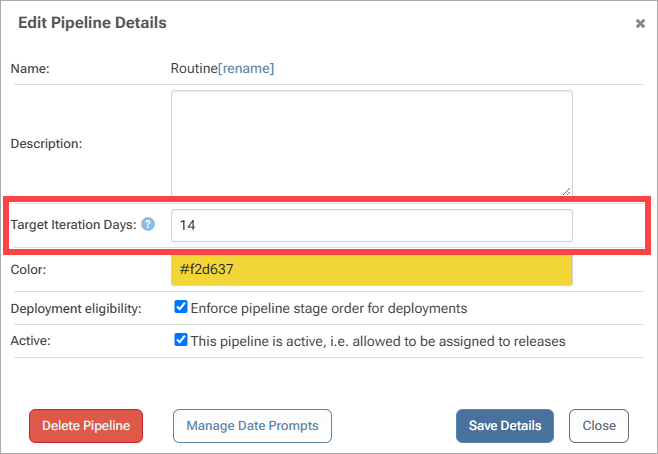
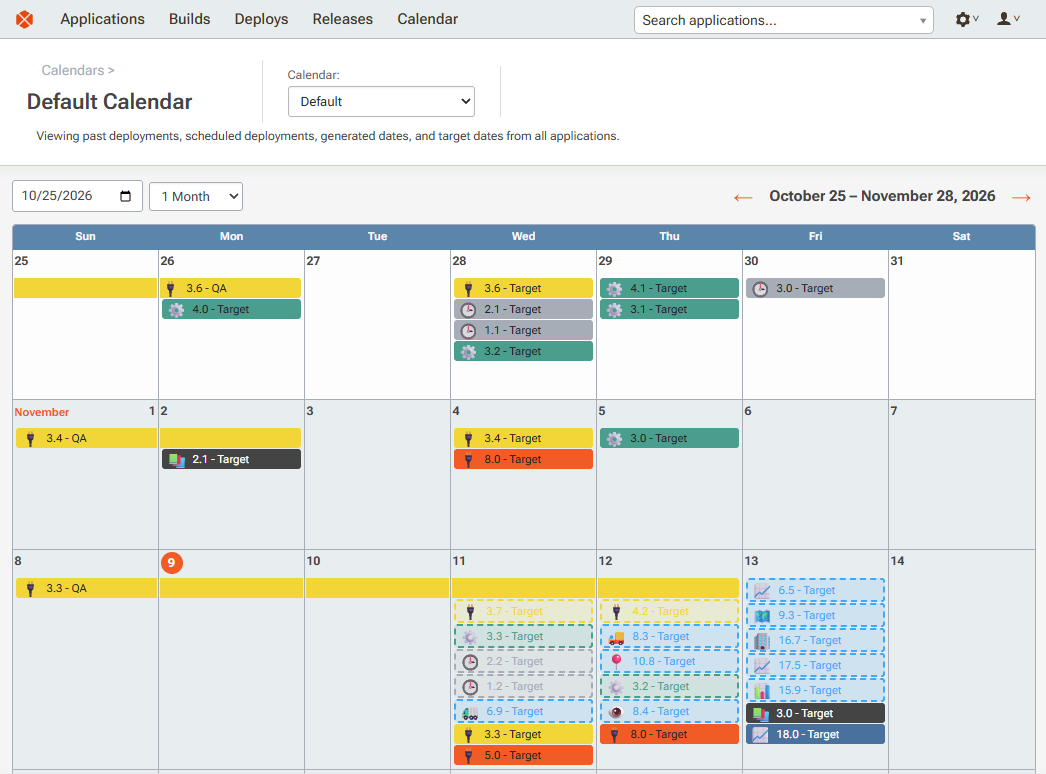
Once set, BuildMaster automatically projects the upcoming target dates for that pipeline and shows them on the calendar as dotted outlines.

Setting Date Prompts
Routine releases need only a light touch here. We recommend a couple of short prompts, such as a code cutoff 4 days before the target date and a short QA window 3 days before.
To set these up, navigate to your Routine release pipeline, select "Edit Details" under "Pipeline Details", and then select "Manage Date Prompts".
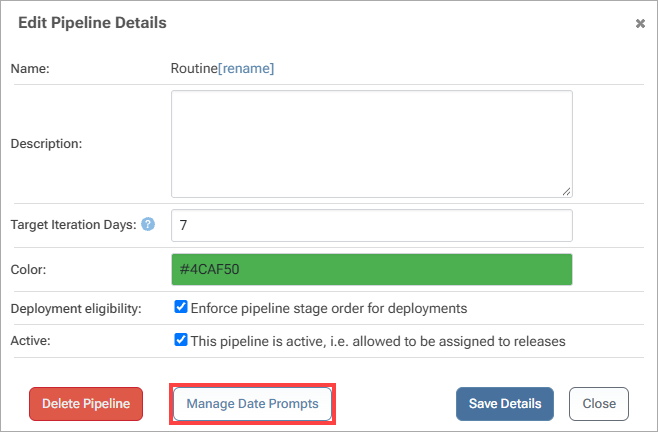
Then select "Add Date Prompt". Name the date (e.g., "Code Cutoff"), enter how many days before the release target date it will be scheduled as a negative number (e.g., -3), and select "Save". Repeat for the QA window, setting it 3 days before with a duration of 2 days.
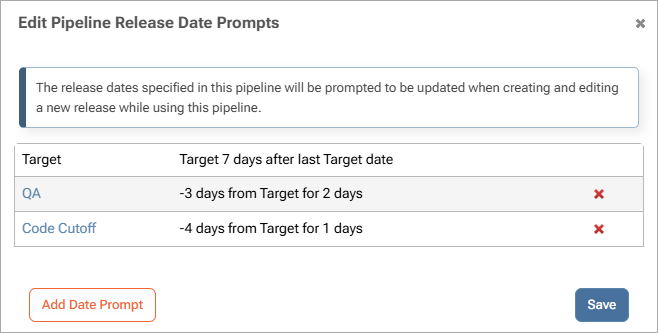
These will then be pre-populated each time you create a new Routine release.
Step 4: Configure the Routine Release Pipeline Gating
Because Routine Releases ship frequently and carry low risk, their gating should enforce quality without slowing anyone down. We recommend relying on automated gates rather than manual approvals, and adding variable prompts to make quick, repeatable testing easier. This step will cover both.
Setting Up Automated Gating
Because routine releases ship frequently, we recommend relying on automated gates rather than manual approvals. Use the same compliance and prerelease dependency checks as the Major pipeline.
To configure these, navigate to your Routine Release pipeline, scroll down to the Build stage and select "add stage requirement".
From here, select "Edit Packages/Dependencies", check both checkboxes and select "Save". This will prevent builds containing packages that break compliance rules or unstable (prerelease) dependencies from moving forward.
As with the Major Release pipeline, we'll add a requirements at the Production stage that all issues must be resolved before the release can be deployed to this stage, and another to ensure that the build deployed to this stage was built from the master branch.
Scroll down to Production, select "add stage requirement" and select "Edit Issues/Status Requirements". From here select "All issues must be closed to enter this stage" and select "Save".
Now select add, select "Add "Git Branch" requirement, enter "master" and select "Save".
Finally, make sure you scroll up to the top of the pipeline page and select "Commit Changes".
Unlike the Major pipeline, we haven't added any manual approvals here. Builds that meet these requirements are free to move forward, which keeps your fixed-cadence releases on schedule.
Creating Variable Prompts
Variables let you write a single deployment script that works across multiple environments, and have BuildMaster ask users for parameter values before a build is created or deployed using Variable Prompts. For example, a prompt at the Testing stage can let the tester choose whether to enable new features after deployment, so the same build can be checked with a feature off and then on without needing a separate build. In addition we'll add a prompt to define whether or not to restart services after deployment.
Navigate to your Routine Release pipeline, scroll down to the Testing stage and select "Add an input prompt or constant".
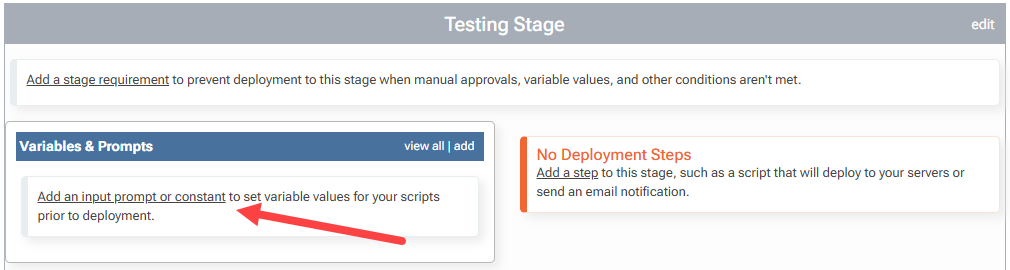
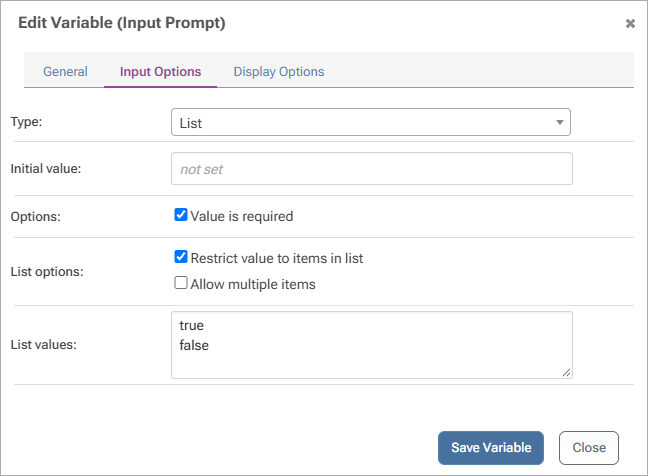
Then select "Prompt for Input" and name it "Enable New Features After Deployment". This prompt will be set up as a list to create "true" or "false" choices, so select the "Input Options" tab, select the "List" option, as well as selecting "Value is Required" and "Restrict value to items in list". Then enter "true" and "false" as list options.
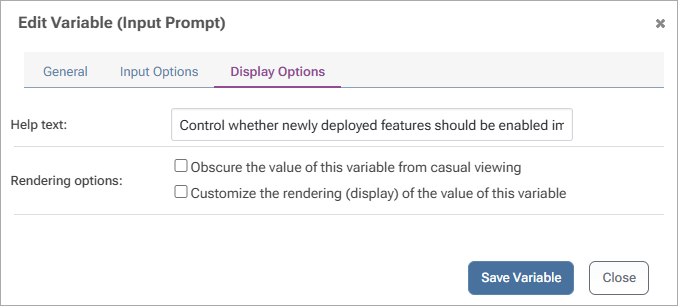
We also recommend adding a short description by selecting the "Display Options" tab and typing a short description in the "Help text" field. Then select "Save Variable".
Repeat this to create a prompt to define whether or not to restart services after deployment.
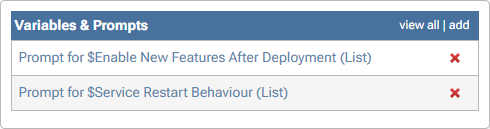
Then, scroll to the top of the pipeline page and select "Commit Changes".
Now testers can deploy the same build with new features switched off and then on, and choose whether services restart after deployment, all without needing a separate build or a change to the deployment script.
Step 5: Create a release in each pipeline
With both pipelines in place, we will now create a release in each one to see how the two tracks differ in practice. First we will create a Major release and set its target date. The date prompts you defined will pre-populate automatically, giving the release a long run-up with several milestones.
Then we will create a Routine release, which will pre-populate with just a code cutoff and a short QA window. Putting the two side by side shows how much more planning a Major release involves compared with a Routine one. It also gives us something to look at in the next step, where we will view both tracks on the calendar.
Creating a Major Release
To create a Major release, navigate to your Major release pipeline and create a new release. When prompted, set the release target date for the scheduled deployment.
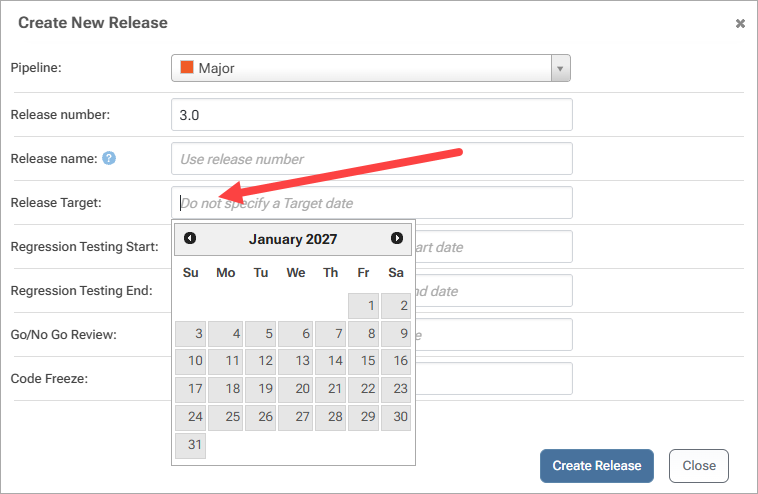
Once the date is set, the date prompts you defined in Step 1 are scheduled relative to it.
Creating a Routine Release
To create a Routine release, navigate to your Routine release pipeline and create a new release.
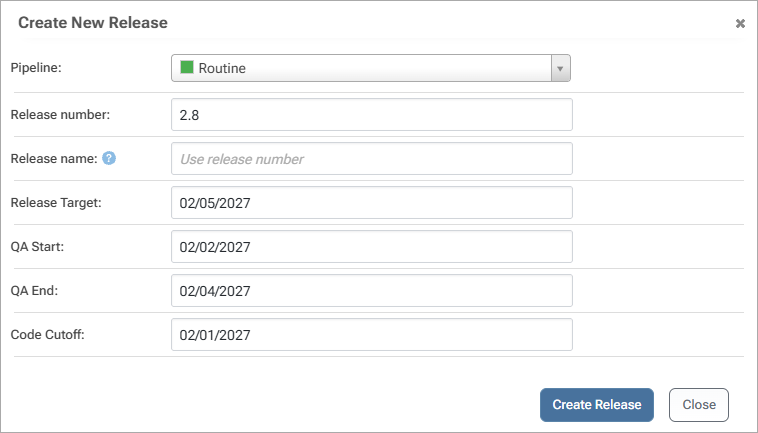
Unlike a Major release, this date should hold: Routine releases ship on a fixed cadence, so changes that aren't ready simply move to the next one. Once the date is set, the code cutoff and QA window you defined in Step 3 will pre-populate relative to it.
Scheduling Build Promotion
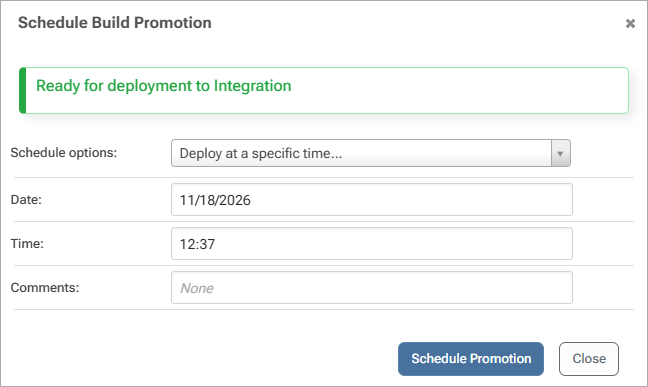
Because Routine releases follow a fixed cadence, you can schedule builds to be promoted automatically so they land on the release date. To schedule the promotion of individual pipeline stages, navigate to a build in your release and select the current stage under "Pipeline Progress".

From here select "Schedule" and enter the date and time to promote the build.
Step 6: View Target Release Dates on the Calendar
Once you have created releases and builds in your Major and Routine release pipelines, you can view them on the Calendar by selecting "Calendar" on the header. The default calendar will display all target dates for all applications in BuildMaster:
Creating Custom Calendars (Optional)
Viewing all of your applications at once through the default calendar can be overwhelming, so Buildmaster lets you create custom Calendars to view only specified applications.
To create a custom calendar, navigate to "Administration" > "Manage Calendars" (Global Components). Then select "Create Calendar".
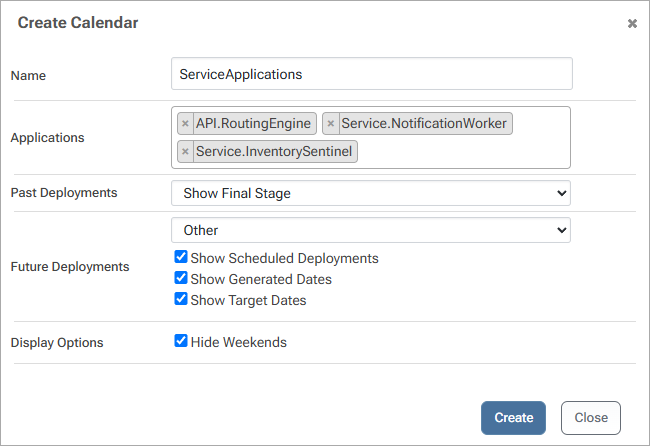
For more details on the options available when creating a customized calendar, read Creating Custom Calendars