Using Romp

In this tutorial, we will take an existing Romp Package and deploy it with Romp. The package contents in Accounts.Web-1.5.0.upack are the build output of a basic .NET web application.
Prerequisites
- Download and install the latest version of Romp from Romp Download Page
- Download Accounts.Web-1.5.0.upack from: http://cdn.inedo.com/downloads/romp/Accounts.Web-1.5.0.upack
- IIS installed on the server or workstation used for this tutorial
- Basic PowerShell or Windows Command Prompt knowledge
Package Structure
A romp package is simply a upack with additional layout requirements.
Once created, we will be taken to the Manage Feed page. Select "DeploymentPackages" from the breadcrumb to view the Feed Overview page. In the Accounts.Web-1.5.0 example package, there are the following extra files:
- install.otter – the OtterScript plan used for deployment
- packageVariables.json – a collection of values captured at build time intended to be used by package deployers in decision making
You may examine the package file contents using any program capable of examining a zip file.
Verifying the Romp Package
It is a good practice to verify that a package follows the basic format requirements of a romp package. To accomplish this, we will save the package C:\tmp\romp and run the validate command:
PS C:\tmp\romp> romp validate Accounts.Web-1.5.0.upack
If there are any validation errors, they will be written to standard error.
Deploying the Package
The key feature of Romp is the ability to deploy the application within the package and configure the environment required for the application to run. To deploy the package to a target directory, run the install command in a PowerShell window running as Administrator:
PS C:\tmp\romp> romp install .\Accounts.Web-1.5.0.upack
At this point, we will be prompted for the $TargetDirectory variable:
Variable "TargetDirectory" is required.
Description: Directory to install the package contents.
$TargetDirectory: C:\tmp\romp-install
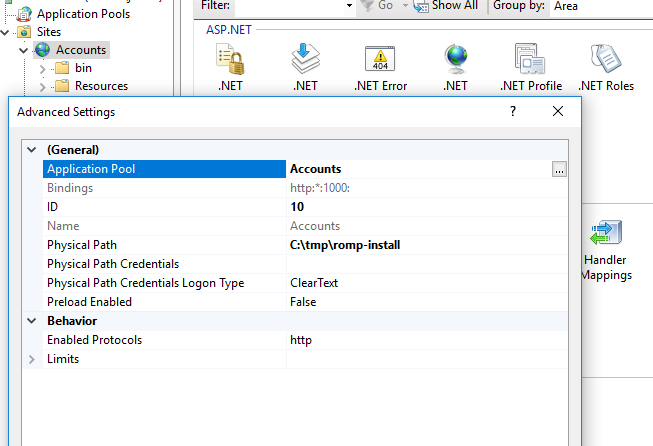
Once entered, Romp will begin executing the contained install.otter plan which automatically extracts the package contents (i.e. the build output), configures the Accounts application and website in IIS, and starts both:
What did Romp just do?
It may seem like magic, but Romp is simply invoking the execution engine to perform the steps outlined in the install.otter plan. To gather more information for what just happened, you use the jobs subcommand:
PS C:\tmp\romp> romp jobs
romp 1.0.0
Usage:
romp jobs list
romp jobs logs [jobId]
romp jobs purge ‹days›
PS C:\tmp\romp> romp jobs list
romp 1.0.0
Jobs:
8 5/4/2018 9:58:16 AM Normal
7 5/4/2018 9:57:47 AM Normal
…
1 5/3/2018 6:15:14 PM Error
This command shows the history of jobs executed by romp. To get a detailed log, use the romp jobs logs command, (or romp jobs logs # replacing the # with a specific job ID):
PS C:\tmp\romp> romp jobs logs
romp 1.0.0
** (unnamed scope) **
** Ensure Accounts Application Pool with .NET CLR v4.0 **
DEBUG: Looking for Application Pool "Accounts"...
DEBUG: Applying configuration...
DEBUG: Committing configuration...
INFO: Application Pool "Accounts" configured.
** Ensure IIS Site: Accounts application pool Accounts; virtual directory path: $TargetDirectory **
DEBUG: Looking for Site "Accounts"...
...
Removing the Example Website
This example package includes an uninstall.otter script which enables removal of the website and associated files. To undo everything that was done in this tutorial, use the uninstall command:
PS C:\tmp\romp> romp uninstall Accounts.Web
Note that this command uses the package **name** to identify the installed package, not the package file.