Create a GUI for Scripts with Input Forms

Otter can create a GUI for scripts so that it becomes easy to run complex PowerShell and Shell scripts by defining script parameters that includes descriptions, help text, dropdown, or checkbox inputs, and more.
This is a step-by-step tutorial to show how to:
- Add a script to Otter
- Create Job Templates
- Create Variable Prompts
- Perform Server Targeting
- Use Variables to define Custom Server Targeting
Add Your Scripts to Otter
Otter's tight PowerShell and scripting integration makes it easy to use your current scripts to automate your current infrastructure.
To add your script to Otter, navigate to Scripts > Create Script, and then choose one of the available types.
Once you've added a PowerShell, Shell, or OtterScript script, you can call it as an operation in an orchestration. Otter will then execute those scripts on the appropriate server and store logs about their execution.
Otter can read your scripts from a Git repository if you configure a raft
We recommend using job templates, as they define usage restrictions to enable self-service for even complex jobs.
Creating a Job Template
Job templates are used to create jobs and will restrict which servers scripts are run on, as well as provide variable prompts before running the script.
Variable prompts will automatically be added if your script is using Comment-based Help.
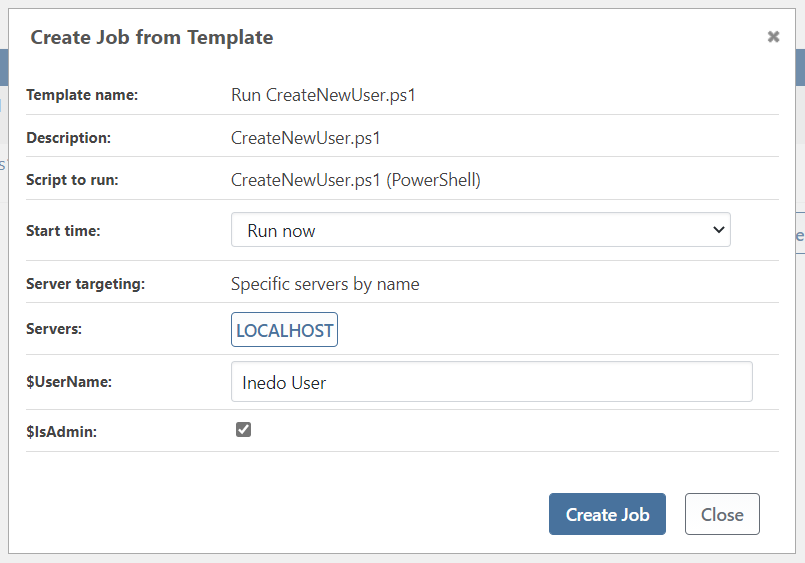
Comment Based Help Input:
<#
    .SYNOPSIS
    A script that creates a new user on the target server

    .PARAMETER UserName
    Specify the new user name

    .PARAMETER IsAdmin
    Specify if the new user will receive admin privileges
#>
Comment Based Help Output:

Creating Variable Prompts
Before running a job, Otter can prompt the user for input using textboxes, checkboxes, and lists. The values entered in these prompts are used as parameters for the script before it is executed as a job.
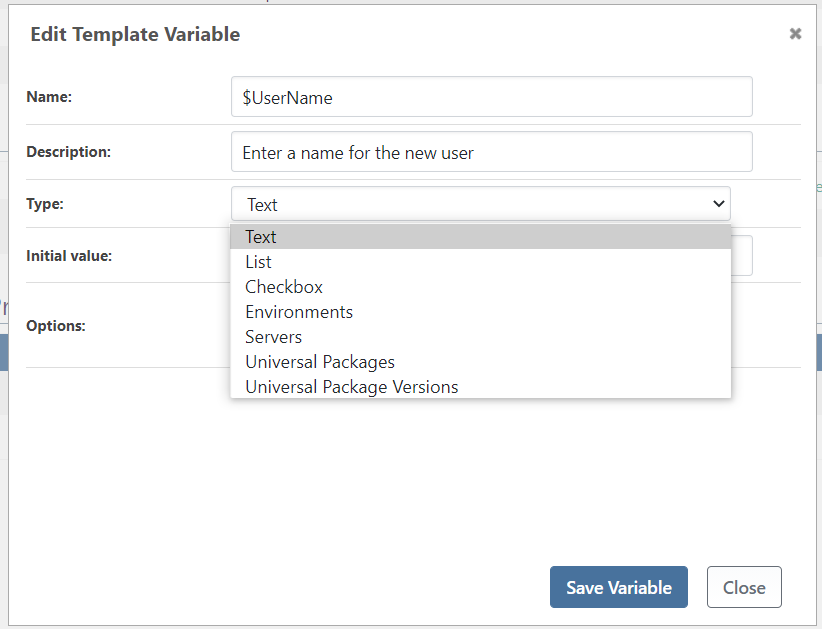
A template variable can be text, a checkbox, or a list.
Text Variables
Text variables allow you to enter a string of text when running a template job, e.g., to enter a file path.
Parameters
- Description: A description of what kind of input is required, e.g., “Please enter you name.”
- Initial Value: The default value that will be filled in if the user does not enter any text into the input field.
- Required: Specifies if the input is required or not. The job will not execute if a required value is not entered.
- Obscure: Obscure the value of this variable from casual viewing.

Output:

Checkbox Variables
Checkbox Variables act like textbox variables but with a checkbox instead of a free text input field. When checked, the value is True otherwise it’s False.
Parameter
- Description: A description of what value the checkbox variable toggles as true or false
- Initial Value: Specifies if the checkbox will be ticked by default
- Required: Specifies if the input is required or not. The job will not execute if a required value is not entered.
Example: When running a job to create a new user on a target server, use a checkbox to specify if the user will be an admin.
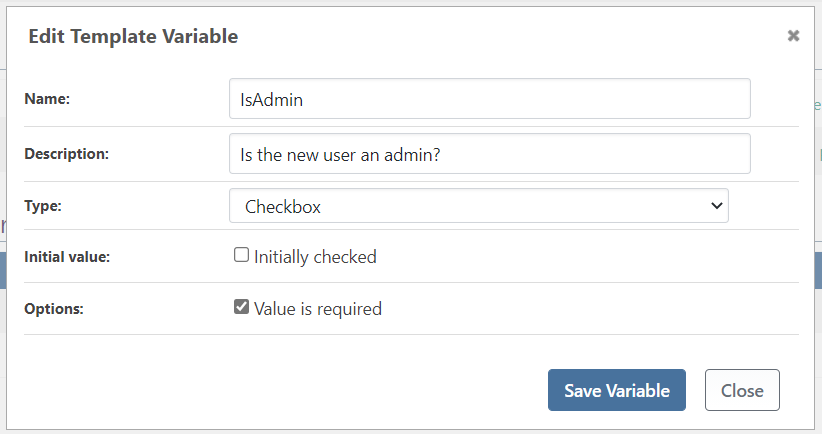
Output:

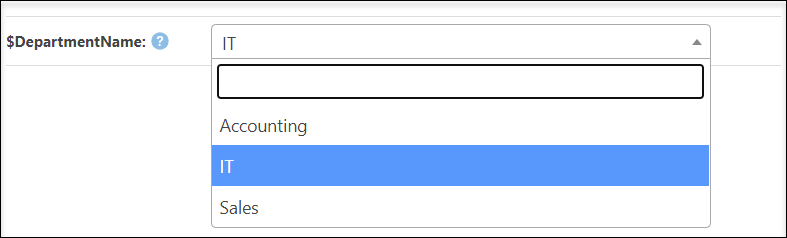
List Variables
List variables allow for the creation of drop-down lists to select a specific choice from. In the “List values” field, enter one value per line.
Parameter
- Description: A description of what value the checkbox variable toggles as true or false.
- Initial Value: Specifies if the initially selected value.
- Required: Specifies if the input is required or not. The job will not execute if a required value is not entered.
- Restrict: Specifies if new items can be added to the list of options when running the template job.
- Multiple: Specifies if one or multiple items can be selected from the list.
- Example: Select the department a newly created user belongs to.

Output:
Dynamic Lists
Template variables can also be a dynamic list.
Dynamic lists use a data source for list items instead of you manually entering values into the template. The built-in dynamic lists include environments, servers, universal packages, etc., but they are also extensible (i.e., you can create your own using the SDK).
Server Targeting
Scripts are run against a server, and there are three ways a job can target servers:
- Direct (simplest for just one or two): specify servers by name, and the script is then run against each server.
- Indirect (requires some planning ahead): specify a combination of roles and/or environments that will be used to specify the servers the script is run against.
- Custom (most complex but most flexible): perform complex orchestration that can run different commands or scripts on different servers. These servers can be targeted sequentially, in parallel, and with branching and iterating (looping) logic.
When using direct or indirect targeting, you can use variables names. See variables to learn more.
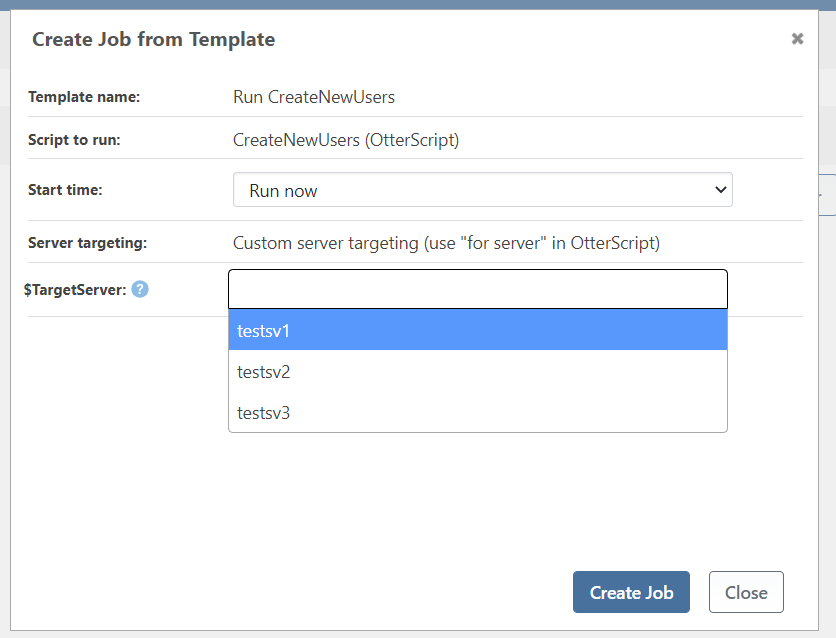
Using Variables to Define Custom Server Targeting
By using template variables, it’s possible to create custom server targeting patterns to ensure that you only target servers that meet specific requirements.
For example: You want user to be able to select which server to run a job on. However, you want to limit which servers they can choose from, e.g., limit to testsv1, 2, or 3 instead of the hundreds you have configured.
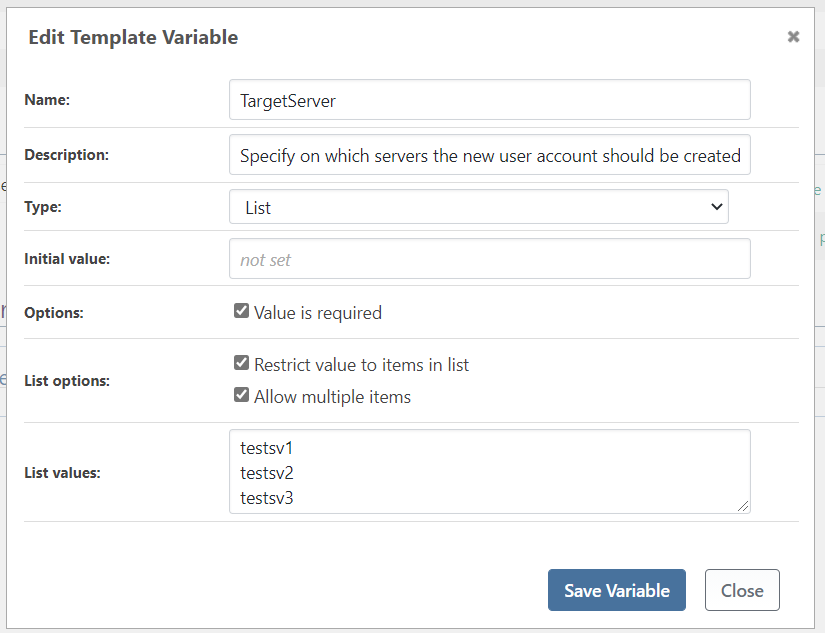
1. After creating a new job template, click on “edit”

2. On the “Edit Job Template” page, navigate to “Template Variables (Prompts)” and click “add”
3. Create a template variable with the following parameters:
- Name: TargetServer
- Type: List Variable
- List values: testsv1, testsv2, testsv3
4. Ensure that Server Targeting is set to "Custom server targeting"

5. Click on “Commit Changes”

6. When you create a job from the template, you’ll be asked to select the server you want to run job on