Deployment Scripts & Templates

Deployment scripts are used to deploy artifacts or packages that are created with a build script or imported from a CI Server like Jenkins.
A deployment script will be run during several stages of a pipeline (i.e. Integration, Testing, or Production), and each stage can use its own script, or you can reuse scripts using variables
Although deployment scripts are created in OtterScript, they're easy to edit using Script Templates and the Visual-to-Text Editor.
Creating a Deployment Script with a Script Template
To create a Deployment Script, navigate to Settings > Scripts, then click Add Script. You'll be presented with several options:
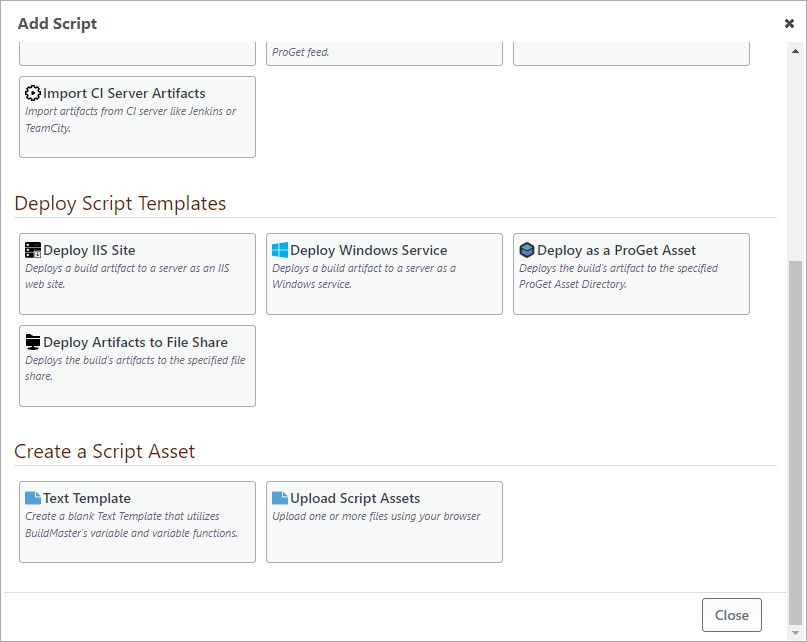
You can create a deployment script in any supported language or use a Deployment Script Template that will do most of the work for you. As long as the script starts with Deploy (e.g. Deploy, DeployProd, DeployDev), it will be considered a deployment script.
Deployment Script Templates
BuildMaster includes several Deployment Script Templates that are designed to handle most deployment targets on popular development platforms, including:
- Deploy IIS Site; deploys a build artifact to a server as an IIS website.
- Deploy Windows Service; deploys a build artifact to a server as a Windows service.
- Deploy as a ProGet Asset; deploys the build's artifact to the specified ProGet Asset Directory.
- Deploy Artifacts to File Share; deploys the build's artifacts to the specified file share.
Creating and editing a Script Template won't feel like you're writing a script at all. For example, a Deploy IIS Site script template will look something like this:
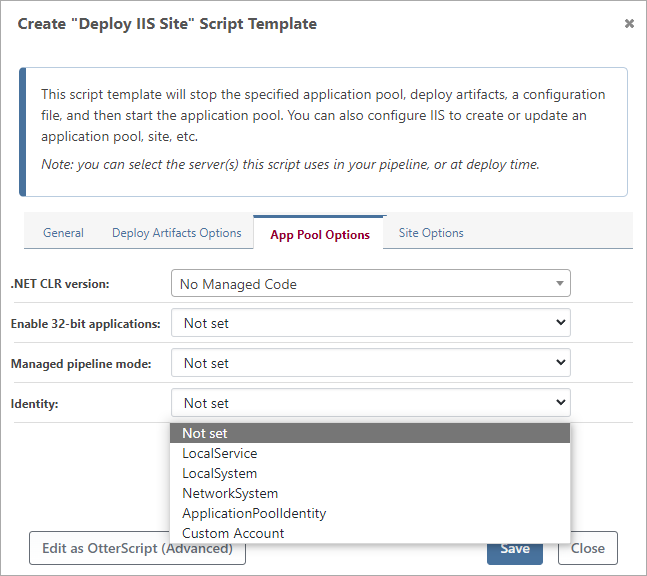
Despite not looking anything like a script, these are called script templates because they use OtterScript behind the scenes. The script template is simply modifying certain properties of various operations in a pre-defined OtterScript.
Converting Script Templates to OtterScript
To view or edit the underlying OtterScript in your script template, click the Edit as OtterScript button.
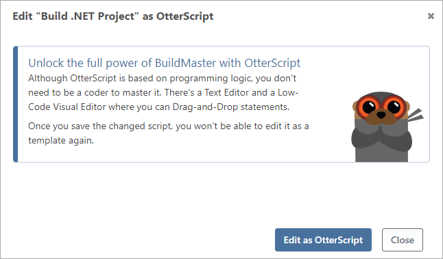
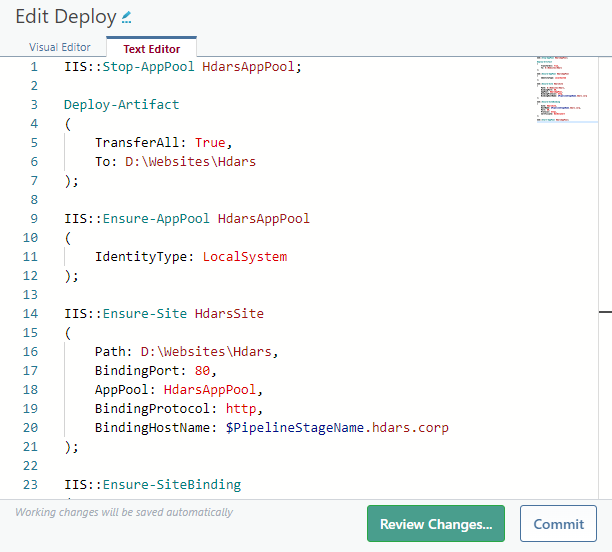
After clicking Edit as OtterScript, you'll be able to use the OtterScript Editor. This allows you to switch back and forth between a text mode and a low-code, visual-editor mode to drag-and-drop statements.
After you save the OtterScript (i.e. click Commit), you won't be able to edit it as a template again.
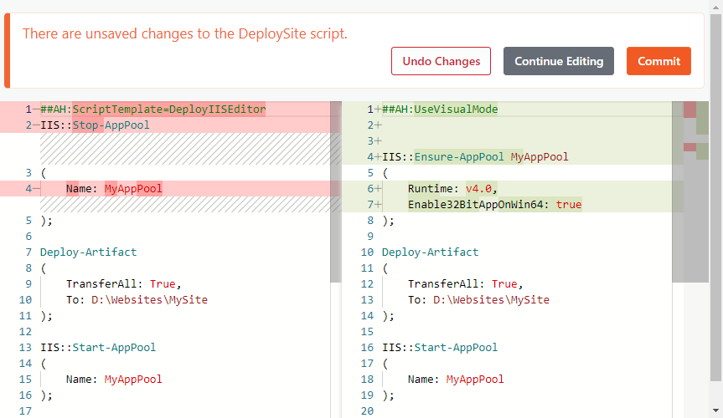
Undoing the Edit as OtterScript Button
If you haven't clicked the Commit button to save the changes, you can simply click Review Changes, then Undo Changes on the Comparison Page:
Deploy Scripts and Servers
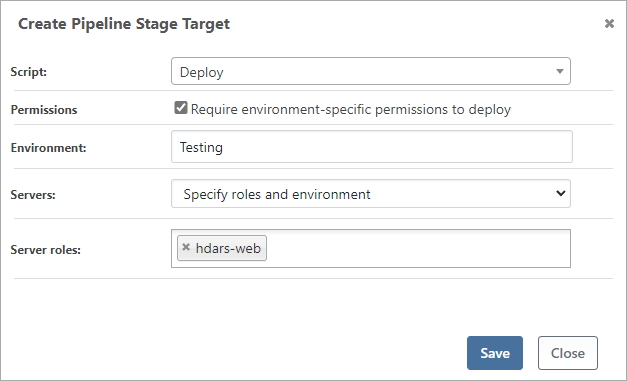
BuildMaster generally runs scripts using a deployment target that's specified in a pipeline stage (e.g. Integration, Testing, Production). Deployment targets give you a lot of options including specifying servers by name, role, or environment.
For example, you could specify to target all servers in the Testing environment that are assigned the hdars-web role.
You can also use custom targeting, which lets you specify the server names in OtterScript itself. This will let you perform complex orchestration that can run different commands or scripts on different servers. These servers can be targeted sequentially, in parallel, and with branching and iterating (looping) logic.
Creating a Deployment Script from Scratch
Although every deployment script is a little different, many will follow four general steps.
1. Stop Services
This step will generally stop the running application so that you can deploy the new version. Otherwise, you'll be deploying files while the application is running—which might lead to errors.
For example, if you're deploying a web application to IIS, you would want to stop the application pool first:
IIS::Stop-AppPool MyAppPool;
Or, if you were deploying a Windows service, you'd want to stop that too.
Windows::Stop-Service MyService;
2. Deploy Artifacts
This step involves deploying the files that you captured as build artifacts. Usually, this is done with a single Deploy-Artifact operation that points to a target directory.
Deploy-Artifact
(
  To: d:\WebApps\MyApp;
);
When run in this manner, Deploy-Artifact will synchronize the contents of the artifacts file and target directory (d:\WebApps\MyApp in the example above) by performing an incremental transfer. But there are a lot of other options available; see Deploying Artifacts to Servers to learn more.
3. Deploy Configuration
After the application's files have been deployed, the next step involves deploying two types of configuration:
- An Environment-specific configuration file, such as
web.appSettings.config - Infrastructure configuration, such as application pool or Windows service settings
Environment-specific Configuration Files
The simplest way to manage your environment-specific configuration files is with BuildMaster's Configuration Files feature. Unlike source control, you can store—and secure—multiple instances of the same file. Developers can access/modify the Dev instance, while only Operations teams can access/modify Production instances.
Deploying this type of file can be done with the Deploy Configuration File operation:
Deploy-ConfigFile
(
    ConfigFileName: web.AppSettings.config,
    Instance: $PipelineStageName
);
Infrastructure Configuration
You can also use BuildMaster to manage infrastructure configurations like application pools and Windows service settings. This way, the infrastructure configuration will be deployed in tandem with the application.
Infrastructure configuration can be complex, but there are many Ensure operations available in BuildMaster that will make it as easy as possible. For example, if you wanted to configure an IIS Website, you could use the IIS::Ensure-Site operation.
IIS::Ensure-Site HdarsSite
(
    Path: D:\Websites\Hdars,
    BindingPort: 80,
    AppPool: HdarsAppPool,
    BindingProtocol: http,
    BindingHostName: $PipelineStageName.hdars.corp
);
If you wanted to configure the corresponding application pool (i.e. HdarsAppPool), you'd just run the IIS::EnsureAppPool operation. There's much more that you can do using Otter; see Desired Configuration with OtterScript .
4. Start Services
The final step involves starting the application again. This is generally the opposite of the first step.
For example, if you're deploying a web application in IIS, you would want to start the application pool once everything is deployed:
IIS::Start-AppPool MyAppPool;
Or, if you were deploying a Windows service, you'd want to start that too:
Windows::Start-Service MyService;
Advanced Deployment Scenarios
The four-step deployment script above describes a simple approach that is appropriate for most applications.
You can do a lot more in Buildmaster, including advanced CI/CD patterns like Blue-Green Deployments.