HOWTO: Integrate Inedo Products with Active Directory

Inedo products come with their own built-in user module, but they also allow integration with a third-party LDAP directory or Active Directory domain forest. Integrating with Active Directory allows users from that directory to sign in and perform the tasks they are permitted to do.
This article will walk through how to configure an Inedo product to reference active directory, add users, and customize user permissions.
This tutorial is for a single domain and your server should be joined to that domain. If you are using more than one domain or your domain is not joined to your server, read our docs on advanced active directory configuration instead.
Step 1: Plan out Groups and Permissions
Integrating Active Directory will query users and groups directly from it. Those users and groups will then need to be set up with the relevant permissions. We recommend planning out what groups you would like to add along with their permissions and restrictions before configuring Active Directory domain integration
While individual users can be added, we strongly recommend setting up groups in your active directory instead. This allows for much easier scalability and management of permissions.
Available Permissions & Restrictions
When adding groups from your Active Directory they can be set up to be allowed or restricted from the following tasks:
| Product | Tasks |
|---|---|
| ProGet | Administer, Manage Feed, Promote Packages, Publish Packages, View & Download Packages |
| BuildMaster | Administer, Coordinate Releases, Deploy to Environment, Manage Application, View Application |
| Otter | Administer, Create and Schedule Jobs, Manage Servers & Configuration, Remediate Configuration Drift, Run Jobs Using Templates |
Administers not only have no restrictions, but are also able to add new users and groups from the active directory as well as permissions.
Example Scenario
To illustrate how groups and permissions can be utilized, let's consider the following scenario:
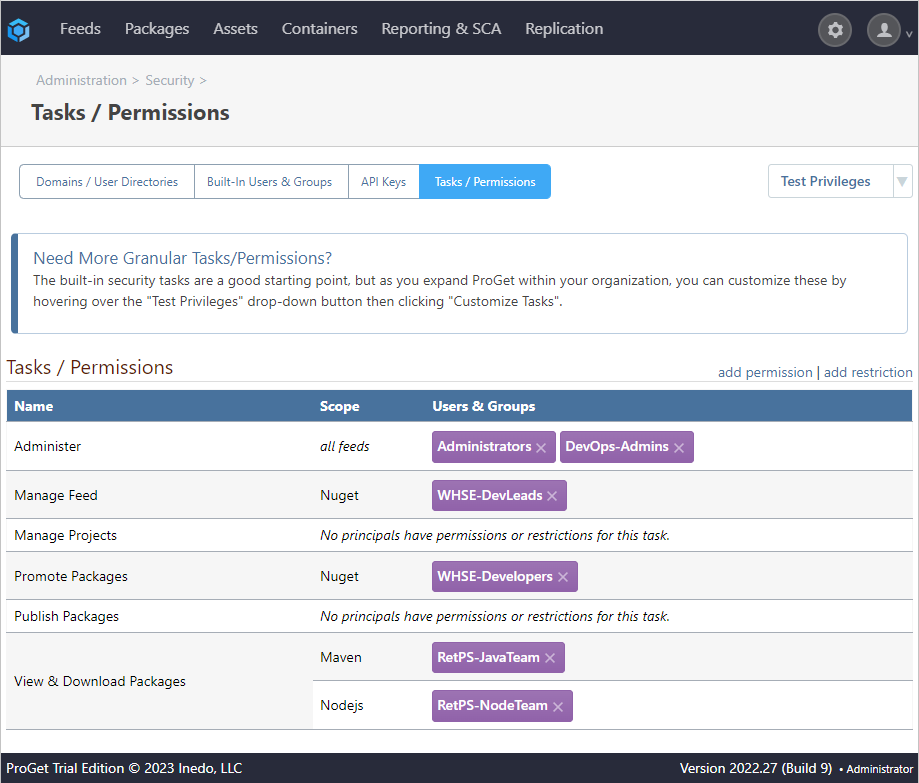
We belong to a company called Kramerica, and wish to integrate our active directory with ProGet. We want to add the following groups and permissions from our active directory:
- RetPS-JavaTeam (Maven feed): View & Download Packages
- RetPS-NodeTeam (npm feed): View & Download Packages
- WHSE-Developers (NuGet feed): Promote Packages
- WHSE-DevLeads (NuGet feed): Manage Feed
- DevOps-Admins (all feeds): Administer
ProGet was used as an example, but adding groups and permissions from an Active Directory can be done just as easily in any Inedo product.
After switching to an external directory, you won't be able to edit users and groups inside your Inedo product. While you can customize permissions and restrictions for users and groups from your Active Directory, you will need to make changes in your Active Directory if you wish to edit the users and groups themselves.
Step 2: Enable Active Directory Integration
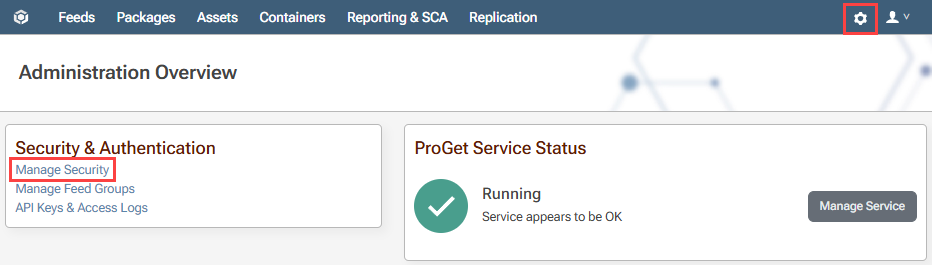
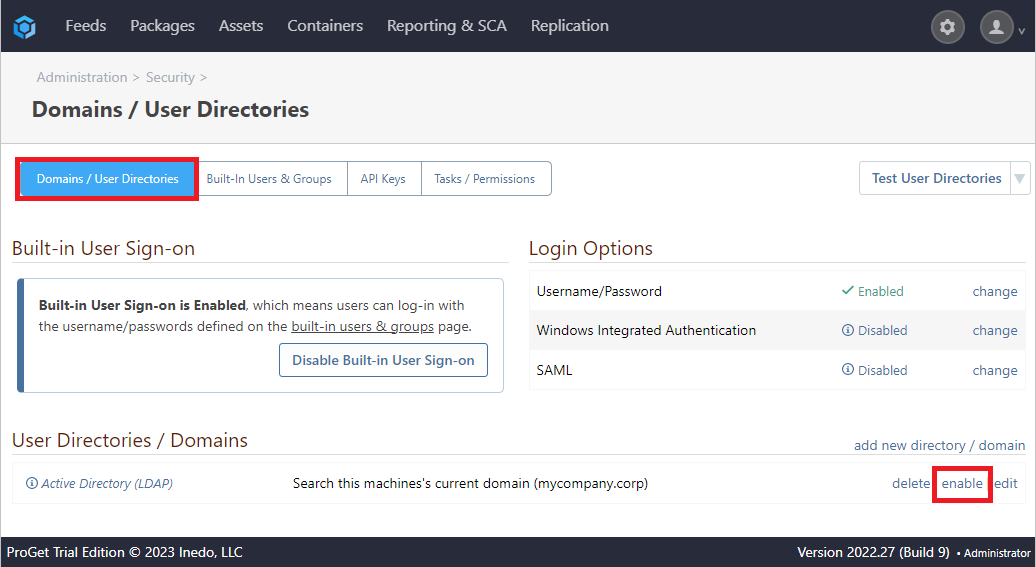
Now that we have planned our users, groups and permissions, we will need to enable our Active Directory. To do this, we navigate to "Settings" > "Manage Security" > "Domains/User Directories".
From here, we select "enable" next to our Active Directory.
Step 3: Add Groups and Privileges
To add groups and privileges from our Active Directory, we navigate to "Manage Security" as with step 2, select the "Tasks/Permissions" tab, and then click on "add permission".
Depending on the product we're using, we will need to fill out the following boxes:
| Field | Notes |
|---|---|
| Type | The users and/or groups to grant the task to. |
| User/GroupP | Specified in Type, the User or Group the permission will be applied to. |
| Feed or groupP | The feed or feed group the permission will be scoped to. |
| Tasks | The task the users or groups will be granted permission to. |
| Environment B,O | The environment the permission will be scoped to. |
In the "Type" box select the range of groups or users that we wish to assign permission to. From here, we specify the group or user in the "User/Group" box, then assign the "Feed or Group" and "Tasks" in the relevant boxes. In this example, we'll select our WHSE-Developers group assign them to the NuGet feed, and permit them to "Promote Packages".
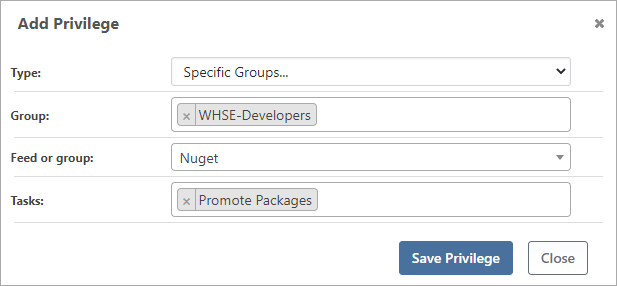
Finally, we click [Save Privileges] to add this group. The changes will now be reflected in our list of "Tasks/Permissions".
Optional: Disabling Built In User Sign-On
Inedo products come by default with a built-in Admin user, along with any other users added through the UI by the user.
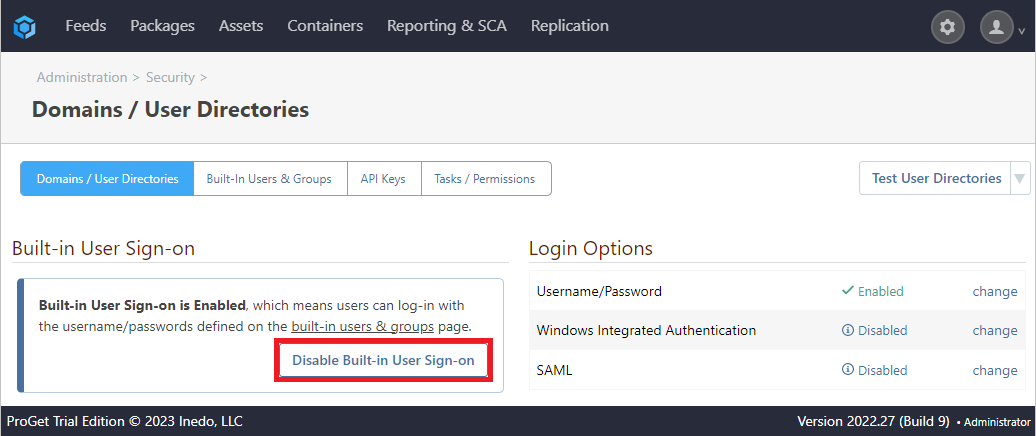
However, for the sake of security or preference, Inedo products allow the user to disable these users. To do this, we navigate to Settings > Manage Security > Domains/User Directories and select "Disable Built-in User Sign-On":
We will be prompted to enter a username and password to continue, after which we can select [Disable Built-in User Sign-on]
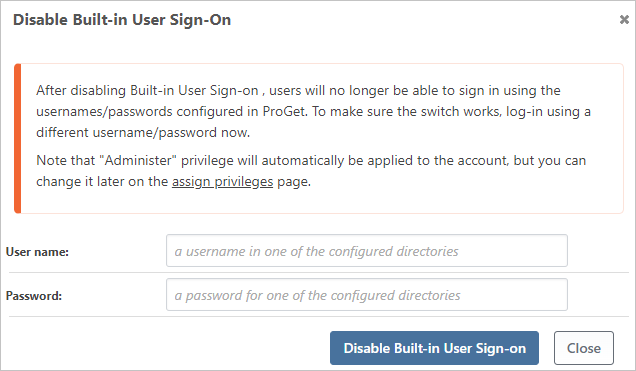
Note: We should avoid entering the name of a built-in user or we may cause issues accessing our Inedo product.
Troubleshooting
If you run into any of the following errors, see the troubleshooting documentation.
- Locked out: Resetting the built-in user directory and Admin account
- The Active Directory (New) user directory is not found/not selectable
- Privileges assigned to the Domain Users group not working
- Integrated Authentication Not Working
- Behind The Scenes: Integrated Windows Authentication