Configuring HTTPS on Windows

HTTPS is increasingly becoming a requirement inside of many organizations, even for internal-only web applications. It's also required by several third-party client tools, such as NuGet and Docker.
If you haven't configured HTTPS on a web server before, it may seem unintuitive and complex. Because of this, many users will instead configure a load balancer that terminates SSL connections and forward the requests over HTTP, or use a reverse proxy like Stunnel.
In this article, we'll briefly explain how HTTPS works, and show you how to enable HTTPS for ProGet, BuildMaster, and Otter when installed on Windows. For Linux-based installations, see HTTPS Support on Linux.
How does HTTPS (SSL/TLS) Work?
HTTPS (SSL/TLS) is a secure connection between a web server (such as ProGet) and a client (such as the browser or a command-line tool) that encrypts all communication to make it harder for third parties to intercept or read the data. This is a complex process, and requires that :
- The server has an "SSL/TLS certificate" installed
- The client can validate that certificate
- Both the client and server can use a compatible secure channel
If any of these requirements aren't met, you'll get errors like "certificate invalid" or "cannot establish a secure channel." One of the most challenging aspects of configuring HTTPS is acquiring an SSL/TLS certificate that can be validated by most clients.
Acquiring and Installing a Certificate on your Server
Before configuring HTTPS support, you need to acquire and install a SSL/TLS certificate on your server. There are two types of certificates you can use: Issued and Self-signed.
Use an Issued Certificates (Recommended)
An Issued Certificate is cryptographically signed by a trusted source, which means that clients can validate them without any additional configuration. There are a few ways to acquire one of these certificates.
- Generate with Active Directory, by configuring Windows Certificate Authority; this certificate will only be trusted on computers connected to the domain
- Purchase from Traditional Certificate Authority, such as Digicert or ComodoSSL to get a certificate with long-term or multi-year validity
- Use a Free, Automated Issuing Service, such as Let's Encrypt with a tool like win-acme to get short-term certificates
Each method has specific instructions for acquiring a certificate. See their individual web sites for the proper process to add their certificates to your server.
Using a Self-signed Certificate (Not Recommended)
The alternative option is to generate and install a self-signed certificate on your server. While this the simplest option, the clients (i.e. browsers and command-line tools) will not trust the certificate by default and give errors or warnings when connecting to the server. This is useful when testing SSL functionality with Inedo Products.
To generate and install a self-signed certificate on your server, you can use the following command in PowerShell:
New-SelfSignedCertificate -Subject "ProGetSelfSigned" -DnsName "proget.myserver.com" -CertStoreLocation "cert:\LocalMachine\My"
If you export and then install this certificate as a Trusted Root to the client machines, then the browsers and command-line tools will trust the server and be able to communicate over HTTPS.
How to Configure HTTPS
The Integrated Web Server (IWS) supports HTTPS, but can be a little complicated due to Windows operating system restrictions.
There are two ways to configure the Integrated Web Server for HTTPS:
- Bind to Port (e.g. listen to all requests to port 443)
- Bind to Hostname (e.g.
https://proget.kramerica.com/)
Configuring Directly in ProGet
Starting in ProGet 2022.19, BuildMaster 2024, and Otter 2024, we have added the ability to configure your integrated web server's HTTP/S bindings and a certificate directly in ProGet.
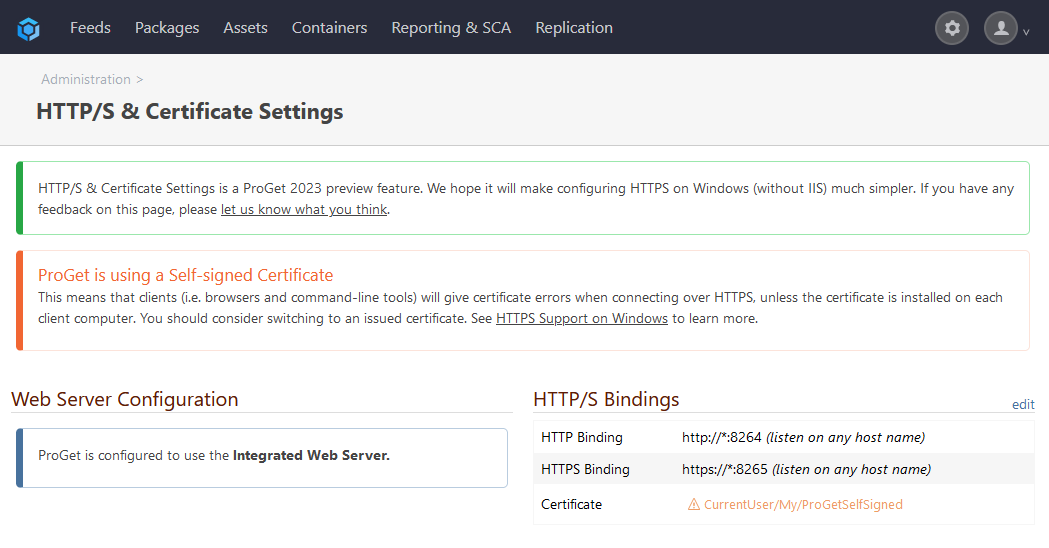
The HTTP/S settings page enables users to enable or disable HTTP and HTTPS bindings, change the port to listen on, add or change a hostname to listen on, and configure an SSL certificate for HTTPS bindings. Note that you can only manage the binding for the protocol you are not currently connected to; for example, to manage the HTTPS binding, you must connect via the HTTP binding.
To add an HTTPS binding using the HTTP/S Settings page:
- Navigate to Administration > HTTP/S Settings
- Click the "edit" link to the right of HTTP/S Bindings
- Click "Configure Certificate" in the lower left corner
- Select a Certificate option:
- Windows Certificate Store:
- Select or enter the Store, Location, and Subject for a certificate stored in the Windows Certificate Store
- Allow invalid is only needed when using a self-signed certificate
- Certificate File:
- Enter the path to a certificate file (pfx or pem)
- Optionally, enter the path for a key file (typically only used with pem)
- Optionally, enter a password to decrypt the certificate file
- Using a Self-Signed:
- ProGet will automatically create a self-signed certificate tied to
- The hostname you are connected with
localhost- The IPv4 loopback address
- The IPv6 loopback address
- The ProGet servername
- ProGet will automatically create a self-signed certificate tied to
- Windows Certificate Store:
- Click Save
- Check Enabled for the HTTPS binding and enter the port to listen to HTTPS requests on
- Click Confirm Changes and review any warnings that are displayed
- Click Save to configure the HTTPS binding and ProGet will restart the integrated web server
The confirmation page may display a warning if any commands need to be run directly on the server. If you are binding to a port below 1024, you will see a command that needs to be run on your server to allow the integrated web server to bind to that port. Additionally, when using a hostname with your HTTPS binding, you will also see a command to bind your certificate to your hostname and port.
Once configured, the integrated web server will restart. If any binding errors occur during startup, they will be logged in the Windows Event Log. See our troubleshooting documentation for more information.
HTTPS Binding to a Port (Recommended)
If you want your Inedo product to bind to a port (i.e. respond to all requests issued to a port like 443), you will need to perform the following steps.
This is only supported in ProGet 2022.19+, and is considered experimental. This feature will later be brought to all of Inedo's products.
1. Permit the Binding with netsh http
This step is only required if you're binding to the default HTTPS port (443), or any port lower than 1024.
In our examples so far we are using ports 8624 (for HTTP) and 8625 (for HTTPS), but you may want to use the default HTTP (80) and HTTPS (443) ports. In this case, Windows requires that an application has administrative access to bind to a port lower than 1024. By default, Inedo products are installed to run as NETWORK SERVICE, which means they cannot bind to these ports.
You'll need to allow this binding by running netsh http add urlacl as an administrator. This command has two important parameters:
urlis the URL specified in config but requires a trailing slashuseris the account that your site's service is running as
For example, if you wanted to bind to port 443 for NETWORK SERVICE, you'd run this command:
netsh http add urlacl url=https://*:443/ user="NETWORK SERVICE"
2. Update Configuration File
Next, you'll need to update the WebServer node's Urls attribute in the shared configuration file to include an https://*:<PORT> URL. Be sure to include the port when specifying your URL. For example:
<WebServer Enabled="true" Urls="https://*:8625;http://*:8624" />
You then will then need to add a binding for your SSL certificate. Your SSL certificate can be stored in the Windows certificate store or on disk using a ".pfx" file or a ".pem" file. This certificate binding will be specified in the WebServer node.
Certificate Store (Preferred)
To use a certificate from the Windows certificate store, you can register it in your shared configuration file using the following:
<WebServer Enabled="true" Urls="https://*:8625;http://*:8624" Store="Root" Subject="ProGet SelfSigned" Location="LocalMachine" AllowInvalid="true" />
- Store: This is the certificate store that your certificate is located in. Typically this will be
MYorRoot - Subject: This is the subject specified in your certificate. If you have multiple certificates with the same subject, the latest issued certificate wil be chosen
- Location: This is the location of the Windows certificate store to use. This will normally be
LocalMachine - AllowInvalid: (Optional)This attribute is only needed when using a self-signed certificate. When using a self-signed certificate this value should be true.
.PFX File
A certificate can be exported from your Windows certificate store and store it locally on your hard drive or using a network share. When exporting the certificate, make sure to include the private keys. Otherwise this certificate cannot properly decrypt SSL connections.
To use a ".pfx" file:
- Export your certificate as a ".pfx" file:
- Locate your certificate in the Windows Certificate Manager
- Right click on your certificate and click All Tasks > Export...
- On the Export Private Key page select "Yes, export the private key"
- On the Export File Format page, select "Personal Information Exchange - PKCS #12 (.PFX)" and check the following options:
- Include all certificates in the certificate path if possible
- Export all extended properties
- Enable certificate privacy
- On the Security page, select "Password" and enter a password
- On the File to Export page, select the location and file name to export the certificate to
- To use a ".pfx" file that was exported from your certificate store:
<WebServer Enabled="true" Urls="https://*:8625;http://*:8624" CertFile="C:\ProgramData\Inedo\ProGetCertificate.pfx" Password="MyCertificatePassword" />- CertFile: The location that your ".pfx" file is stored
- Password: The password that was used when exporting your certificate
.PEM File
A certificate can be saved as a ".pem" file and store it locally on your hard drive or using a network share. When saving your ".pem" file you must include the certificate validation path as part of your ".pem" file. The private keys can be stored in a separate key file or in the ".pem" file. To configure a ".pem" file:
<WebServer Enabled="true" Urls="https://*:8625;http://*:8624" CertFile="C:\ProgramData\Inedo\ProGetCertificate.pem" KeyFile="C:\ProgramData\Inedo\ProGetCertificateServer.key" AllowInvalid="true" />
- CertFile: The location that your ".pem" file is stored
- KeyFile: The location that your private keys ".key" file is stored. This is not needed if you embedded the key file in the ".pem" file
Convert a .PFX File to a ".PEM" File
A ".pfx" file can be converted to a ".pem" file using openssl. To convert it to a ".pem":
- Create the main .pem file
- Option 1: Include the private keys in the ".pem" file
openssl pkcs12 -in ProGetCertificate.pfx -out ProGetCertificate.pem -nodes- Option 2: Create a separate key file for the private keys
openssl pkcs12 -in ProGetCertificate.pfx -clcerts -nokeys -out ProGetCertificate.pem openssl pkcs12 -in ProGetCertificate.pfx -nocerts -out key.pem openssl rsa -in key.pem -out ProGetCertificateServer.key - Append the certificate validation path:
openssl pkcs12 -in ProGetCertificate.pfx -cacerts -nokeys -out ProGetCertificate-ca.pem -nodes
cat ProGetCertificate.pem ProGetCertificate-ca.pem > ProGetCertificateWithCA.pem
3. Restart the Integrated Web Server
Finally, you can restart the ProGet, BuildMaster, or Otter services. If the services can successfully restart, then the binding will be successful and you can visit the server on the new url.
HTTPS Binding to a Hostname (Not Recommended)
If you want your Inedo product to bind to a specific hostname (i.e. respond to requests issued only to a hostname like proget.kramerica.com), you will need to perform the following steps.
1. Update Configuration File
Update the WebServer node's Urls attribute in the shared configuration file to include a hostname-specified URL and the port.
Make sure to include a port when editing the Urls node, even if you want to use the default port (443) for HTTPS. Do not add a trailing slash.
For example, if you wanted to add an HTTPS binding to the proget.kramerica.com host name, in addition to the default HTTP binding to port 8624, the node would look like this:
<WebServer Enabled="true" Urls="http://*:8624;https://proget.kramerica.com:443" />
2. Permit the Binding with netsh http
This step is only required if you're binding to the default HTTPS port (443), or any port lower than 1024
Windows requires that an application has administrative access to bind to a port lower than 1024. By default, Inedo products are installed to run as NETWORK SERVICE, which means they cannot bind to this port.
You'll need to allow this binding by running netsh http add urlacl as an administrator. This command has two important parameters:
urlis the URL specified in config but requires a trailing slashuseris the account that your site's service is running as
For example, if you wanted to add allow proget.kramerica.com for NETWORK SERVICE, you'd run this command:
netsh http add urlacl url=https://proget.kramerica.com:443/ user="NETWORK SERVICE"
3. Register the Certificate with netsh http
Windows also requires that the certificate is bound to that URL.
You can do this by running the netsh http add sslcert command as an administrator. This command has two important parameters:
hostnameportis the URL specified in config minus thehttps://cerhashis the thumbprint of you SSL certificatecertstornameis the location of your certificate in the Windows certificate store. This will typicallyMYorROOT. See Microsoft's documentation for more information.appidis a just unique GUID; you can generate one by running the PowerShell commandNew-Guid
For example, the following command would bind proget.kramerica.com
netsh http add sslcert hostnameport=proget.kramerica.com:443 certhash=b1647f08924633cdf749856abc44c59379cfcaa1 certstorename=My appid="{E7FD8489-4931-45D9-8D42-427367B12584}"
4. Restart the Web Server
Finally, you can restart the ProGet, BuildMaster, or Otter services. If the services can successfully restart, then the binding will be successful and you can visit the server on the new url.
How to Unregister a Binding
A binding may need to be removed for various reasons such as a certificate, hostname, or port update, a configuration problem, or you are migrating to IIS.
For example, to remove the certificate and hostname binding, you would run the following commands:
netsh http delete sslcert hostnameport=proget.kramerica.com:443
netsh http delete urlacl url=https://proget.kramerica.com:443/
Automated / Silent Configuring HTTPS on the Integrated Web Server
The Inedo Hub's silent installation process will not configure HTTPS in this manner. However, it's possible to automate this after installation with scripting; user Stephen Valdinger (steviecoaster) wrote a script (Set-ProGetSslConfig.ps1) that serves as an excellent starting point.