Issue Tracking

BuildMaster can pull issues from Jira, Azure DevOps, GitHub, YouTrack, and other issue trackers so that you can quickly see release notes, prevent deployment if there are open issues, and automatically update issue statuses after deployment.
Connecting to an Issue Tracker
To connect your application to an issue tracker, navigate to the Settings page under your application. Then click "add" under Connections, and select "Issue Tracker Project".
You'll then be prompted to select or create a connection to an issue tracker like Jira, Azure DevOps, GitHub, or YouTrack.
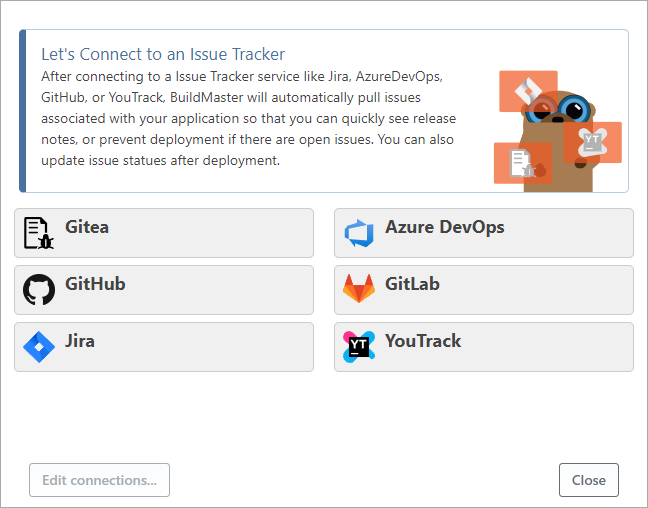
After choosing an issue tracker connection, Rakko will guide you through selecting a project and configuring how issues will be mapped to releases.
Configuring Release Mapping
A Release groups related builds together under a common release number (like 4.2.3) and deployment pipeline. Although Releases are an optional feature, you'll need to use them to pull issues.
Every issue tracker uses different terminology for grouping issues together in a release. For example:
- Jira has a "Releases" feature that you can enable on your project, which basically just creates a "Fix version" field that you can select on issues
- GitHub (and of course GitLab, and Gitea) have Milestones, and a Milestone field
- YouTrack has a Versions field type that can be added to your project, and is typically "Fix version"
- Azure DevOps Boards uses Iterations and sub-iterations called Sprints
When connecting a BuildMaster application to a project on your Issue Tracker, you'll need to configure how this grouping should map to a BuildMasters release.
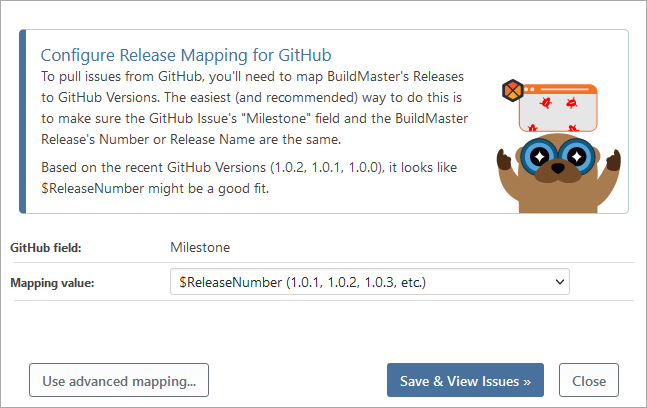
The easiest way to map releases is by using the same release number in BuildMaster and your issue tracker, then selecting $ReleaseNumber for the mapping value. BuildMaster releases also have an optional "release name" field ($ReleaseName), which you may find to be a better fit.
Custom Mapping Value
If $ReleaseNumber or $ReleaseName mapping does not suffice, you can specify a custom expression that will be used to map issues. For example, you could specify v$ReleaseNumber if you use values like v4.2.3 in your issue tracker. You could even use custom, release-scoped variables that are prompted using your pipeline.
Advanced Mapping Value
You can further customize how BuildMaster integrates with your issue tracker by configuring values that are specific to your issue tracker. For example, you can filter which issues are pulled using tags on GitHub (and GitLab or Gitea).
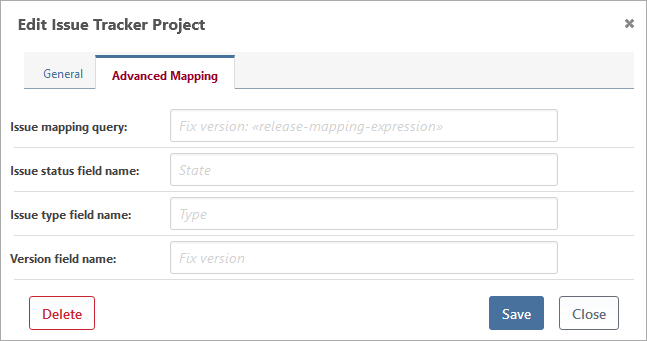
The available fields will vary by the issue tracker you're connecting to.
Viewing Issues in BuildMaster
You can view the issues that have been pulled to your BuildMaster application on the "Issues" tab, and on each release under the "Issues" heading.
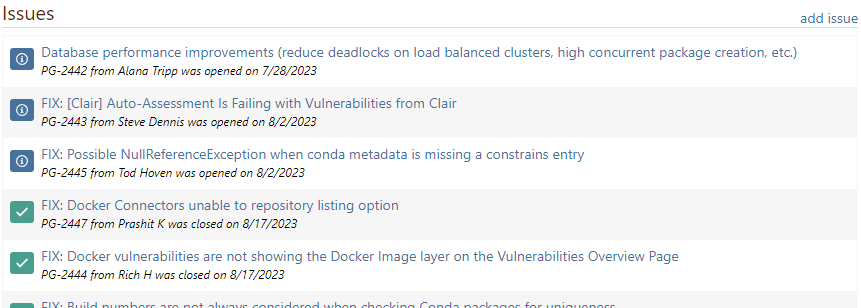
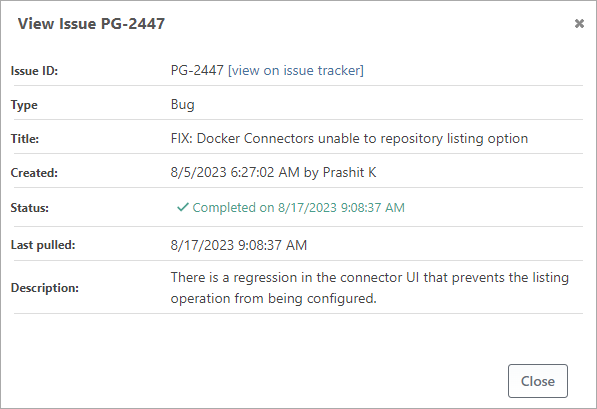
BuildMaster will determine if an issue is open or closed based on the status of the issue, and display an appropriate icon: blue "i" for open, and green check for closed.
You can click on the title of an issue to see the information that was pulled from your issue tracker project, and navigate directly to the issue tracker project if needed.
Issues for active releases will automatically be pulled when viewing the "Issues" and "Release" pages. If any errors occurred when pulling issues, you'll see an error message and prompted to troubleshoot your Issue Tracker connection.
Generating and Emailing Release Notes
BuildMaster can automatically generate release notes using the Generate-ReleaseNotes operation. This operation will generate an HTML document containing the issues associated with that release. This file can then be distributed via email using the Send-Email operation.
Example OtterScript
The following script demonstrates how to generate and then send release notes in two different manners.
Generate-ReleaseNotes
(
    Name: Release-$ReleaseNumber.html,
    IncludeIssueSummary: true,
    IncludeIssueDescriptions: true,
    IncludeReleaseNotes: true
);

# Send Release Notes HTML as an Attachment
Send-Email
(
    To: distributionlist@kramerica.com,
    Attachments: Release-$ReleaseNumber.html,
    Subject: $ApplicationName $ReleaseNumber Release Notes,
    Text: $ApplicationName $ReleaseNumber released on $Date()
);

# Send Release Notes HTML as the email body
Send-Email
(
    To: distributionlist@kramerica.com,
    Subject: $ApplicationName $ReleaseNumber Release Notes,
    Html: $FileContents(Release-$ReleaseNumber.html)
);
The Send-Email operation requires an SMTP server to be setup in Administration > SMTP Settings
Block Deployments based on Issue Status
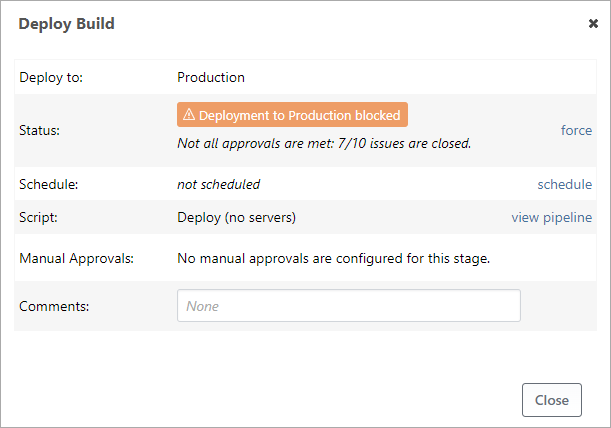
BuildMaster can block builds from being deployed if issues in the release aren't in a certain status. For example, you may wish to prevent production deployments unless all issues are closed.
You can configure this by adding an automated check to the desired stage on your pipeline:
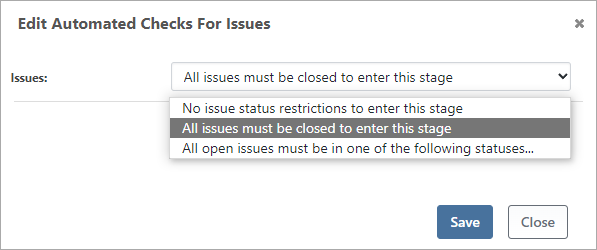
The automated check has two options:
- Require Issues Closed; issues still open will cause the automated check to fail, and the build will be prevented from being deployed to the stage
- Issues in Status; you can also enter specific statuses (such as "Resolved" or "Awaiting Deployment"), and any issue that doesn't have one of those statuses will cause the approval to be not met
As with all automatic checks, a build may be forced into a stage even if issues aren't closed or in the appropriate status. However, this requires specific permission (Force Builds) and a manual override.
Automatically Updating Issue Statuses
BuildMaster can change the status of issues in your issue tracker. For example, after deploying to production, you may wish to change the status of all issues from "Awaiting Deployment" to "Complete".
Issues in GitHub (and GitLab or Gitea) only have an "Open" and "Closed" status. While BuildMaster can automatically close your issues, we generally recommend using "Closed" to indicate that an issue is ready to deploy, and then blocking deployments if there are open issues.
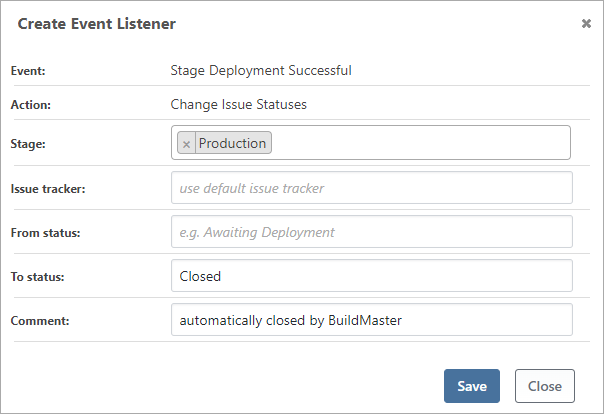
The easiest way to configure BuildMaster to change issue statuses is with a pipeline event listener. Simply go to your pipeline, click "add listener" under the Event Listeners section, select an event like "Stage Deployment Successful", and then select "Change Issue Statuses".
You can also change status using OtterScript. The operation you use will depend on the issue tracker you've connected to. For example, to change statuses in Jira you can use the Jira::Transition-Issues operation.
Jira::Transition-Issues
(
    Project: MyJiraProject,
    From: In Progress,
    To: Ready to Test
);
Automatically Closing Versions (Milestones, etc.)
BuildMaster can automatically close the version (or milestone, etc.) on your issue tracker project. This saves a manual step and prevents users in your issue tracker from accidently assigning issues to a closed version.
The easiest way to configure BuildMaster to change issue statuses is with a pipeline event listener. Simply go to your pipeline, click "add listener" under the Event Listeners section, select an event like "Stage Deployment Successful", and then select "Change Issue Statuses".

You can also close versions using OtterScript. The operation you use will depend on the issue tracker you've connected to. For example, to change versions in Jira you can use the Jira::Close-Version operation.
Jira::Close-Version
(
    Project: MyJiraProject,
    Version: v-$ReleaseNumber
);
Using BuildMaster's Built-in Issue Tracker
When BuildMaster pulls issues from an issue tracker project, they are stored in a lightweight issue tracker within the BuildMaster database. These issues have basic fields like an Issue Number, Title, Status, etc., and these fields will be are automatically updated for active releases whenever you browse the Release or Issues page.
Although it's very basic, you can add issues to this built-in, lightweight issue tracker. You'll first need to enable this by navigating to Settings > Configure Build & Release Features > Issue Features. Once you do, you'll see an "add" link on the Issues and Release pages.
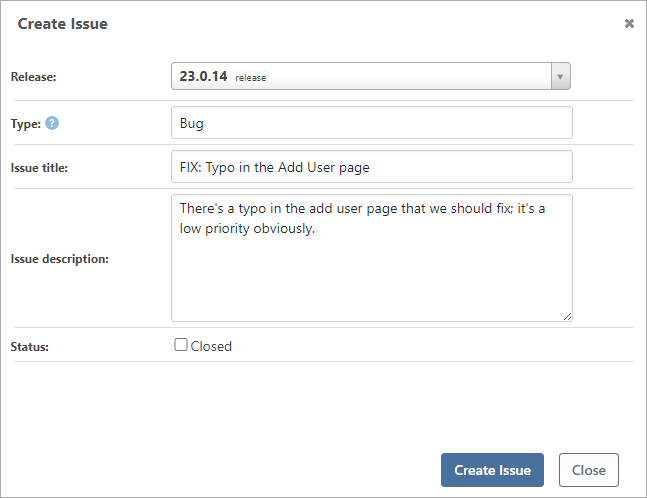
Compared with a dedicated issue tracker like Jira, this built-in issue tracker isn't suitable for most teams or applications. However, it may be adequate for small services or components with very few changes that you want to generate release notes for.
It may also be useful to augment issues pulled from an issue tracker you've connected to, especially if you want to generate release notes.
Troubleshooting
If you receive any errors when trying to pull issues, change issue status, or close issues, you can troubleshoot the integrate by navigating to your application's Settings, clicking on the Issue Tracker project, then clicking the "[troubleshoot]" link next to the status.
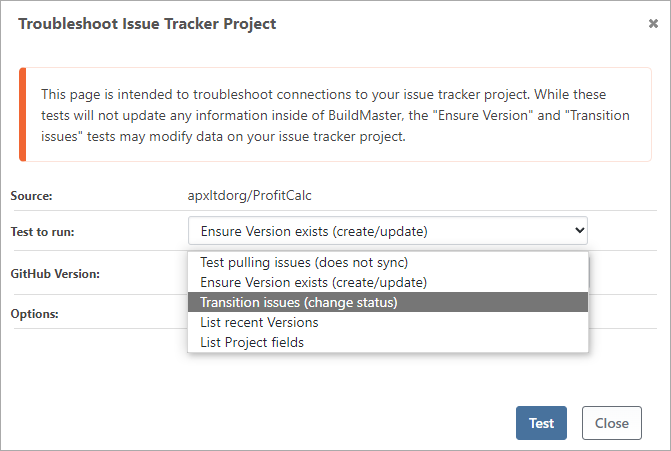
The troubleshooting page will provide details about what API URLs are being queried and which issues are being detected. This can help diagnose problems with release mapping.
Dissapearing Issues
You may notice that all or many of the issues on a BuildMaster release will suddenly disappear. This will only happen on Active releases (not Deployed or Cancelled), and it usually is a side-effect of a release mapping changes:
- Release Number/Name in BuildMaster is edited
- Issue tracker project or version configuration changes
- Issue Tracker Connection Configuration changes
This happens because BuildMaster will delete any issues that are no longer associated with the mapped version on the issue tracker project.
BuildMaster 2022 and Earlier
BuildMaster 2022 and earlier used a component called "Issue Sources" to pull issues from an issue tracker. Issue Sources are conceptually similar to the issue tracker connections introduced in BuildMaster 2023, but they're more complicated to configure and don't allow you to update issue statuses or close versions.
Issue Sources will still work in BuildMaster 2023, but they are considered a legacy feature and will be removed in BuildMaster 2025. We recommend deleting your configured issue sources, and re-adding the issue tracker connections instead.
See the old issue tracking documentation (archive.org) to learn how to configure Issue Sources in older versions of BuildMaster.
In this article
- Connecting to an Issue Tracker
- Viewing Issues in BuildMaster
- Generating and Emailing Release Notes
- Block Deployments based on Issue Status
- Automatically Updating Issue Statuses
- Automatically Closing Versions (Milestones, etc.)
- Using BuildMaster's Built-in Issue Tracker
- Troubleshooting
- BuildMaster 2022 and Earlier