HOWTO: Configure Feeds for Azure Blob Storage

ProGet can use Azure Blob Storage to store your package files instead of your server's disk drive. This simplifies disaster recovery by storing everything in the cloud, and ensures you never run out of storage.
In this article, you'll learn how to set up Azure Blob Storage and then use it to store packages in a new feed in ProGet.
This guide will walk you through creating a new feed. If you have an existing feed that you want to migrate to Azure Blob Storage, check out our migrating an existing feed docs.
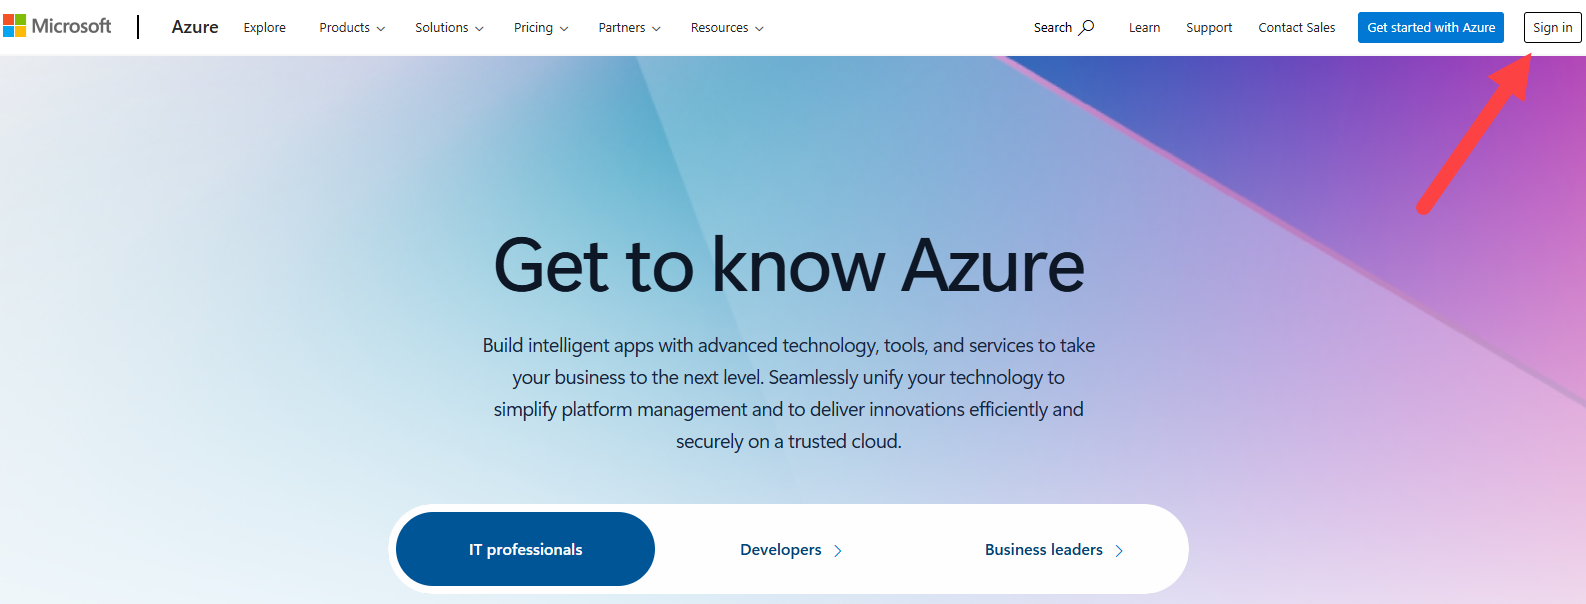
Step 1: Login or Create an Azure Account
Sign up or login your Azure Account.
Step 2: Configure Your Storage Account
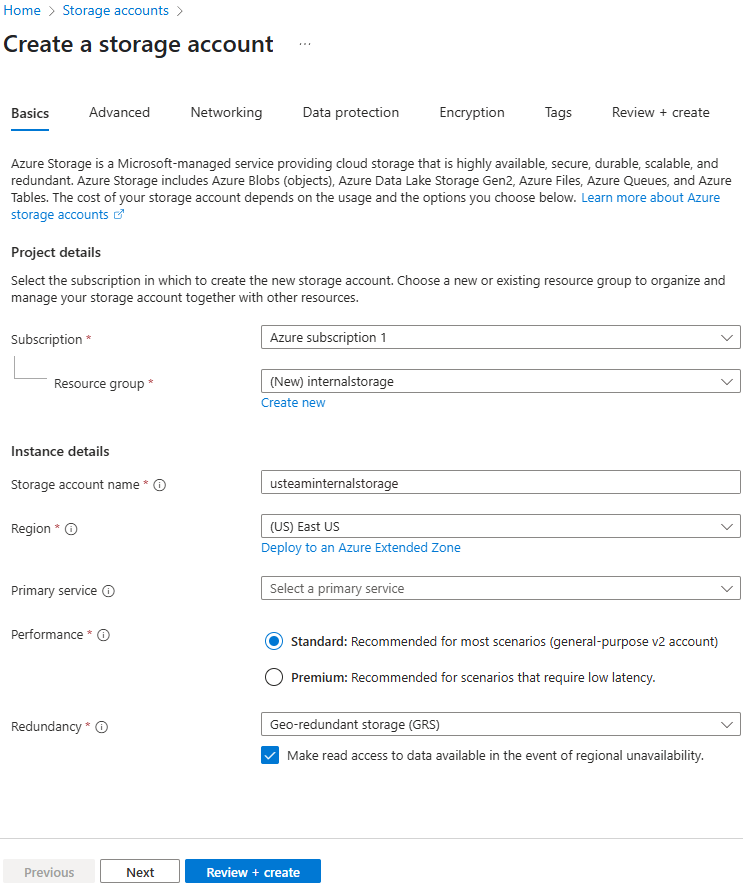
Now that you have logged in, you will need to create a storage account if you have not already done so. Navigate to your storage account in Azure by searching for "storage account" in the search bar at the top of the screen. Then click Create Storage Account.

You must then fill in the appropriate fields. You can also fill in the other tabs, but only the information on the Basics tab is needed to configure your storage account and use it with ProGet. When you are done, click Review+Create in the lower left corner.
Step 3: Create a Container
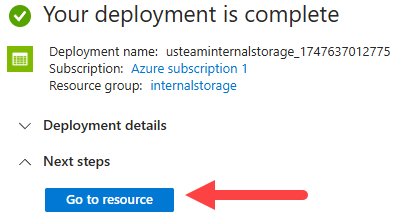
After you have set up your storage account, you need to create a container. To do this, click Go to Resource to access all the tabs you need to manage your new storage account.
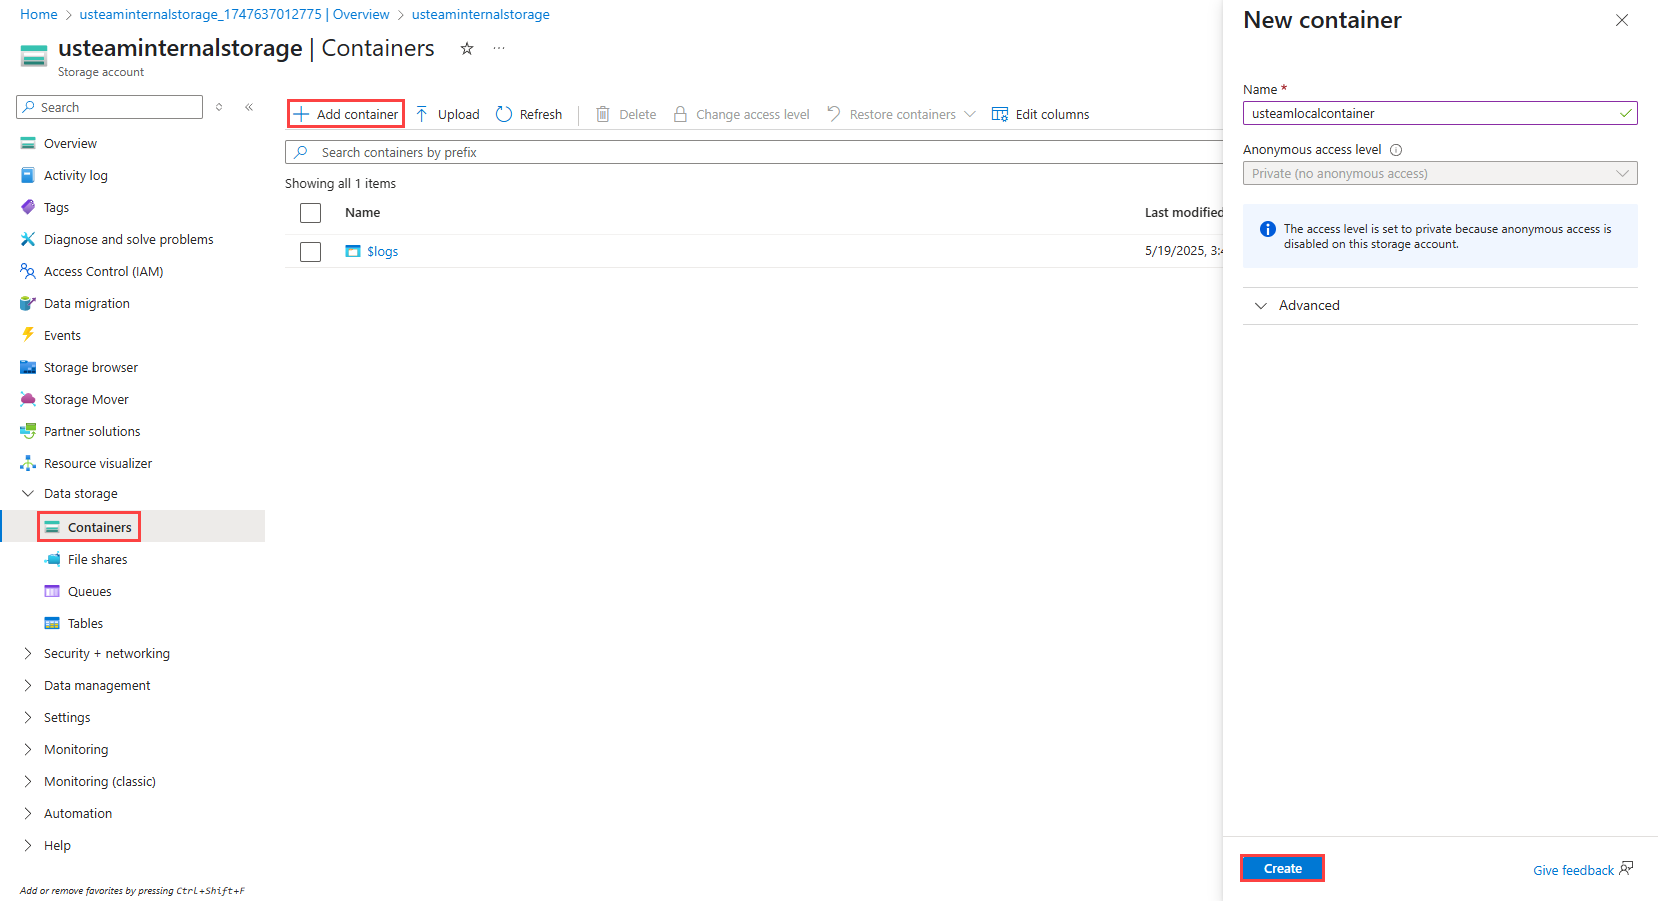
Navigate to the Container tab on the left side of your screen. Then click on the +Container button to create a new container. After entering the name of the container and the public access level, click on "Create" in the lower right corner.
Please copy the name of your container as you will need it in step 7.
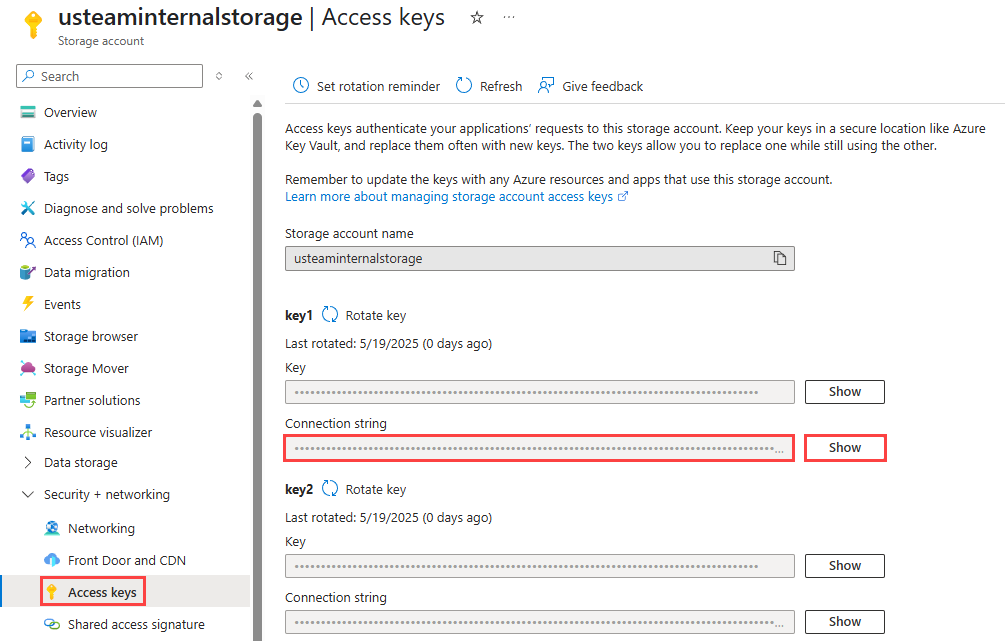
Step 4: Locate Your Connection String
After creating a container, you need to find your container's connection string so that ProGet can use your Azure Blob storage.
To find your connection string, navigate to the Access Keys tab on the left side of your screen. Then click View Keys and copy your connection string to enter it into ProGet in step 7.
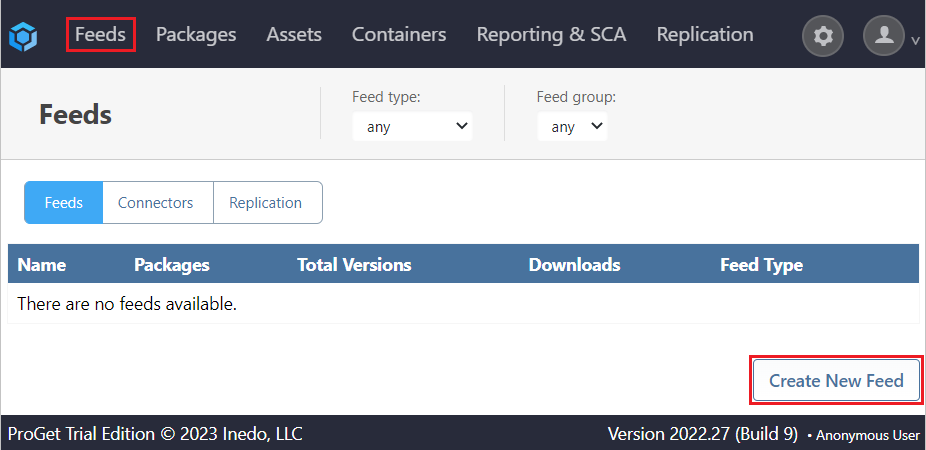
Step 5: Create a New Feed
Now that you have your Azure Blob storage you need to create a new feed to use it. To create a new feed, navigate to the banner at the top of the page and click Feeds. Then select Create New Feed.
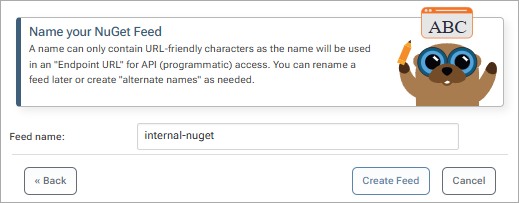
Next, you need to select the type of feed you want to set up. In this tutorial we will set up a NuGet feed, but the steps should be nearly identical for each feed. Select the feed you want to set up and fill in the appropriate fields.
Step 6: Change your Feeds Package Storage Location
By default, ProGet stores package files on disk, so your feed must be configured to store packages on Azure Blob Storage instead. In your feed, click Storage & Retention, and then select Change next to Storage.
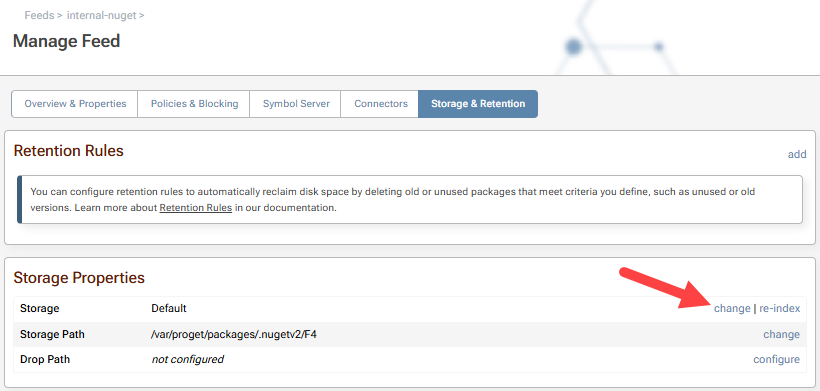
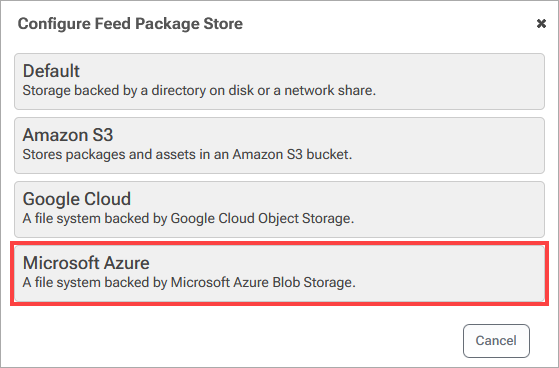
After clicking Change, you will be prompted to configure your feed package store. Select Microsoft Azure.
Step 7: Configure Package Store Location to Use Your Azure Blob Storage
After you select Microsoft Azure as the location for your package, you will be presented with the following configuration options:
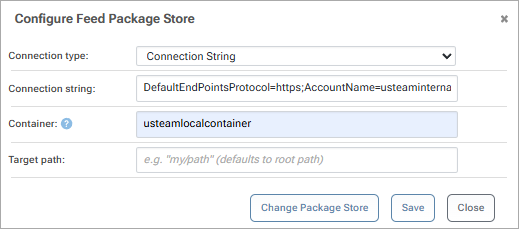
Use the connection string copied in step 4 and the container name from step 3 and fill in the appropriate fields. If Target Path is left blank, the files will be stored in the root directory of your storage container by default. After you have entered all the information, click Save and you are ready to go!
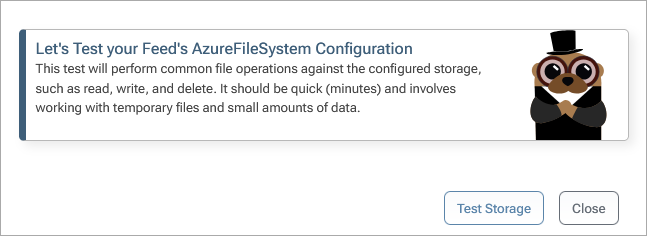
After saving the configuration, you'll be given the chance to test your configuration. You can also do this any time by selecting "test" to the right of "Storage" under "Storage Configuration" on the feed's "Manage Feed" page. For more details on all of the configuration options, you can read our Cloud Storage Overview.
(Optional) Setting up ProGet as a UI for Azure Blog Storage
In addition to configuring your feed to store packages in Azure Blog Storage, you can use ProGet as a UI for managing other assets you may be using it to store. This gives users a way to browse, upload, and organize files without navigating Azure’s console, while admins can maintain full control over access. To learn how to set this up, see HowTo: Set Up ProGet as a UI for Cloud Storage.
Troubleshooting:
Issue: Microsoft Azure is not a storage option
If you have reached step 6 and can't see an option to select Azure, the related extension probably isn't installed. This is normally installed by default, but to confirm, you can navigate to "Administration" > "Extensions". Check if "Azure" appears in the list under "Installed Extensions".
If it isn't installed, it should appears as an option under "Available Extensions". Selecting this will let you install Azure to ProGet.
In this article
- Step 1: Login or Create an Azure Account
- Step 2: Configure Your Storage Account
- Step 3: Create a Container
- Step 4: Locate Your Connection String
- Step 5: Create a New Feed
- Step 6: Change your Feeds Package Storage Location
- Step 7: Configure Package Store Location to Use Your Azure Blob Storage
- (Optional) Setting up ProGet as a UI for Azure Blog Storage
- Troubleshooting: