HOWTO: ProGet as a UI for Amazon S3

Amazon's S3 Bucket is a great storage option as it's easy to create and can be made public or private to others.
It's easy to manage, but accessibility for non-regular users is limited. Amazon's UI tends to change frequently, so a link clicked today may change tomorrow. Granting user access is complicated for large enterprise-level groups, to the point of requiring a cloud engineer to configure users and permissions on AWS.
ProGet can serve as a neutral interface for cloud storage options such as S3 and Azure Blobs. It simplifies the use of a cloud storage service by allowing administrators to control when ProGet is updated and what changes are applied. In addition, adding or removing files from cloud storage is easy for any user in any location, as long as they can access ProGet.
Using ProGet as the front end of an S3 bucket reduces security risks because you only need to configure users and permissions in ProGet, not ProGet and Amazon AWS.
This tutorial explains how to configure an asset directory to use S3 buckets as storage, allowing ProGet to act as a user interface for AWS S3.
To use Amazon S3 in a ProGet Feed (not an asset directory) check out our tutorial for configuring a new Feed with an S3 Bucket.
Step 1: Login to your AWS Management Console
Sign up or login your Amazon AWS account.
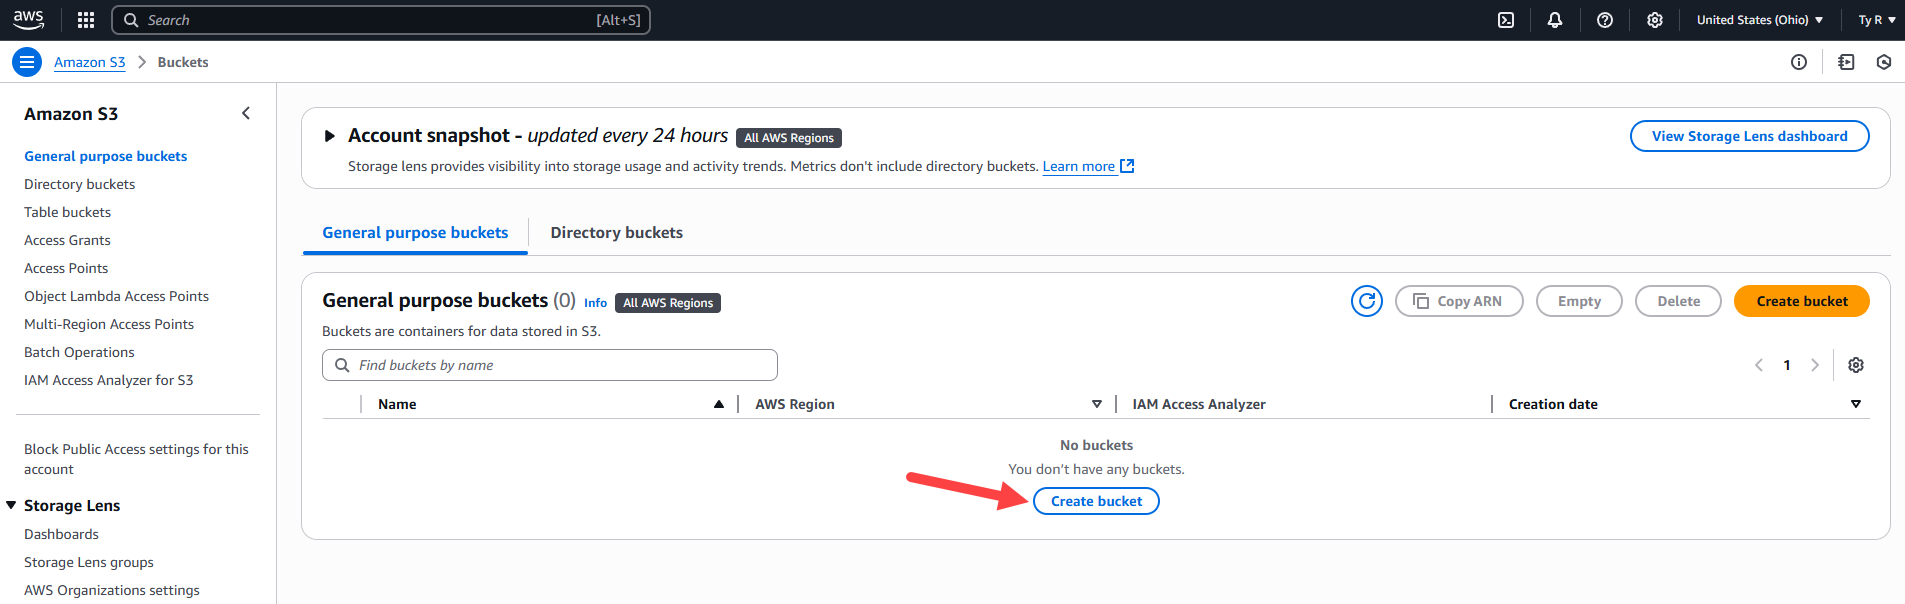
Step 2: Create an S3 bucket
From the top of the AWS Management Console, enter “S3” into the search bar.
Or find S3 in the "All Services" drop-down menu under "Storage"
For this tutorial, you must create a new S3 Bucket. There will be another tutorial describing how to bulk import from an S3 Bucket (currently not available).
On the bucket page, click "Create bucket"
Step 3: Input the new bucket information
Name your bucket. For this demonstration, we will use "progetconnected"
Choose an appropriate AWS region. A region that is geographically closest to you optimizes latecy and minimizes cost.
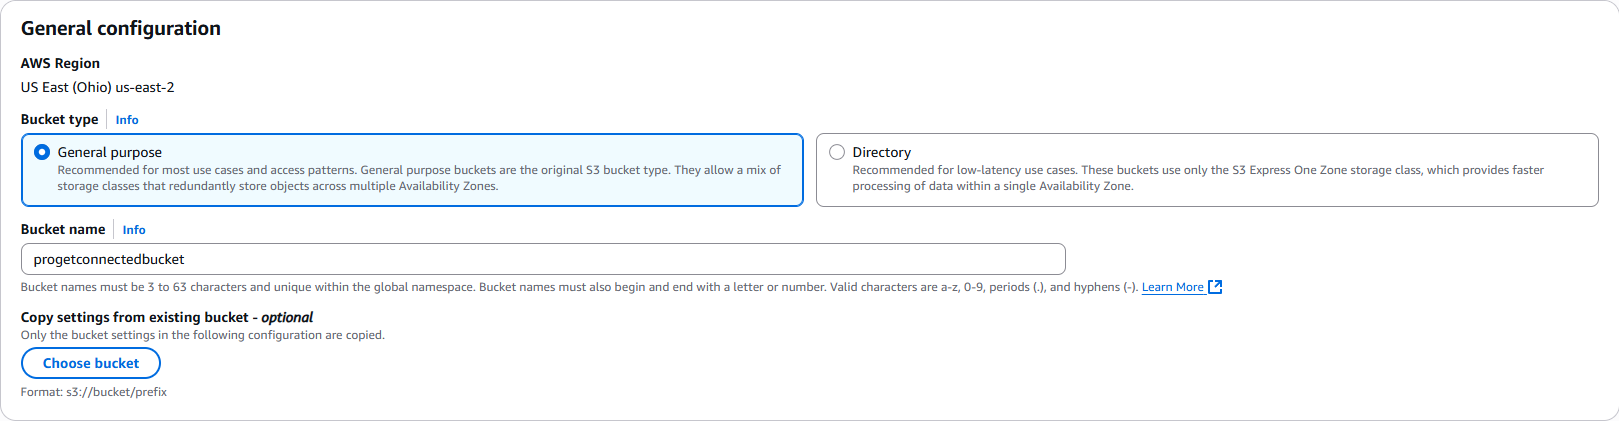
Fill in the remaining S3 fields to your organization’s preferences.
When you’re ready, click "Create bucket" at the bottom of the page.
Step 4: Check your new bucket information
Once the bucket is created, you’ll need the AWS Region for Step 8 of the tutorial.
Confirm your AWS region on the main bucket page.

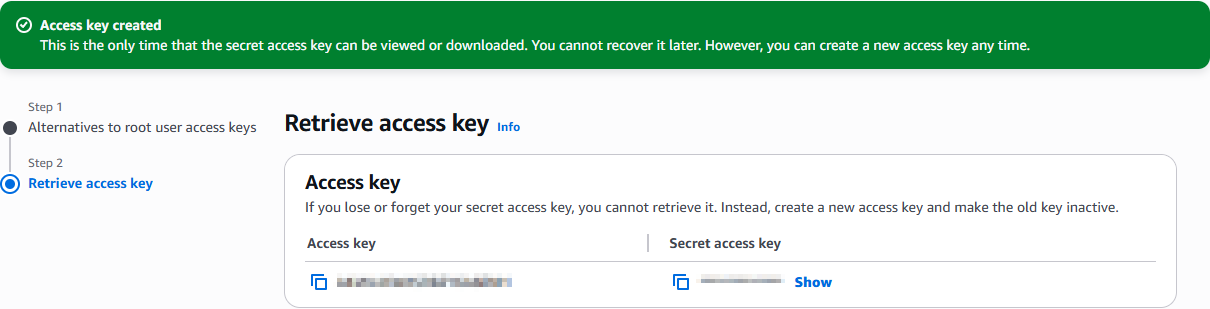
Step 5: Create an access key and secret access key
Navigate to the Identity and Access Management (IAM) in AWS to find the access keys drop-down menu.

Click "Create New Access Key"
In the pop-up under Hide Access Key, copy the Access Key ID and Secret Access Key for Step 8.
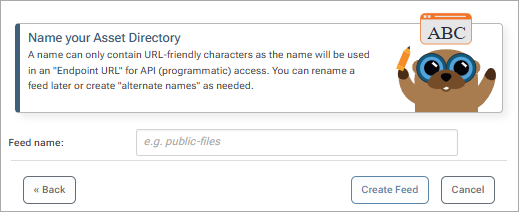
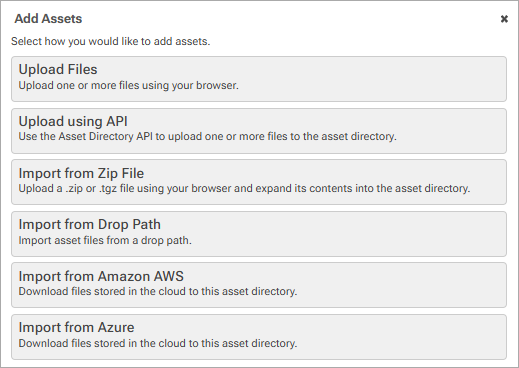
Step 6: Create a new asset directory in ProGet
In ProGet, navigate to the Assets tab on the top ribbon and click "Create New Asset Directory"
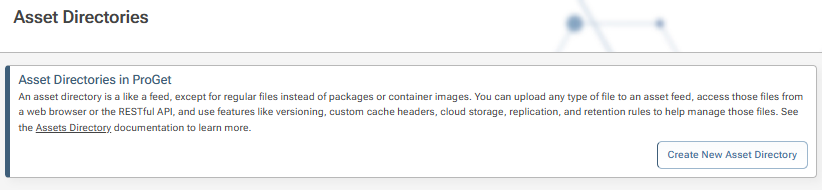
In the pop-up, name the new asset directory and, optionally, provide a description of it.
Click "Create New Feed"
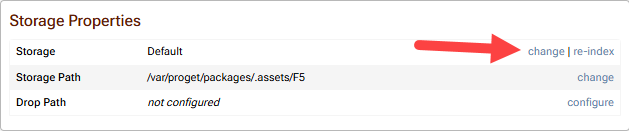
Step 7: Navigate Manage Feed > Storage and Retention
Once the asset directory is made, navigate to its Storage and Retention page.
On the "Storage" line item, click "change" at the far right.
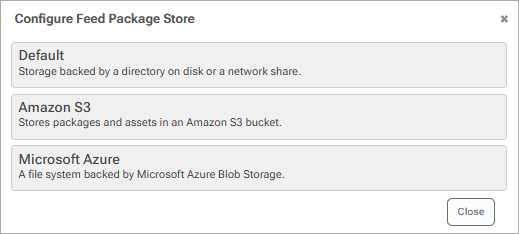
Step 8: Configure a S3 Bucket
A pop-up with two pages will appear.
On the first page, select “Amazon S3”
On the second page, input your S3 bucket information collected in steps 4 and 5.
Paste your access and secret access key IDs.
Select the Region endpoint.
Type the bucket name.
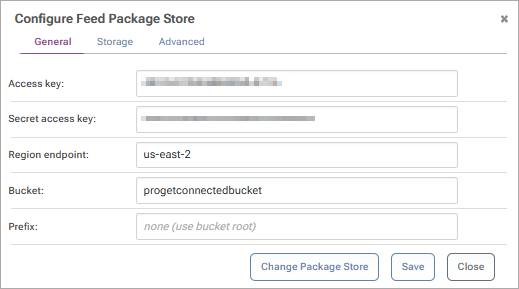
By default, ProGet uses the root folder of the bucket. The prefix field allows you to use a subdirectory.
Prefix is ideal if you have multiple asset directories or feeds that use the same S3 bucket for storage
Click "Save"
Your bucket is now configured to S3.
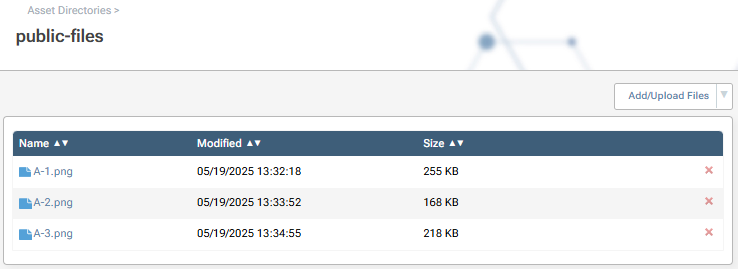
Step 9: (Optional) Test your S3 and ProGet connection
You can verify that you have successfully connected ProGet to your S3 bucket by uploading files through ProGet and seeing them appear in S3.
Navigate to the asset directory and add some files to it
Perform the upload using your preferred method: Upload via browser, via zip file, etc.
Depending on the size of the file and the server, this may take a few minutes.
After uploading to ProGet, go to your S3 bucket and you'll see that the files have been populated.
After uploading to ProGet, go to your S3 bucket and you'll see that the files have been populated.

Troubleshooting
Issue: Amazon S3 is not a storage option
If you cannot select Amazon S3 as a storage option in steps 7 and 8, most likely the Amazon AWS extension has not been installed.
To install the Amazon AWS extension:
Navigate to Settings > Integration & Extensibility > Extensions
Click the Amazon extension under Available Extensions
Click "Install"
Issue: “Unexpected Error” while adding or removing files in Asset Directory
You may come across an error that says “(500) Server Error” and “specified bucket does not exist,” “the AWS access key id you provided does not exist,” etc.
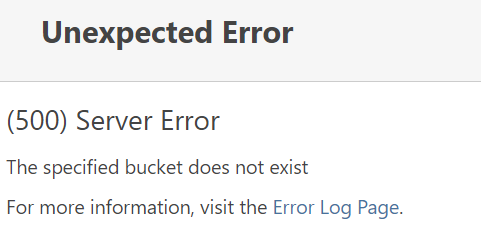
It’s possible there was an error when inputting the S3 bucket information during steps 7 and 8.
For access keys, go to the Identity and Access Management (IAM) page in AWS and back to the Access Key drop-down menu. You may need to make a new access key if you did not write down or save the previous key’s secret access key.
Return to ProGet and input the access key again, as in steps 7 and 8.
For the bucket error, go to the AWS bucket page and confirm the name of the bucket is the same as written in ProGet. Repeat steps 7 and 8 and change the bucket name if necessary.
In this article
- Step 1: Login to your AWS Management Console
- Step 2: Create an S3 bucket
- Step 3: Input the new bucket information
- Step 4: Check your new bucket information
- Step 5: Create an access key and secret access key
- Step 6: Create a new asset directory in ProGet
- Step 7: Navigate
- Step 8: Configure a S3 Bucket
- Step 9: (Optional) Test your S3 and ProGet connection
- Troubleshooting