HOWTO: Switch to Integrated Web Server from IIS

When you install any of our products using the installer, you're presented with two application hosting options: Integrated Web Server or IIS Web Application.
Following Microsoft's guidance to no longer use IIS for modern .NET applications, we no longer recommend using IIS to host modern versions (2022+) of our products.
Instead, you should use the Integrated Web Server, which is our (and Microsoft's) recommended web server. Beginning in version 2025.0+ of our products IIS is no longer supported installation option. Instead, see our HOWTO: Use IIS a Reverse-Proxy.
In this guide, we’ll look at how to switch your Inedo Product (such as ProGet) from IIS to the Integrated Web Server. Going from IWS to IIS is not recommended; however, if you need to do so see Hosting Through IIS Instead of the Integrated Web Server (archive.org).
Prerequisites: Gather Information
1. Connection String & Encryption Key
You should note your connection string and encryption key. These can be found in InedoHub by navigating to “Configuration” > “Change settings...”
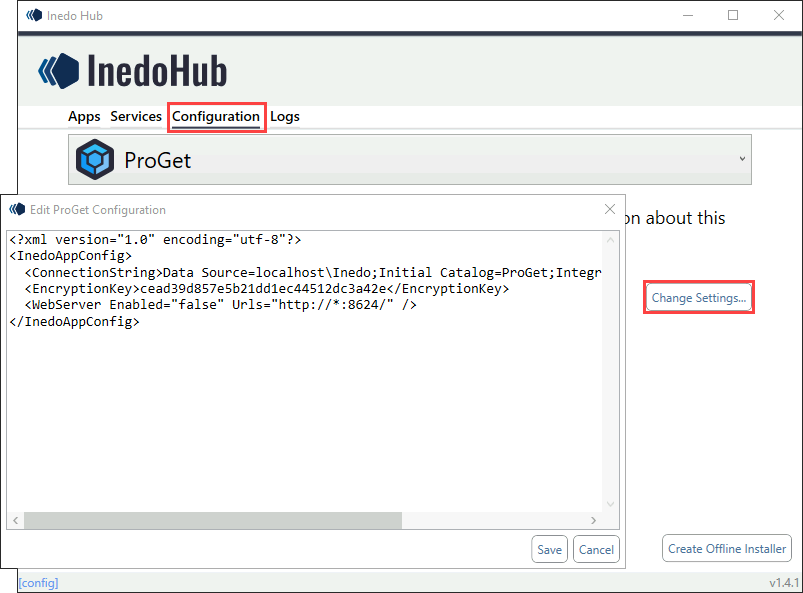
Note that the configuration file does not change during the uninstall process, but it is recommended to make note of these just to be safe.
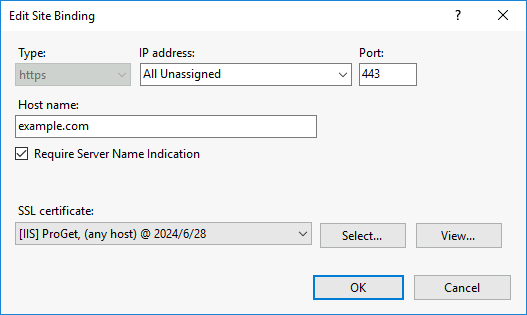
2. Website configuration
Take note of your website’s certificate name, port, and host name. These can be found in “Site Bindings” under the Site settings in “IIS Manager.”
When your Inedo Product is installed, IWS defaults to a different port. However, this can be changed later.
3. App Pool & Service Accounts
You may have configured a domain account, and will need to reconfigure this after you have switched to IWS. Take note of the username.
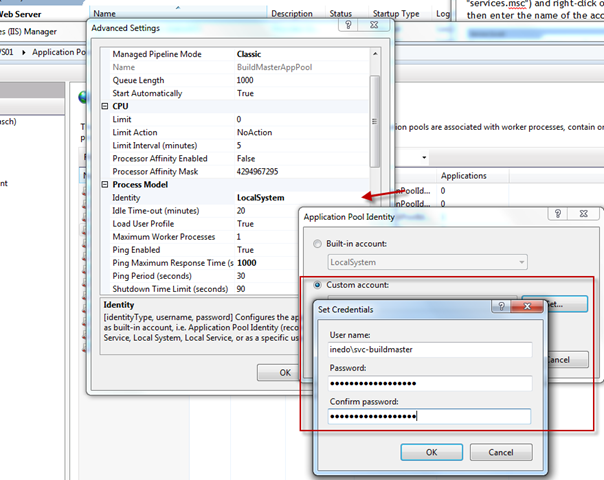
You will also need the password. This is hidden, but hopefully you can find a record of it internally. If not, it's technically possible to decrypt.
Switching Your Inedo Product to Integrated Web Server
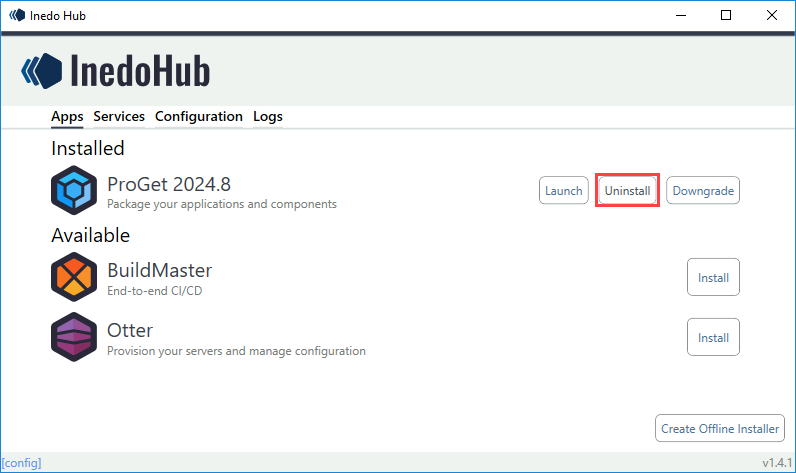
Step 1: Uninstall Your Web Application
First, uninstall the current installation of your Web Application. The uninstall process will only remove the components of the product install, and will not remove the database or any existing package files or artifacts.
Step 2: Ensure That All Components Are Removed
The uninstaller should have removed IIS components such as the App Pool and Website. However, if they are still there you will need to remove them.
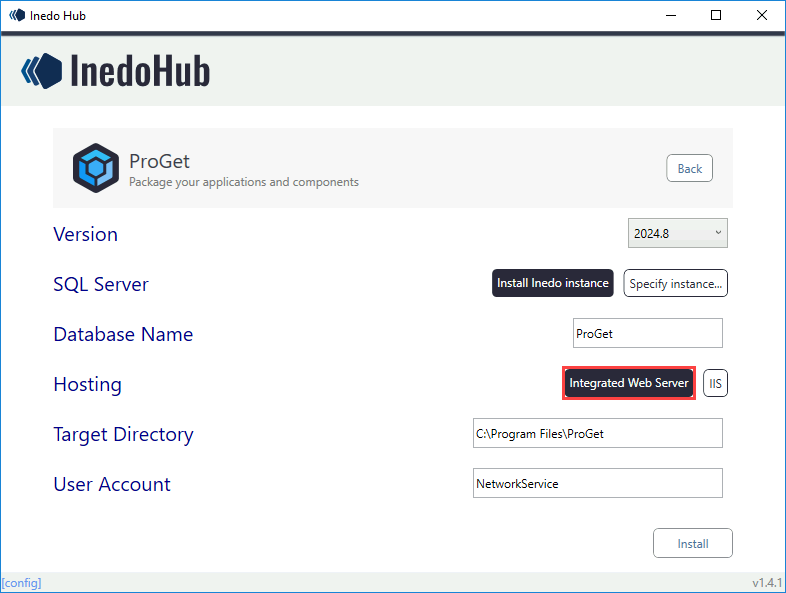
Step 3. Reinstall Your Web Application
Next, open InedoHub and select the application to reinstall. Select "Integrated Web Server", making sure to enter the SQL Server instance and database name that matches your connection string. Note that you can change this later, after installation.
Note that services may fail to start, especially if they require a domain to access SQL Server. You can troubleshoot this by checking the Windows event log to see why the service failed to start.
Step 4 (Optional): Configure Your Windows Domain Account
If you previously configured your Inedo product to run as a Windows Domain Account you will need to reconfigure it. See our guide on HOWTO: Configure Your Inedo Product to Run As a Windows Domain Account (github.com).
Step 5: Load Your Web Application on the Server
While still logged into the server, launch your installed application from InedoHub (e.g. localhost:8264 for ProGet). You should be able to see and browse all your packages in ProGet.
Step 6: Configure Web Server
Next, navigate to “Administration Overview” > “HTTP/S & Certificate Settings”
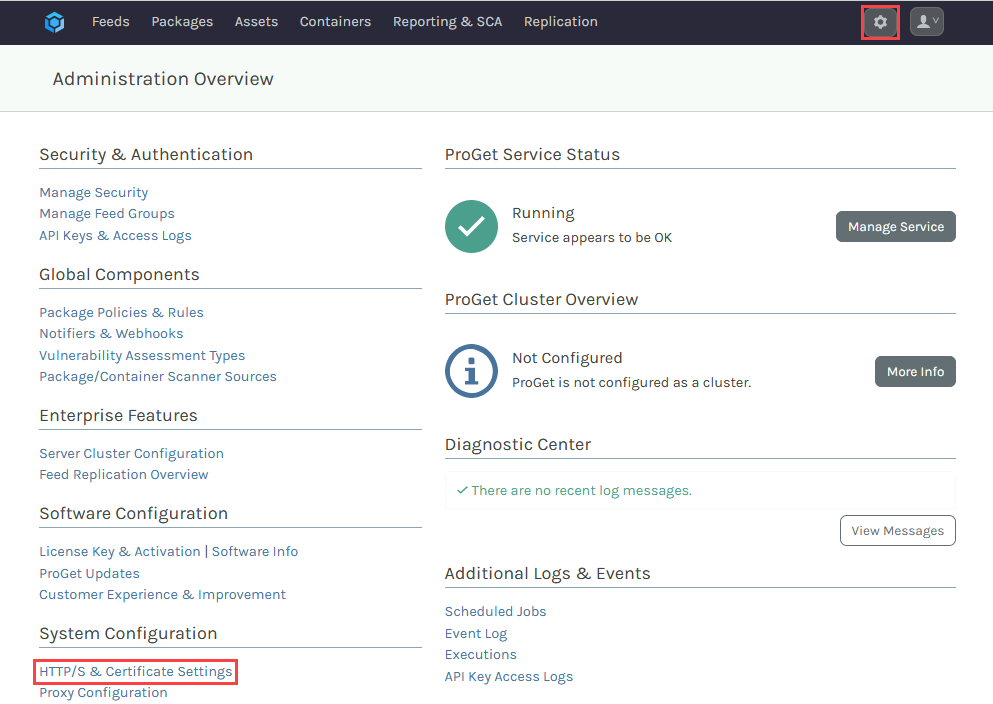
From here you can Configure HTTPS on the Integrated Web Server.
Step 7: Test and Verify that Old URLs Work
You will now be able to access the server externally (e.g. at https://yourserver.com), and everything should work as before.