Installation & Upgrading

Installing the Inedo Agent is really easy with our user-friendly, GUI-based installer. Simply follow the step-by-step guide below.
Alternatively, you can use silent installation or manual installation options to help automate installation and management.
Pre-Installation Check List
The Inedo Agent will run on all modern version of Windows (7+/2008+), and has no hardware requirements outside of Microsoft's minimal Windows Server requirements.
However, before installing, consider the following:
- .NET Framework is Required; this is already installed on most Windows servers, and can be installed as a feature under .NET Framework 4.x Features > .NET Framework 4.x if it's not
- Open a Firewall Port (Inbound); the Inedo Agent will listen on the port of your choosing (default 46336), which will likely require an open port in Windows Firewall and any other firewalls you use
You can open a Firewall Port using the Windows Firewall GUI (see Creating an Inbound Port Rule), or by using a PowerShell script like this:
New-NetFirewallRule -DisplayName "Inedo agent" -Direction Inbound -LocalPort 46336 -Protocol TCP -Action Allow
1. Download the Inedo Agent
We recommend downloading the latest version of the installer, which you can find here:
Download Inedo Agent Installer (latest)
You can also download older versions from the Agent Versions & Release Notes page.
Depending on the browser you use or the malware detection heuristics, you may receive an "unsafe" warning. This is a "false positive", and you can ignore it.
If the installer is signed by Inedo, you can be assured it's safe. See Anti-malware False Positives, Code Signing, and Safety of Inedo Products to learn more.
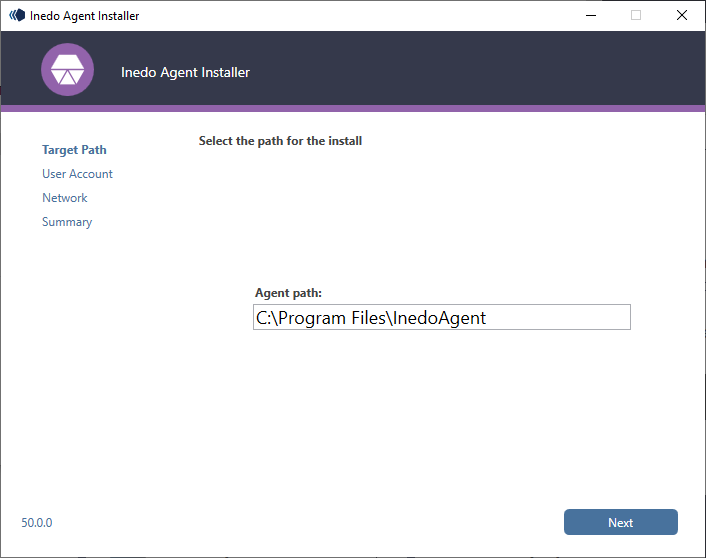
2. Target Directory
You may install wherever you like; this is not where temporary files will be stored.
3. User Account
By default, the agent service will run as LocalSystem, which is an administrative service account. While not required, administrator-level privileges are strongly recommended as it will eliminate any difficulty or confusion with moving files and running different operations.
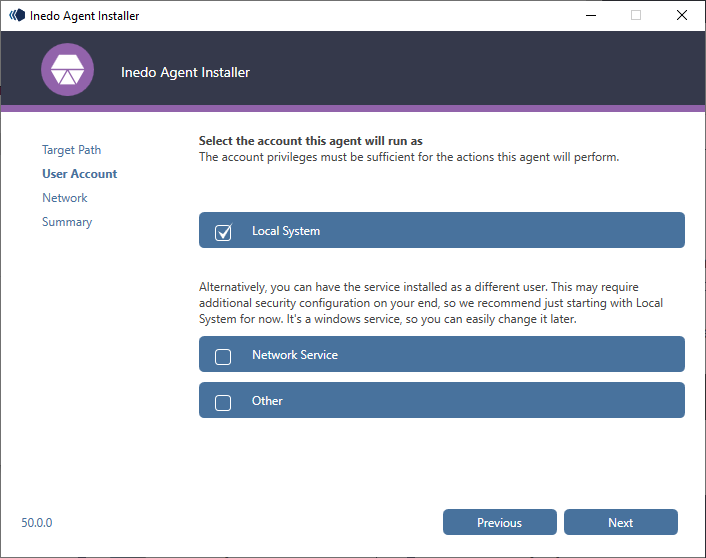
You can change this later by using the Windows Service Manager, and changing the account that the service is configured to use. See Security Requirements to learn more.
3. Network & Security Settings
In this step, you'll select the Agent Port and Agent Security settings.
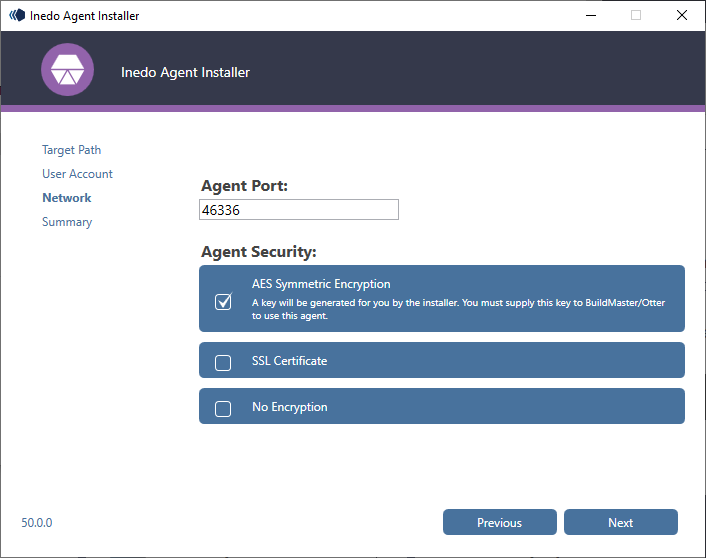
You can change these settings later by editing the configuration file, and restarting the service.
Agent Port
We recommend using the default port (46336), as that's Inedo's officially designated port. Make sure that the selected port is not blocked by a firewall.
Agent Security
Inedo's agents use a FIPS-compliant symmetric AES encryption scheme by default, and the installer will automatically generate a secure, 32-digit key for you. You can use that key, or another one of your choosing.
If you select SSL instead of built-in AES, then you will need to have a valid certificate installed on the server.
No Encryption is also an option, but we don't recommend using it. The primary reason we have this is so that you can use a tool like Wireshark to inspect the individual messages, either as directed by our support engineers or because you really like studying binary TCP protocols.
4. Confirmation & Install
Verify that the information here is correct and then click Install.
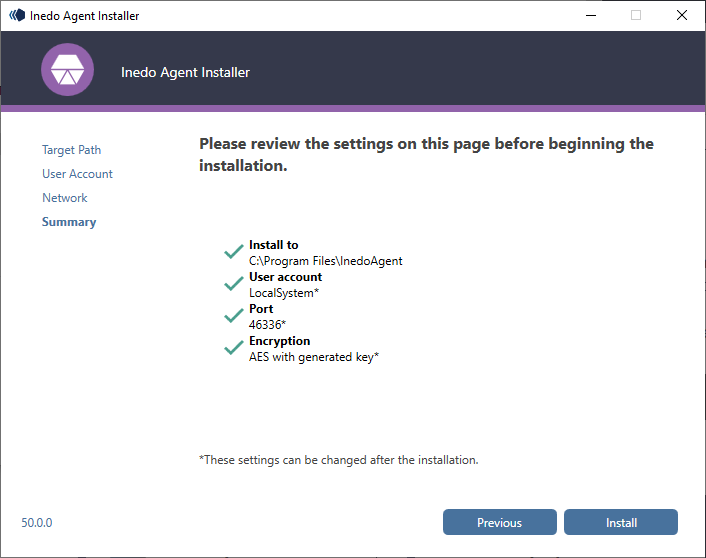
After you do that, the Inedo Agent service will be installed and running.
Installation will be near instantaneous, on even the slowest of systems. If you want to verify that the installation actually occurred, just check that the Inedo Agent service was installed and is running.
5. Copy AES Key (Optional)
If you selected AES as the Agent Security option, the installer will generate a key and save it in the Inedo Agent configuration file.
It will also be presented after installation.
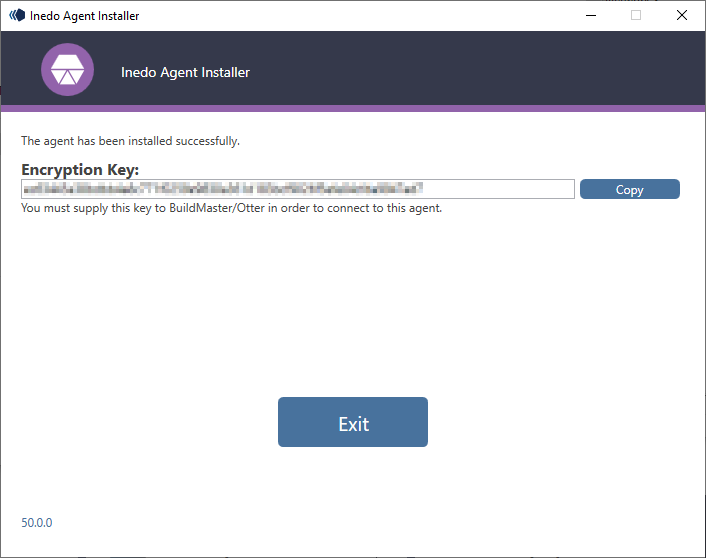
You will need to supply this key to BuildMaster or Otter to use the agent.