Jenkins

Jenkins is a Continuous Integration (CI) tool that offers general-purpose jobs with many plugins that can do just about anything. But it’s complex, and Jenkins often becomes a bottleneck due to its steep learning curve, poor visibility, and lack of access control features.
This is where BuildMaster can help, and in this article we'll discuss how to import build artifacts from Jenkins (so that you can deploy them later) as well as how to automatically run jobs configured on Jenkins. To learn more about how the tools compare, see BuildMaster vs. Jenkins on our main site.
Connecting to Jenkins
BuildMaster's Jenkins integration allows you to connect to Jenkins at application creation or through the application's settings page. To connect BuildMaster to Jenkins:
- Either create a new application or add a new connection on the application settings page, then select CI Project
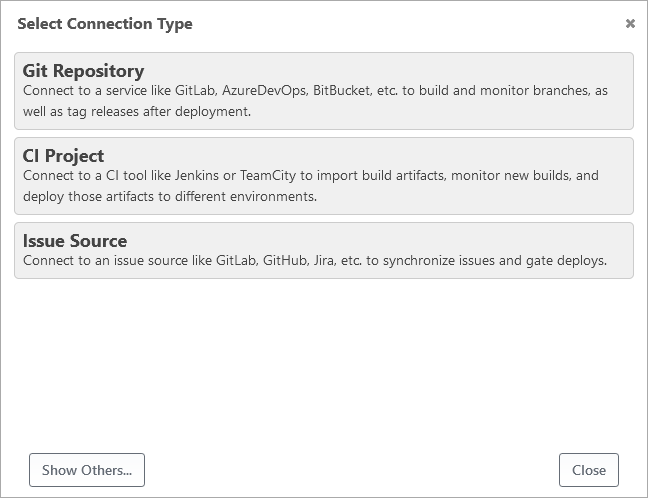
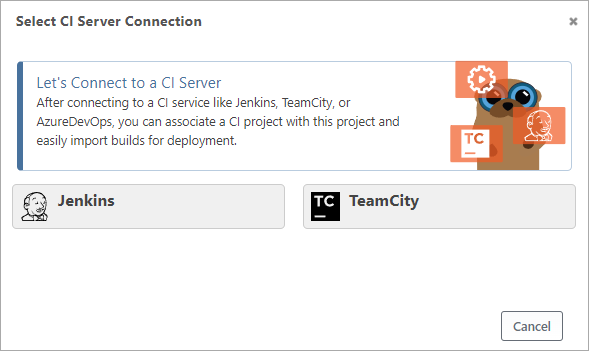
- Select the Jenkins connection type
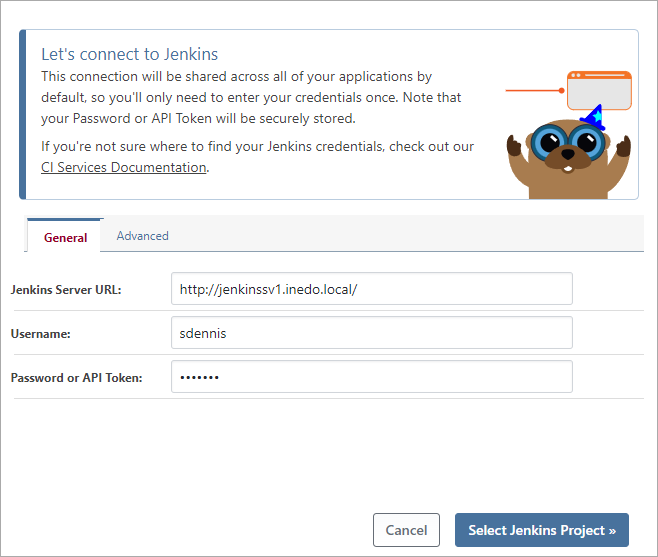
- Enter your Jenkins Server URL, user name, and password (or API token), then and click Select Jenkins Project
- Select your Jenkins Project then click Set Application Name.
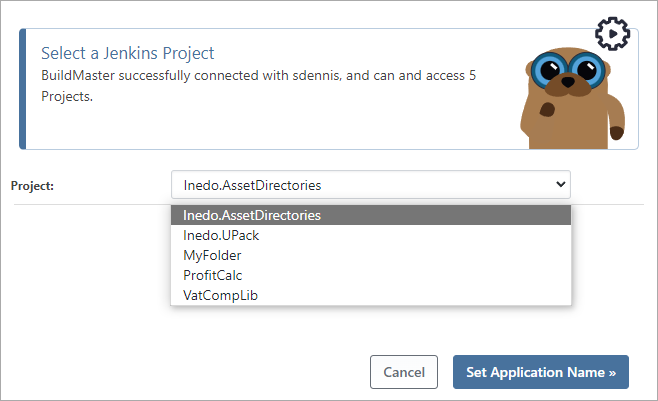
After setting your application name, your Jenkins project will then be synchronized with your application, allowing you to browse Jenkins builds directly in BuildMaster.
Editing a Jenkins Connection
You can edit these items directly to enable advanced scenarios (such as a shared project) by clicking view all on the Settings page, or by going to Admin > Credentials & Resources. See Credentials & Resources to learn more.
Browsing Jenkins Builds
After adding a Jenkins project to an application, you will be be able to browse Jenkins builds and quickly import artifacts for later deployment. Simply click on the "Jenkins" tab to see recent builds and their status:
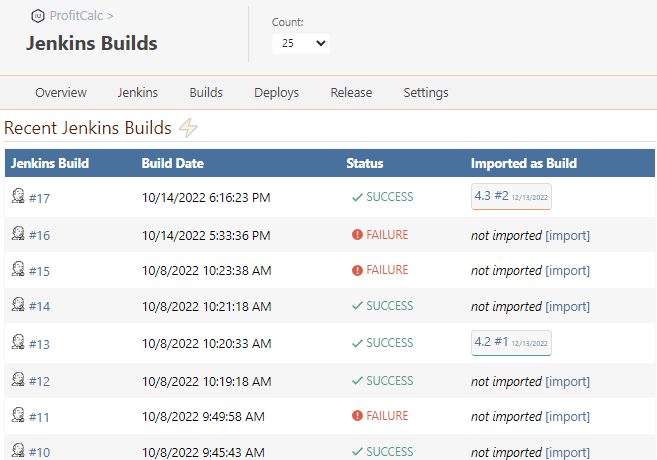
Clicking on an individual Jenkins build will display Jenkin's metadata about the build, including parameters and artifacts.
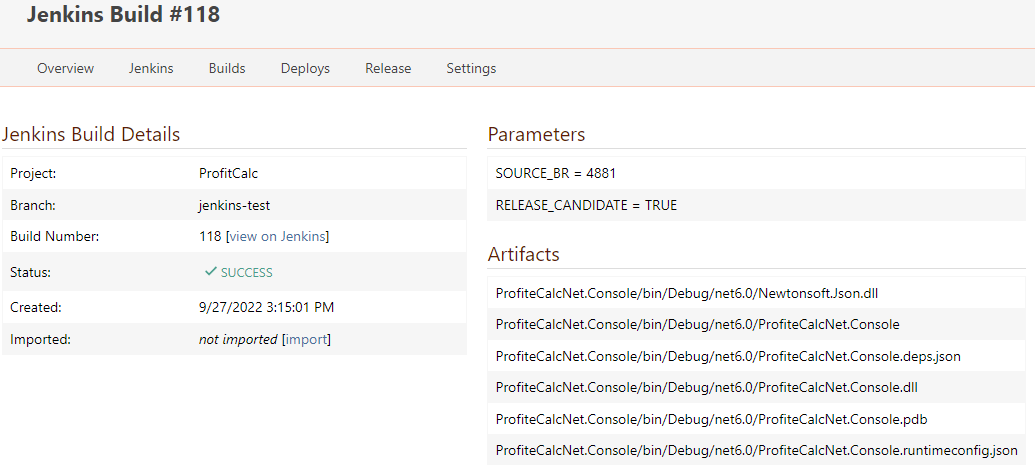
Click the "view on Jenkins" link to directly navigate to the build in Jenkins to see all of the details.
Branched Projects in Jenkins
BuildMaster supports Branched Projects in Jenkins, and when this type of project is selected, you'll often see the Branch name displayed next to the build number.
For example, a multi-branch project in Jenkins can have two different builds numbered #11: one under a master branch and one for a develop branch. In lists, these will be distinguished with master #11 and develop #11.
Internally, these are considered a "build scope" to BuildMaster.
Importing Jenkins Build Artifacts
When your application is connected to a Jenkins project, you'll be able to import artifacts by clicking the import button next to a build, or navigating to Builds > Import Build.
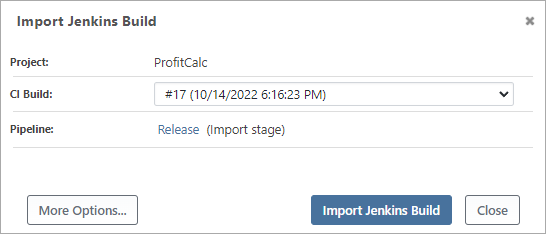
When importing a build in this manner, the selected Jenkins build number (along with the project and branch, if applicable) will be associated with BuildMaster's build number and displayed throughout the UI.
You can access these associated values in scripts with the $CIBuildNumber, $CIProjectScope, and $CIProject variable functions. The $CIProjectScope references the branch, if applicable.
The $CIBuild variable function is BuildMaster's internal identifier and will be a concatenation of the build number and branch.
Import Jenkins Artifact Scripts & Operations
BuildMaster uses a script to import artifacts from Jenkins, and in most cases, you can simply use the Import CI Server Artifacts script template available under the Scripts tab of your application:
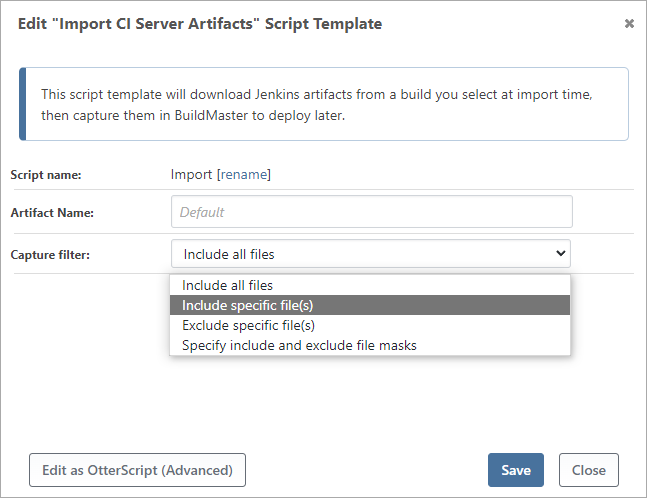
This template will attempt to download the artifacts from the associated Jenkins build ($CIBuildNumber) in the associated project ($CIProject) and then capture them as artifacts in BuildMaster for later deployment.
Under the hood, this script template uses OtterScript operations to import these artifacts. You can use these operations in your own OtterScript for more complex or advanced scenarios.
Jenkins::Import-Artifacts Operation
When you don't specify any parameters, the operation will attempt to download artifacts from $CIBuild in $CIProject on the associated Jenkins server. If the BuildMaster build is not associated with a Jenkins build (and you don't have those variables defined), then the option will error.
However, there are some cases where you may not wish to associate your BuildMaster build with a Jenkins build, or use Jenkins resources at all. For example, if you use convention-driven design, then you may have everything specified by variables like $ApplicationName.
In a case like this, you can specify the input parameters you'd like, for example:
Jenkins::Import-Artifacts
(
    Server: https://jenkins.kramerica.corp/,
    Project: $ApplicationName,
    Branch: release,
    BuildNumber: lastBuild,
    JenkinsBuildNumber => $JenkinsBuildNumber
);

Log-Information Imported artifacts from $JenkinsBuildNumber;
Jenkins::Download-Artifacts Operations
The Jenkins::Download-Artifacts will download the artifacts directly from Jenkins without adding them to the BuildMaster build. This can be useful when you want to combine artifacts from multiple Jenkins projects by first downloading your build artifacts and then adding them to the BuildMaster build using the Create-Artifact operation.
When you don't specify any parameters, the operation will attempt to download artifacts from $CIBuild in $CIProject. If the BuildMaster build is not associated with a Jenkins build (and you don't have those variables defined), then the option will error.
To download an artifact from Jenkins to a subdirectory within the working directory:
Jenkins::Download-Artifacts
(
    To: artifact-tmp
);
Jenkins::Queue-Build Operations
The Jenkins::Queue-Build can be used to queue/start new builds on your CI server. This can be useful in some cases like:
- Create different builds in Jenkins that are automatically triggered upon check-in
- A Release Configuration build that instructs the compiler to optimize speed and does not include debugging symbols
- A Release Branch build that uses a different source control branch to create the build
- Inject contextual information from BuildMaster (release number, etc.) into the application code after it is checked out but before Jenkins builds it; this information can then be displayed when the application is running in an environment
- Link from Jenkins back to the application or build in BuildMaster so you can have cross-references in both systems
- Execute a job in Jenkins that runs automated tests after you have deployed from BuildMaster
Just as with the other operations, when you don't specify any parameters, the operation will use $CIBuild and $CIProject from the associated Jenkins project when queueing a new build.
By default, BuildMaster will queue the new build and continue executing your OtterScript. By setting WaitForCompletion to true, BuildMaster will wait until the queued build has completed prior to continuing its execution. When WaitForCompletion is enabled, BuildMaster will poll Jenkins every 2 seconds to check if the build has completed.
Jenkins::Queue-Build
(
WaitForCompletion: true,
AdditionalParameters: buildType=release¶m2=value,
JenkinsBuildNumber => $JenkinsBuildNumber
);
Jenkins::Import-Artifacts
(
BuildNumber: $JenkinsBuildNumber
);
This example will also pass the buildType=release as an additional parameter.
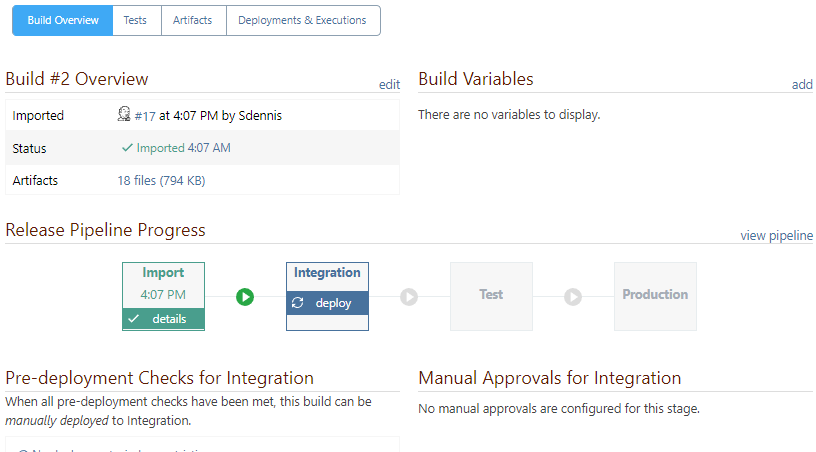
Pipeline: Import & Deploy Jenkins Artifacts
BuildMaster can support a wide variety of workflows through the use of pipelines. To help guide you through deploying your CI build, BuildMaster includes an Import & Deploy Artifacts pipeline.
To learn more about this, see Pipeline: Import & Deploy Artifacts.
Jenkins Project Monitors
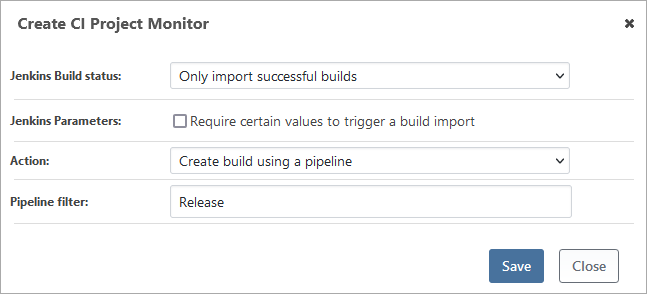
BuildMaster can monitor your Jenkins project for new builds, then perform an action like importing artifacts into a BuildMaster build by creating a build using a script, pipeline, release, or a custom script. Builds can be triggered based on a Jenkins build status and, optionally, certain build parameters to be set.
You can add a CI project monitor by clicking on the ⚡ icon on the Jenkins page or on the application settings page.
BuildMaster builds can be triggered when a CI build has completed with a status of:
- Only successful builds
- Any build status
- A specific build status (e.g. SUCCESS, WARNING, etc.)
To learn more, see the Resource Monitors & Scheduled Jobs documentation.
Deploying Jenkins Artifacts
Once an artifact is captured via the optional queuing followed by import operations, future stages simply need to use the Deploy-Artifact operation to deploy to any number of servers or targets:
Deploy-Artifact archive.zip
(
    To: E:\Websites\ProfitCalc
);
See Deployment Scripts & Templates to learn more.
Special Build Names
BuildMaster can reference Jenkins builds using the following special build names instead of direct build numbers:
lastSuccessfulBuild- compilation reported no errorslastStableBuild- latest successful build and no publisher reports it as unstablelastBuild- the latest build, including in-progress builds (should rarely be referenced in BuildMaster)lastCompletedBuild- the latest build that has finished, no matter what the result (should rarely be referenced in BuildMaster)
Also, builds can be referenced by their Jenkins build number instead of their name. In general, you should avoid using a hard-coded build number in OtterScript. Instead, you should capture the actual build number as a variable, and use that instead.
Automatically Importing to BuildMaster after a CI Build
Instead of monitoring a Jenkins project for the completion of a build, you may want to have Jenkins trigger the import. This can be programmatically done either using the Release & Build Deployment API or the Jenkins BuildMaster Plugin.
The Release & Build Deployment API
If you want to specify the build number to import from, simply specify it as a variable (e.g. $JenkinsBuildNumber) when making the API request. This will automatically create a build-scoped variable that can then be used in your OtterScript plans to import artifacts from that build.
Example: Triggering an Importing Artifact Build Using PowerShell
This example also demonstrates triggering a build from a multi-branch job.
# The BuildMaster APIs used here are documented at https://docs.inedo.com/docs/buildmaster/reference/api/release-and-build
$ErrorActionPreference="Stop"

$buildmasterUrl = "http://inedo:8622"
$apiKey = "<secret>"
$applicationName = "JenkinsExtension - Demo MultiBranch"
# These two variables should be populated from the Jenkins variables BRANCH_NAME and BUILD_NUMBER
$jenkinsBranchName = "branch1"
$jenkinsBuildNumber = "lastSuccessfulBuild"


function Invoke-BuildMasterAPI($api, $body) {
    $response = Invoke-WebRequest "${buildmasterUrl}/$api" `
                   -ContentType "application/json" `
                   -Method POST `
                   -Headers @{"X-ApiKey" = "$apiKey"} `
                   -Body "$body" `
                   -UseBasicParsing

    return ($response.Content | ConvertFrom-Json)
}

# Get latest release number
$releases = Invoke-BuildMasterAPI "api/releases" @"
{
    "applicationName": "$applicationName",
    "status": "ACTIVE"
}
"@
$releaseNumber = $releases[0].number

# Trigger Build - passing in variables
"Create build for '$applicationName', release $releaseNumber"
$build = Invoke-BuildMasterAPI "api/releases/builds/create" @"
{
    "applicationName": "$applicationName",
    "releaseNumber": "$releaseNumber",
    "`$JenkinsBranchName": "$jenkinsBranchName",
    "`$JenkinsBuildNumber": "$jenkinsBuildNumber"
}
"@
$buildNumber = $build.number

# Advance to first stage (this is the same as checking the "Automatically advance to <stage name> stage" option in PowerBuilder create build screen)
"Advance build $buildNumber to the first stage"
$deploy = Invoke-BuildMasterAPI "api/releases/builds/deploy" @"
{
    "applicationName": "$applicationName",
    "releaseNumber": "$releaseNumber",
    "buildNumber": "$buildNumber"
}
"@

"Successfully triggered the '$($deploy.pipelineStageName)' stage"
The Jenkins BuildMaster Plugin
While the APIs provide a convenient way to trigger a build from any system, in Jenkins we also have the option to use the BuildMaster Jenkins plugin, which makes triggering builds and promotions from Jenkins even easier. The plugin also has some advanced features that are difficult to replicate in a script without making it too complicated.
Setup instructions for the plugin are in the Jenkins Wiki Page.
Example: Triggering a BuildMaster Build from Jenkins
A BuildMaster build can be triggered using the following pipeline script:
pipeline {
   agent any

   stages {
      stage('Build') {
         steps {
            buildMasterWithApplicationRelease(applicationId: 'JenkinsExtension - Demo') {
                bat label: 'Build artifact', script: 'echo "This is Jenkins build %BUILD_NUMBER% for BuildMaster Application \'%BUILDMASTER_APPLICATION_NAME%\' (#%BUILDMASTER_APPLICATION_ID%) Release %BUILDMASTER_RELEASE_NUMBER% - Build %BUILDMASTER_NEXT_BUILD_NUMBER%" > Example.txt'

                archiveArtifacts 'Example.txt'

                // Jenkins declarative pipeline script has a somewhat restricted syntax.  Unfortunately to return package
                // number you need to wrap this in a script block
                // See: https://jenkins.io/doc/book/pipeline/syntax/#script
                script {
                    BUILDMASTER_BUILD_NUMBER = buildMasterCreateBuild(applicationId: BUILDMASTER_APPLICATION_ID, releaseNumber: BUILDMASTER_RELEASE_NUMBER, deployToFirstStage: [waitUntilCompleted: true], variables: "JenkinsJobName=$JOB_NAME\nJenkinsBuildNumber=$BUILD_NUMBER")
                }

                buildMasterDeployBuildToStage(stage: 'Integration', applicationId: BUILDMASTER_APPLICATION_ID, releaseNumber: BUILDMASTER_RELEASE_NUMBER, buildNumber: BUILDMASTER_BUILD_NUMBER)
            }
         }
      }
   }
}
Steps:
- buildMasterWithApplicationRelease queries BuildMaster for the next build number for the selected release and populates several environment variables for later use in the script. Combining the release and build number variables is a good way to create a version number for your application binaries.
- buildMasterCreateBuild triggers a build in BuildMaster. In this example, it would be a pipeline created using the Jenkins Template. The variables passed to BuildMaster allow the build to retrieve and import the artifact from Jenkins.
- buildMasterDeployBuildToStage has been included here just to demonstrate the feature. This is not something that is typically run after a build, but it could be used after running some automated tests to notify BuildMaster to automatically move to the next stage.
In this article
- Connecting to Jenkins
- Browsing Jenkins Builds
- Importing Jenkins Build Artifacts
- Import Jenkins Artifact Scripts & Operations
- Pipeline: Import & Deploy Jenkins Artifacts
- Jenkins Project Monitors
- Deploying Jenkins Artifacts
- Special Build Names
- Automatically Importing to BuildMaster after a CI Build
- The Jenkins BuildMaster Plugin