.NET

.NET Automated Builds & Deployments in BuildMaster
BuildMaster can help build, test, and deploy your .NET-based software anywhere: Windows, Linux, Docker, the cloud, etc.
.NET is Microsoft's development framework that's used to build many types of software, from desktop applications to Windows services, and even cross-platform games.
This article will show you how to get started with .NET in BuildMaster, provide a high-level overview of how BuildMaster and .NET work together, including:
Getting Started with .NET in BuildMaster
The easiest way to start automating .NET builds (CI) and deployment (CD) is to simply create a new application in BuildMaster. Just navigate to the Applications page, then "Create Application".
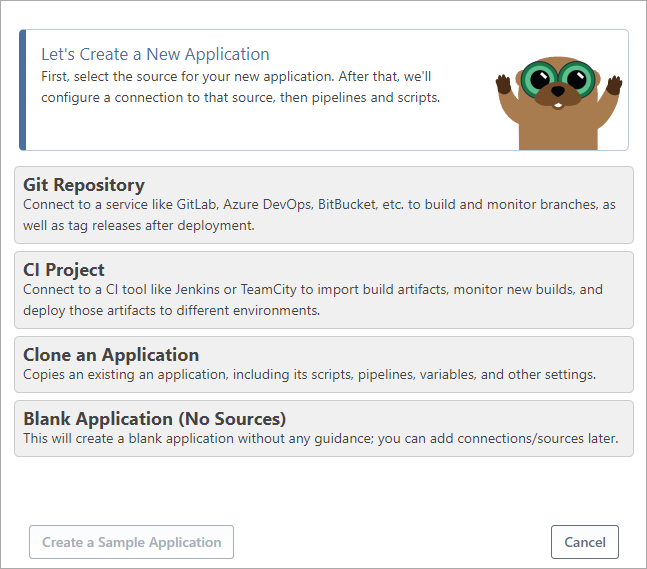
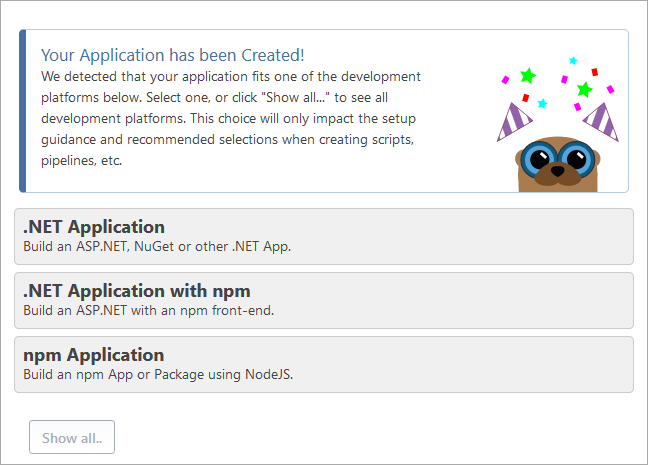
After selecting a Git Repository (see Git & Source Control that has your .NET application, Rakko will detect the type of .NET application and guide you through creating and configuring an application.
.NET: Automating Build (CI) and Deploy (CD)
Most developers use an IDE like Visual Studio to write code for the .NET applications. Although Visual Studio has a "Publish" function that allows developers to directly deploy their software to servers and the cloud, that leads to all sorts of problems like production errors and losing track of which code is deployed where.
This is where automated build (CI) and deployments (CD) will help, and even small teams find a lot of benefits to using this automation.
Inedo's founder and CEO recently conducted a webinar, .NET Series: The Future is... On Prem CI/CD!?; check it out to see some high-level demonstrations of BuildMaster with .NET
In BuildMaster, you can configure a CI/CD pipeline that will build, test, and deploy your applications in a consistent manner, and give you a chance to use manual approvals or automated checks.

BuildMaster includes several pipeline templates, and you can customize one to follow your current or desired process
If you're creating NuGet packages (i.e. libraries that will be consumed by other .NET applications), BuildMaster includes a special pipeline that will help; see CI/CD and NuGet Packages to learn more.
Creating Build Scripts
The easiest way to build .NET projects in BuildMaster is with the Build.NET Project Script Template. It's a simple, no-code solution that will check out your code from Git, build your code, then capture build artifacts for later deployment.
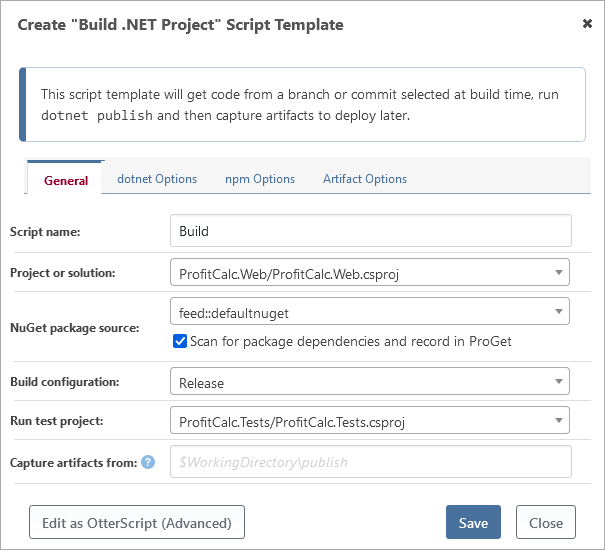
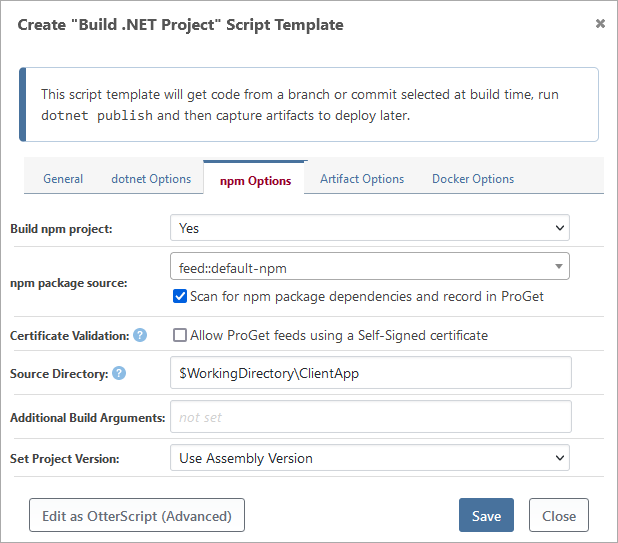
In addition to the standard build components, this script template can also handle integrating with ProGet feeds, setting your assembly versions or runtime identifiers, building npm projects, and many other options.
If you're creating NuGet packages, there is also a Build NuGet Package Script Template. This is designed to work with the CI/CD for NuGet Packages pipeline.
Writing a Build Script in OtterScript
The "Build .NET Project" and "Build NuGet Package" script templates are designed to handle 80% of .NET Applications 80% of the time. That means there's a good chance that you'll need some more complex logic than what the script template can provide.
Fortunately, the script template will get you most of the way there; just click the "Edit as OtterScript" button.
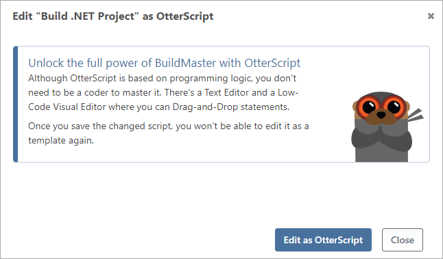
That will allow you to use the regular OtterScript Editor, which has both a text mode and low-code, visual-editor mode that will let you drag-and-drop statements and create complex scripts.
To get an idea of how we recommend starting with a fresh build script, see Creating a Build Script from Scratch.
.NET Build Tools & OtterScript
BuildMaster supports three different command-line tools that can build .NET applications.
| Tool | OtterScript Operation | Notes |
|---|---|---|
dotnet |
DotNet::BuildDotNet::Publish |
✔ Recommended, and works for .NET5+ and most .NET Framework applications |
msbuild.exe |
MSBuild:Build-Project |
⚠ Not Recommended, but may be required for some .NET Framework applications |
devenv.exe |
DevEnv::Build |
✖ Avoid if Possible, but some really ancient .NET Framework or non-.NET applications may only build with this |
You'll need to make sure the appropriate tools are available on the server that you'll use to build your .NET application:
- On Windows servers, you should generally install Build Tools for Visual Studio; this will allow you to use
msbuild.exe - For Linux, you'll need to install the .NET SDK; this will only provide access to 'dotnet'
You can install the .NET SDK on Windows instead, but it will only be able to build .NET5+ applications. If you want to use devenv.exe, you'll need to install a full copy of Visual Studio.
Alternatively, you can use a Docker container image like.NET SDK on the Micorosft Container Registry; see Image-based Services (Containerized Builds) to learn more.
.NET & NuGet Packages
Almost all .NET applications use NuGet to manage their dependencies. These dependencies may be Microsoft libraries like System.Text.Json or third-party, open source libraries like Newtonsoft.Json. You can also create your own NuGet packages to share code across your applications, see CI/CD and NuGet Packages to learn more).
By default, .NET is configured to connect to NuGet.org to download packages; anyone can publish a package on NuGet.org, and there are lots of packages with inappropriate licenses, vulnerabilities, and even malicious packages that can compromise your applications and users.
BuildMaster makes it easy to connect to private package feeds like ProGet, which allows you to filter and approve third-party packages. See Packages & Dependencies to learn how to connect to ProGet.
Using Private Feeds with .NET
Once you've connected to ProGet or another private package source, you can select any of these as package sources within your build scripts.
Running Automated Testing
BuildMaster can run unit tests or other automated tests against the build using VSTest, NUnit, or any other testing framework. These test results are included with each build, allowing you to add blocking to your CI/CD pipeline based on Unit Test results.
Managing web.config, app.settings, etc.
BuildMaster can manage your .NET configuration files (i.e., web.config, connectionStrings.config, appSettings.json, etc,) and let you change and deploy environment-specific configuration values without requiring code changes, manually logging into servers, or deploying the entire application.
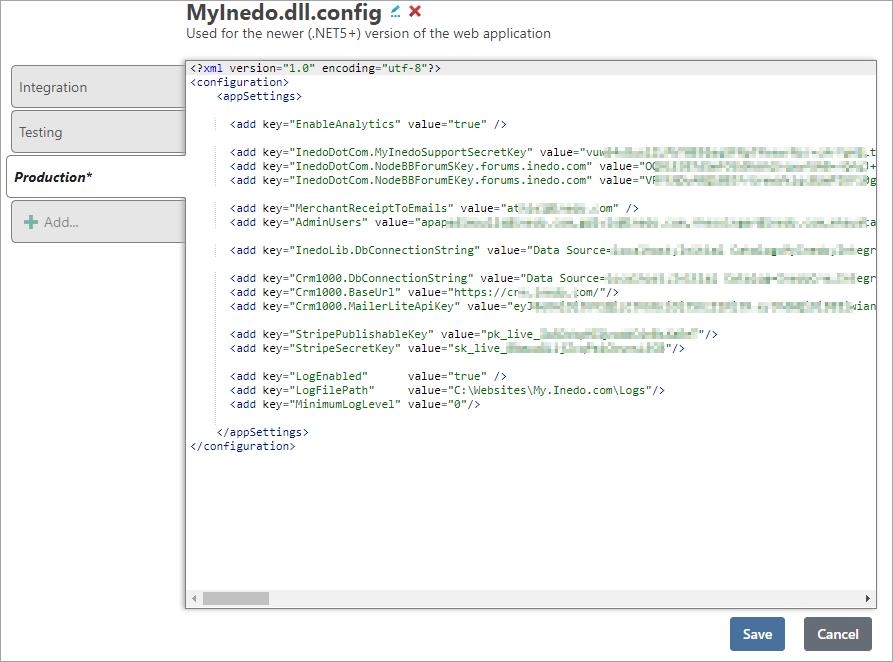
You can also secure the sensitive data in these files (i.e. connection strings, API Keys, etc.). For example, you could permit developers to access/modify the Integration instance, while only Operations teams can access/modify Production instance.
To learn more about this feature, see the Configuration Files documentation.
Creating a .NET Configuration File
To create a configuration file for your .NET application, simply navigate to application's Settings > Configuration Files page, and click "Create Configuration File". You'll be guided through importing a file from your repository, and then setting up and securing environment-specific values.
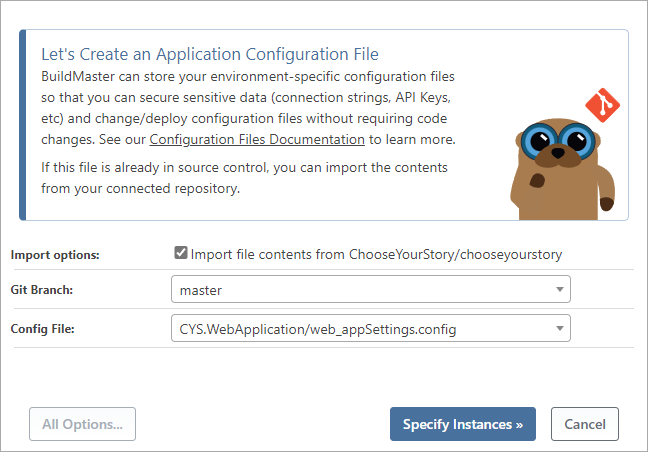
See Creating an Application Configuration File for more details.
Deploying .NET Configuration Files
It's best to deploy your .NET configuration files automatically in your deployment script, but you can also deploy them manually as needed.
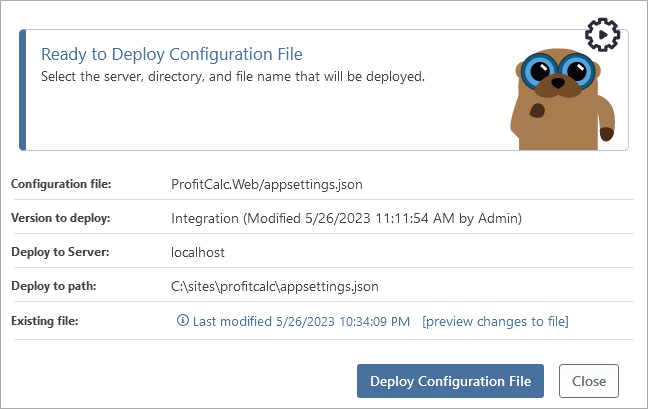
Either way, the deployment will be recorded and you'll be able to see exactly which instance and version were deployed to which server, and by which user.
See Deploying an Application Configuration File for more details.
Creating Deploy Scripts
.NET Applications can be deployed to many different deployment targets. BuildMaster includes many Deployment Script Templates to simplify these releases with a no-code solution. These templates can also be converted to OtterScript to handle more advanced deployment solutions.
| Platform | App Type | Script Template |
|---|---|---|
| Windows | Windows Service | Deploy Windows Service |
| IIS (ASP.NET, MVC) | Deploy IIS Site Script Template | |
| Desktop (WPF, etc) | Deploy Artifacts to File Share - or - Deploy to ProGet Asset Directory | |
| Console Application | ||
| Azure | Azure Web Apps | Deploy Azure Web App |
| Docker | Containerized Applications | Deploy Docker Image |
| Linux | Service (Web, etc) | Deploy Artifacts to File Share |
Other Deployment Targets
Although BuildMaster does not contain a script template for every deployment target (such as Click Once Applications or Web Deploys), BuildMaster can still handle deploying to these targets using alternative operations like DotNet::Tool and InedoCore::Exec.
Writing a Deploy Script in OtterScript
Although every deployment script is a little different, many will follow four general steps. See our Deployment Scripts documentation to learn more.
1. Stop Services
This step will generally stop the running application so that you can deploy the new version. Otherwise, you'll be deploying files while the application is running—which might lead to errors.
For example, if you're deploying a web application to IIS, you would want to stop the application pool first:
IIS::Stop-AppPool MyAppPool;
Or, if you were deploying a Windows service, you'd want to stop that too.
Windows::Stop-Service MyService;
2. Deploy Artifacts
This step involves deploying the files that you captured as build artifacts. Usually, this is done with a single Deploy-Artifact operation that points to a target directory.
Deploy-Artifact
(
  To: d:\WebApps\MyApp;
);
When run in this manner, Deploy-Artifact will synchronize the contents of the artifacts file and target directory (d:\WebApps\MyApp in the example above) by performing an incremental transfer, but there are a lot of other options available. See Deploying Artifacts to Servers to learn more.
3. Deploy Configuration
After the application's files have been deployed, the next step involves deploying two types of configuration:
- An Environment-specific configuration file, such as
web.appSettings.config - Infrastructure configuration, such as application pool or Windows service settings
Environment-specific Configuration Files
Deploying this type of file can be done with the [Deploy Configuration File](/docs/buildmaster-reference-operations-configuration-files-deploy-configuration-file) operation: ``` Deploy-ConfigFile ( ConfigFileName: web.AppSettings.config, Instance: $PipelineStageName ); ```Infrastructure Configuration
You can also use BuildMaster to manage infrastructure configurations like application pools and Windows service settings. This way, the infrastructure configuration will be deployed in tandem with the application.Infrastructure configuration can be complex, but there are many Ensure operations available in BuildMaster that will make it as easy as possible. For example, if you wanted to configure an IIS Website, you could use the IIS::Ensure-Site operation:
IIS::Ensure-Site HdarsSite
(
    Path: D:\Websites\Hdars,
    BindingPort: 80,
    AppPool: HdarsAppPool,
    BindingProtocol: http,
    BindingHostName: $PipelineStageName.hdars.corp
);
If you wanted to configure the corresponding application pool (i.e. HdarsAppPool), you'd just run the IIS::EnsureAppPool operation. There's much more that you can do using Otter; see Desired Configuration with OtterScript .
4. Start Services
The final step involves starting the application again. This is generally the opposite of the first step.
For example, if you're deploying a web application in IIS, you would want to start the application pool once everything is deployed:
IIS::Start-AppPool MyAppPool;
Or, if you were deploying a Windows service, you'd want to start that too:
Windows::Start-Service MyService;
Advanced Deployment Scenarios
The four-step deployment script above describes a simple approach that is appropriate for most applications.
You can do a lot more in BuildMaster, including advanced CI/CD patterns like Blue-Green Deployments.