CI Server (Jenkins, TeamCity, etc.) Integration

BuildMaster is tightly integrated with CI servers such as Jenkins and TeamCity. This allows you to:
- Browse CI server projects directly from BuildMaster
- Import artifacts from projects/builds into BuildMaster build artifacts
- Deploy the imported build artifacts to servers and/or the cloud
- Queue/trigger new builds on CI Servers
- Monitor CI server projects and automatically import artifacts when new builds are created
This article will walk through how this integration works, which will help you set up your applications, create advanced scripts/workflows, as well as troubleshoot issues when they come up.
CI Project Connections
When creating a new application, you'll be prompted to connect to a CI Project. You can also add CI Project connections from the application's Settings page.
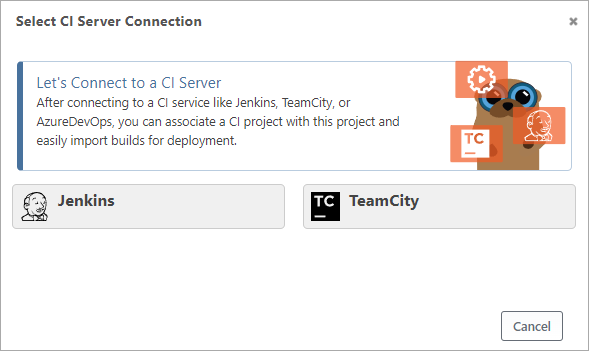
When creating a CI project connection, BuildMaster will guide you through connecting to a CI server such as Jenkins or TeamCity, and then selecting a project your account can access.
Behind the scenes, there are two parts to a CI server connection:
- Credentials; this contains your CI server's service's account information (e.g. personal access token) and is generally shared across all applications (global)
- Resource; this represents an individual project and is generally associated with a credential and not shared with other applications
You can edit these items directly to enable advanced scenarios (such as a shared repository) by clicking view all on the Settings page, or by going to Admin > Credentials & Resources. See Credentials & Resources to learn more.
Synchronizing CI Project Builds
After adding a CI project to an application, BuildMaster will routinely query that project for information about the latest builds. This synchronization occurs in response to user actions like browsing the builds page. While this means you're always seeing the most up-to-date code, it may yield occasional page loading delays (1–2 seconds) while synchronizing.
Errors in Synchronized Repositories
You may occasionally see an error message when browsing CI server builds in BuildMaster:

This means that the project is in an error state. This can happen for a few reasons, but the most common are:
- invalid credentials (access token expired, changed, etc.)
- invalid project (URL changed, etc.)
- network error occurred during synchronization
To resolve this, navigate to Settings, click on the CI project that's in an error state, and resync. You can also try to delete and re-add it from the Settings page.
Browsing CI Server Builds
One of the biggest benefits to BuildMaster's CI server integration is being able to browse builds and quickly import artifacts for later deployment.
For example, after integrating your application with a Jenkins project, a Jenkins tab will become available, and will show recent builds and their status:
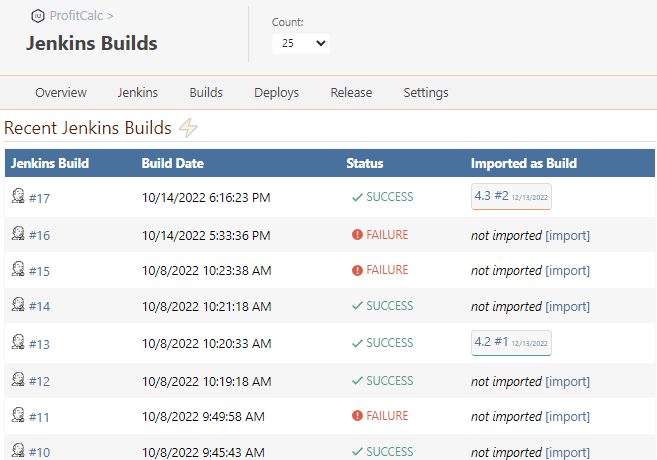
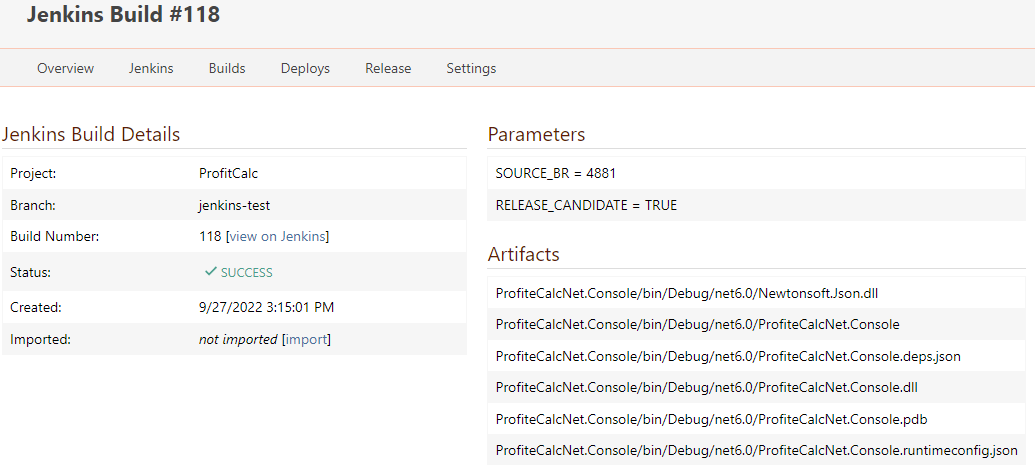
Clicking on an individual Jenkins build will display Jenkin's metadata about the build, including parameters and artifacts.
CI Server Build Scopes
BuildMaster supports Branched Projects in Jenkins and TeamCity projects with multiple build configurations. If your CI project uses either of these features, you'll see a Branch or Build Configuration displayed.
However, in both cases, the Jenkins or TeamCity build number is unique to that scope. For example, a multi-branch project in Jenkins can have two different builds numbered #11: one under a master branch and one for a develop branch. The same is true with TeamCity and build configurations.
Internally, BuildMaster considers the Jenkins Branch or TeamCity Build Configuration to be build scope under the project.
Importing Build Artifacts
When your application is connected to a CI server project, you'll be able to import artifacts by clicking the import button next to a build, or navigating to Builds > Import Build.
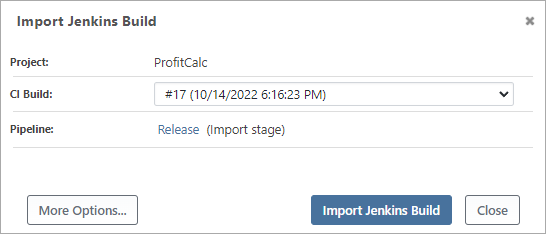
When importing a build in this manner, the selected CI server's build number (along with the project and build scope) will be associated with BuildMaster's build number and displayed throughout the UI.
You can access these associated values in scripts with the $CIBuildNumber, $CIProjectScope, and $CIProject variable functions.
The $CIBuild variable function is BuildMaster's internal identifier and may be a concatenation of the build number and scope.
Import Artifact Scripts & Operations
BuildMaster uses a script to import artifacts from your CI server. If you selected a CI Project when first creating your application, then this script will already exist under Settings > Scripts. If not, you can easily add one.
Import CI Server Artifacts Template
In most cases, you can simply use the Import CI Server Artifacts script template.
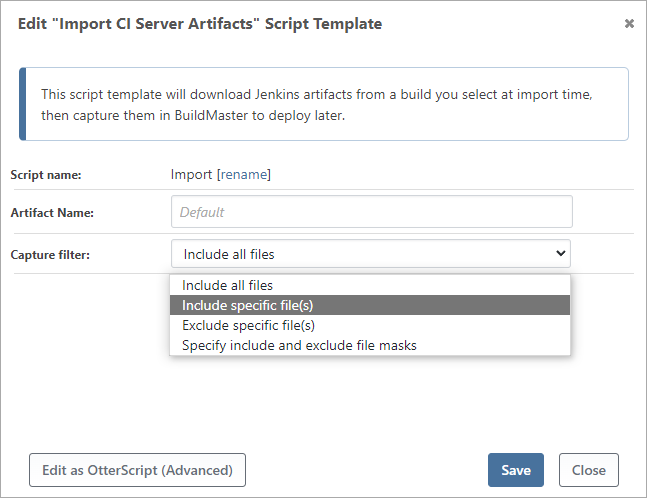
This template will attempt to download the artifacts from the selected CI server build ($CIBuildNumber) in the associated project ($CIProject) and then capture them as artifacts in BuildMaster for later deployment.
CI Server OtterScript Operations
Under the hood, the Import CI Server Artifacts Template uses an operation like Jenkins::ImportArtifacts or TeamCity::ImportArtifacts to import your CI server artifacts into BuildMaster. You can also use this—and other CI-based operations—when creating OtterScripts for more complex or advanced scenarios. There are slight differences in each operation, but the concepts are all the same. View our Jenkins and TeamCity documentation for more details.
Import-Artifacts Operations
Under the hood, the Import CI Server Artifacts Template uses an operation like Jenkins::ImportArtifacts or TeamCity::ImportArtifacts, depending on what type of CI server project your application is connected to. These operations work similarly, but use different parameters.
When you don't specify any parameters, the operation will attempt to download artifacts from $CIBuild in $CIProject. If the BuildMaster build is not associated with a CI server build (and you don't have those variables defined), then the option will error.
However, there are some cases where you may not wish to associate your BuildMaster build with a CI server build, or use CI Server resources at all. For example, if you use convention-driven design, then you may have everything specified by variables like $ApplicationName.
In a case like this, you can specify the input parameters you'd like, for example:
Jenkins::Import-Artifacts
(
    Server: https://jenkins.kramerica.corp/,
    Project: $ApplicationName,
    Branch: release,
    BuildNumber: lastBuild,
    JenkinsBuildNumber => $JenkinsBuildNumber
);

Log-Information Imported artifacts from $JenkinsBuildNumber;
The parameters for other CI Servers like TeamCity are similar, but use TeamCity-specific concepts.
Download-Artifacts Operations
The Jenkins::Download-Artifacts and TeamCity::Download-Artifacts operations will download the artifacts directly from your CI server without adding them to the BuildMaster build. This can be useful when you want to combine artifacts from multiple CI projects by first downloading your build artifacts and then adding them to the BuildMaster build using the Create-Artifact operation.
When you don't specify any parameters, the operation will attempt to download artifacts from $CIBuild in $CIProject. If the BuildMaster build is not associated with a CI server build (and you don't have those variables defined), then the option will error.
To download an artifact from Jenkins to a subdirectory within the working directory:
Jenkins::Download-Artifacts
(
    To: artifact-tmp
);
The parameters for other CI Servers like TeamCity are similar, but use TeamCity-specific concepts.
Queue-Build Operations
The Jenkins::Queue-Build and TeamCity::Queue-Build operations can be used to queue/start new builds on your CI server. This can be useful in some cases like:
- Creating a "Release Candidate" build inside of TeamCity, waiting for it, then importing the artifacts
- Running all-purpose, general scripts in Jenkins
Just as with the other operations, when you don't specify any parameters, the operation will use $CIBuild and $CIProject from the associated CI Project when queueing a new build.
By default, BuildMaster will queue the new build and continue executing your OtterScript. By setting WaitForCompletion to true, BuildMaster will wait until the queued build has completed prior to continuing its execution. When WaitForCompletion is enabled, BuildMaster will poll the CI server every 2 seconds to check if the build has completed.
Jenkins::Queue-Build
(
    WaitForCompletion: true,
    JenkinsBuildNumber => $JenkinsBuildNumber
);

Jenkins::Import-Artifacts
(
    BuildNumber: $JenkinsBuildNumber
);
The parameters for other CI Servers like TeamCity are similar, but use TeamCity-specific concepts.
Pipeline: Import & Deploy Artifacts
BuildMaster can support a wide variety of workflows through the use of pipelines.
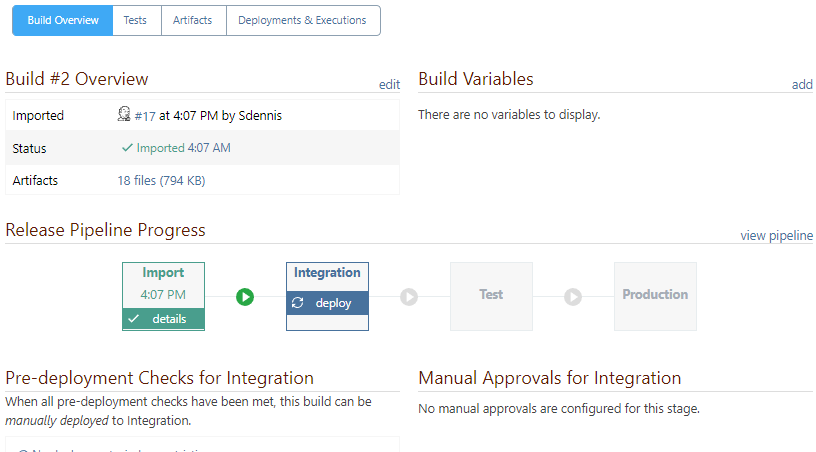
To help guide you through deploying your CI build, BuildMaster includes an Import & Deploy Artifacts pipeline. This pipeline template includes an Import script and a Deploy script in addition to a pre-configured pipeline.
The template includes the following stages:
- Import; Imports artifacts from the associated CI Project into BuildMaster
- Integration; Deploys the artifact to an integration server
- Test; Deploys the artifact to a test server
- Production; Deploys the artifact to a production server
This is just a starting point to deploying your build. From here you can add things like deploy to IIS, deploy a windows service, etc.
CI Project Monitors
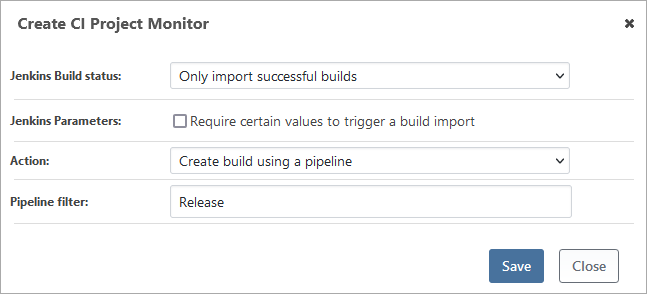
BuildMaster can monitor your CI projects for new builds, then perform an action like importing artifacts into a BuildMaster build by creating a build using a script, pipeline, release, or a custom script. Builds can be triggered based on a CI server build status and, optionally, certain build parameters to be set.
You can add a CI project monitor by clicking on the ⚡ icon on the Jenkins or TeamCity page or on the application settings page.
BuildMaster builds can be triggered when a CI build has completed with a status of:
- Only successful builds
- Any build build status
- A specific build status (e.g. SUCCESS, WARNING, etc.)
To learn more, see the Resource Monitors & Scheduled Jobs documentation.
BuildMaster 7.0 and Earlier
In BuildMaster 7.0 and earlier, CI server integration is handled similarly:
- There is no support for synchronized projects/browsing
- Variables are used for project/build tracking
Converting Old Applications to Use CI Project Integration
After upgrading to BuildMaster 2022, you can upgrade your applications on an as-needed basis. Assuming that you followed the patterns we recommended in BuildMaster 7.0 and earlier, you just need to:
- Add a new CI Project Connection
- Update Import script to use
Jenkins::ImportArtifactsorTeamCity::ImportArtifacts - Remove variables that store or prompt for
$CIBuildand$CIProject