HOWTO: SCA Integration with BuildMaster

By connecting your BuildMaster instance to an existing ProGet instance, you can integrate ProGet's Software Composite Analysis (SCA) features. These will analyze the packages in your builds and raise issues. This will allow you to block deployment in the stages of your pipeline if issues exist in these packages. You can also allow the blocking of pre-release packages.
This guide explains how to configure your BuildMaster application to use ProGet SCA.
For this guide, you will need to have the following:
- Application created in BuildMaster
- Build Script Created
- Pipeline Created
Step 1: Connect to ProGet
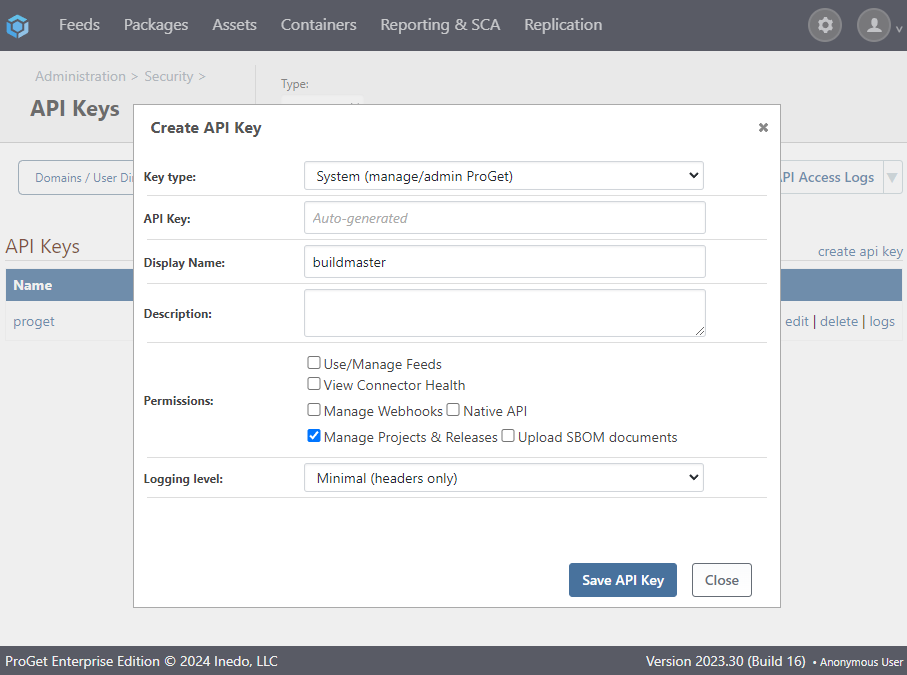
To connect your BuildMaster instance to ProGet you will need to generate an API key in ProGet first.
In your ProGet instance, navigate to "Administration Overview" > "API Keys & Access Logs" under "Security & Authentication" and select "create api key". You will need at least "Manage SCA (Projects & Builds)" selected, although you may wish to have "Upload SBOM documents" selected if you intend to upload these.
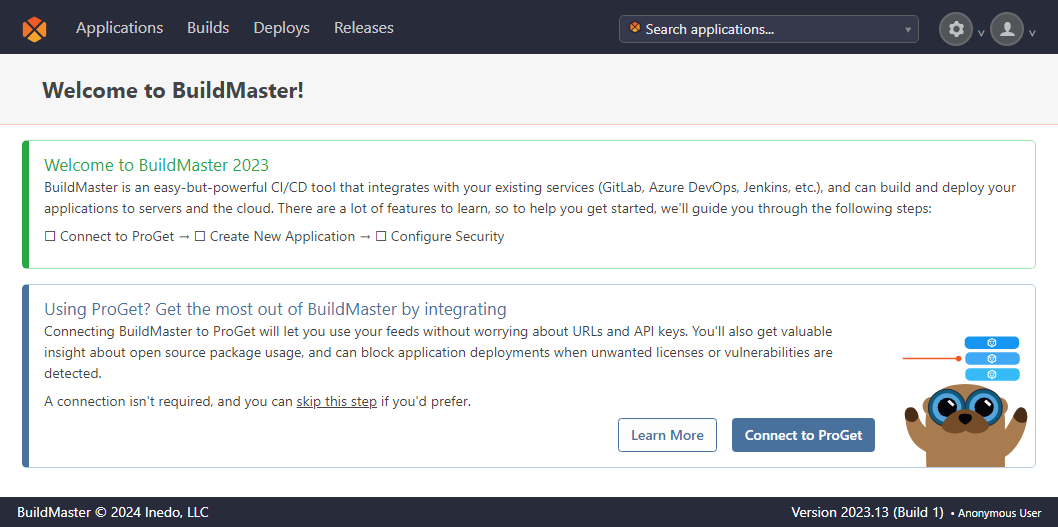
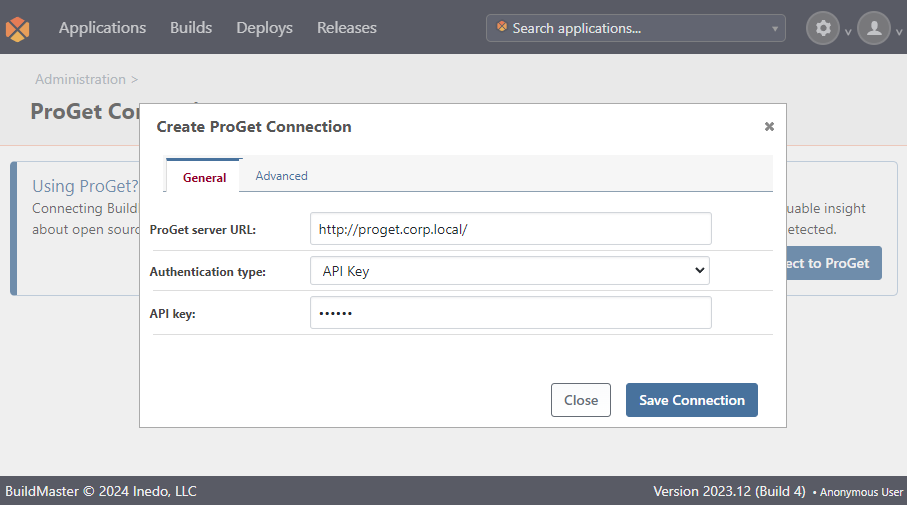
Select "Create API Key". Then in your BuildMaster instance, navigate to "Administration" > "ProGet Integration" under "Security & Authentication", and select "Connect to ProGet". You will also be given the option to do this from the home page.
From here enter the "ProGet server URL" and your "API key".
Step 2: Edit Build Script
Next, edit your Build script by navigating to "Settings" > "Scripts" and selecting your Build.
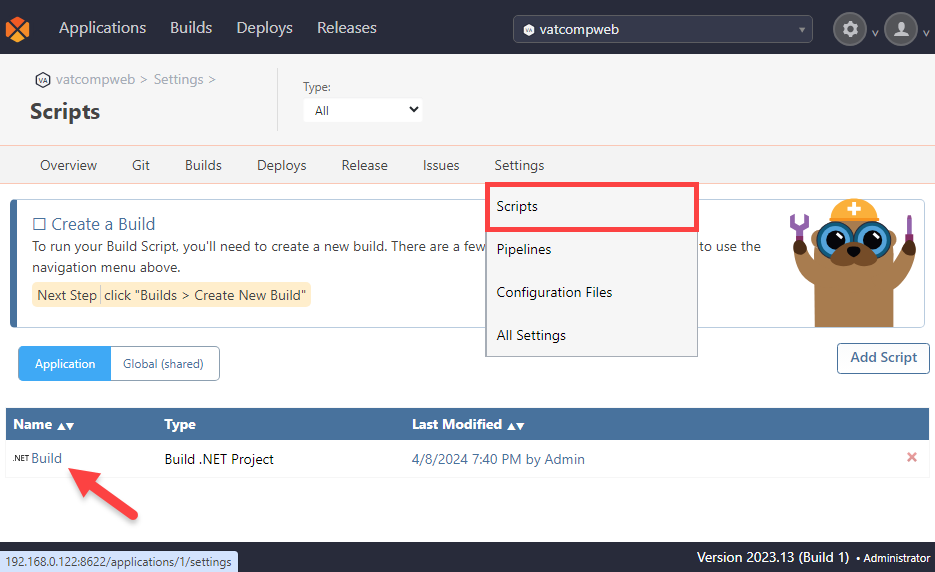
From here, select the ProGet feed you will use as your "package source" for your application. In this example we will be using ::public-nuget. You will also need to check "Scan for packages dependencies and record in ProGet". Then select "Save".
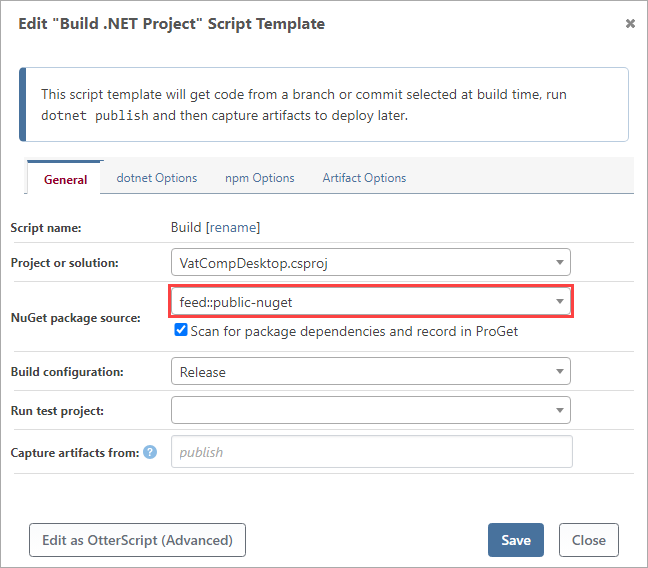
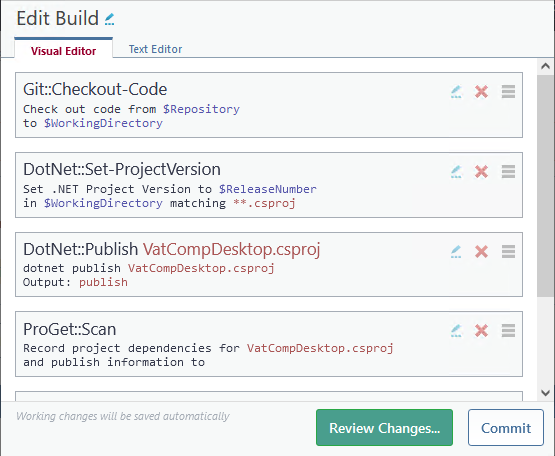
Checking the "Scan for packages dependencies and record in ProGet" box will add pgscan to the Build Script. This will inspect built/compiled code, generate an SBOM document, and publish it to ProGet. We can see this as part of the Build script by viewing it in OtterScript.
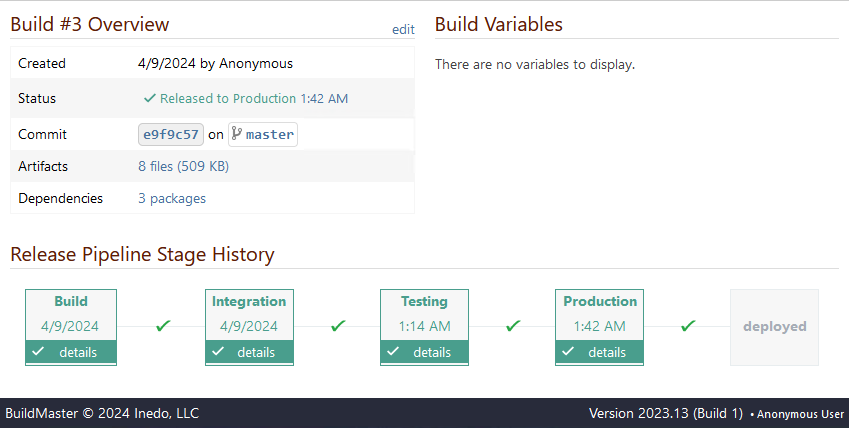
Step 3: Create a Build
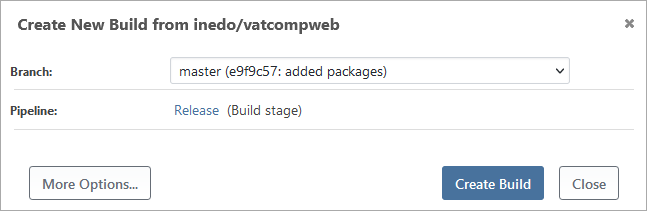
Now, create the build by navigating to "Builds" > "Create New Build" and selecting "Create Build".
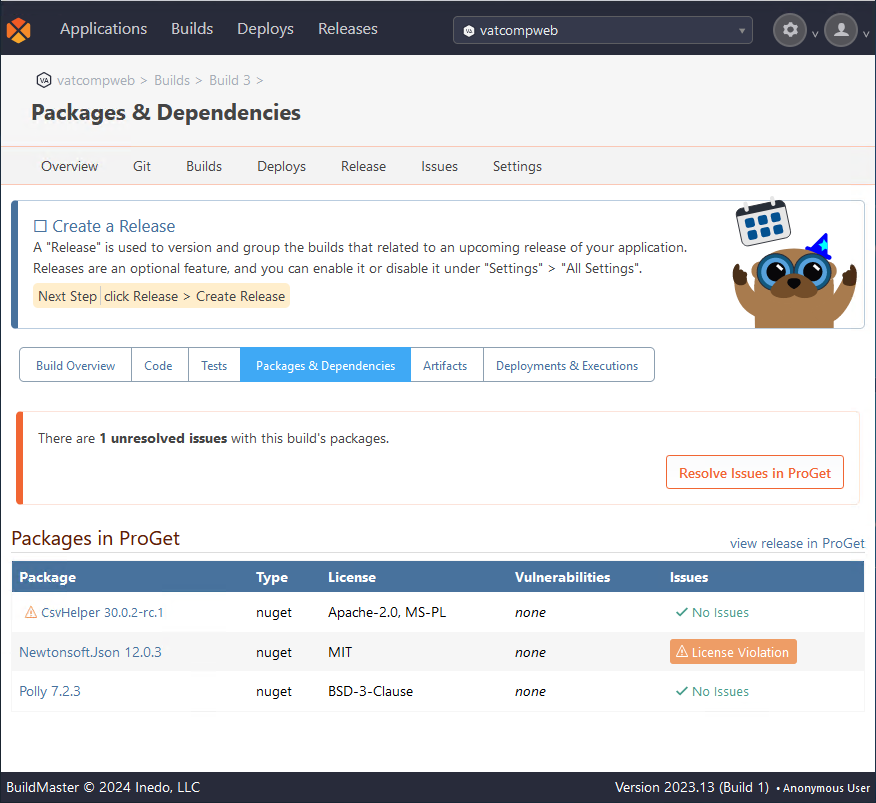
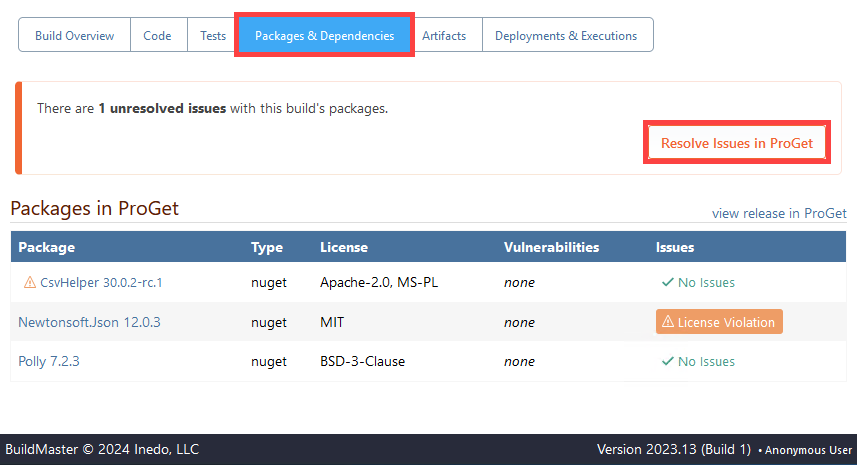
You can now view the packages in this build by selecting it under "Builds" > "View Builds" and selecting the "Packages & Dependencies" tab.
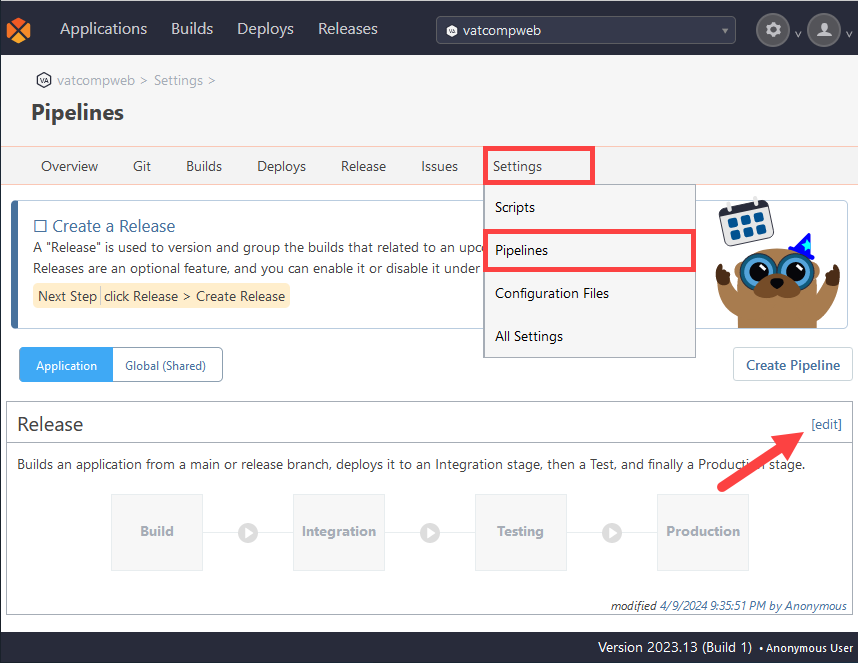
Step 2: Edit Pipeline
Next, edit your Pipeline to add requirements at different stages to prevent deployment when package issues exist. Navigate to "Settings" > "Pipelines" and select "edit".
Scroll to the stages you wish to add requirements to and select "Add a stage requirement". Then select "Edit Packages/Dependencies".
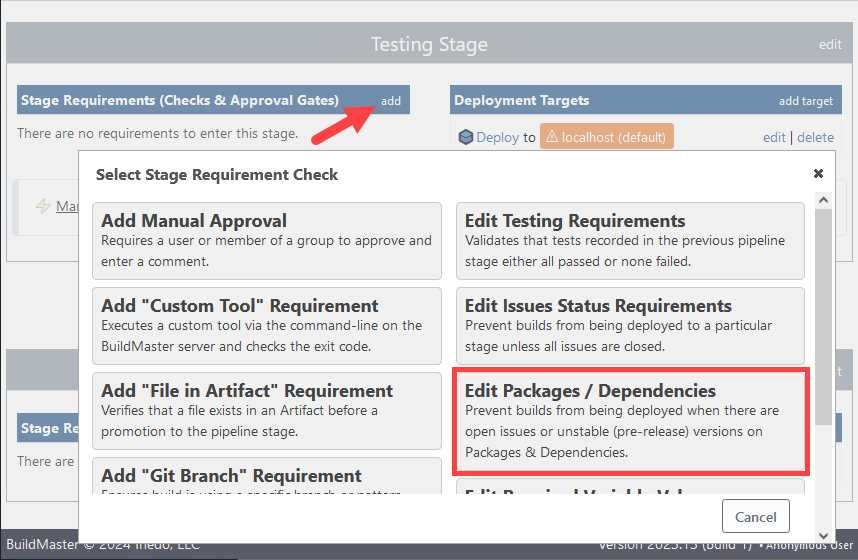
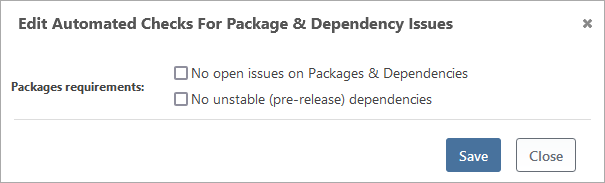
In this example, we are going to check "No open issues on Packages & Dependencies" at the testing stage and "No unstable (pre-release) dependencies" at the production stage.
After making your changes scroll back to the top and select "Commit Changes" to finalize the pipeline.
Step 3: Deploy to Testing
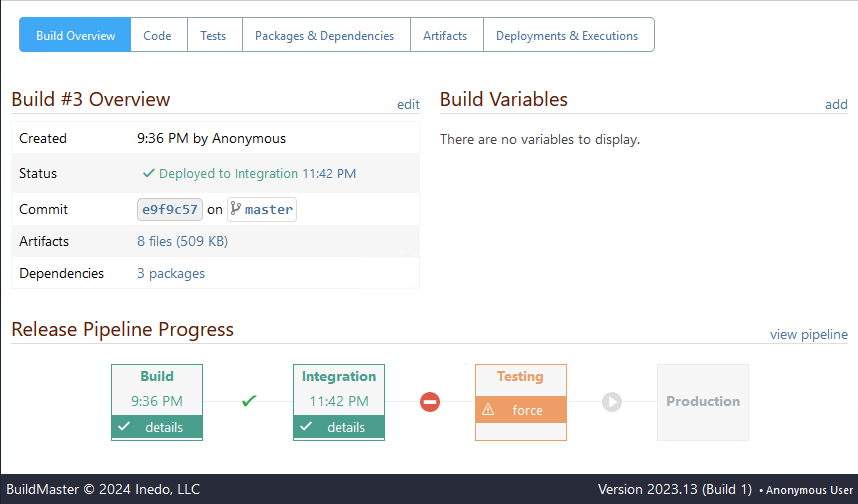
We can see that the pipeline is now blocked as a license issue exists in one of our packages.
To resolve this, navigate to the "Packages & Dependencies" tab and select "Resolve Issues in ProGet", which will direct you to the "Issues" tab in your application's "Project".
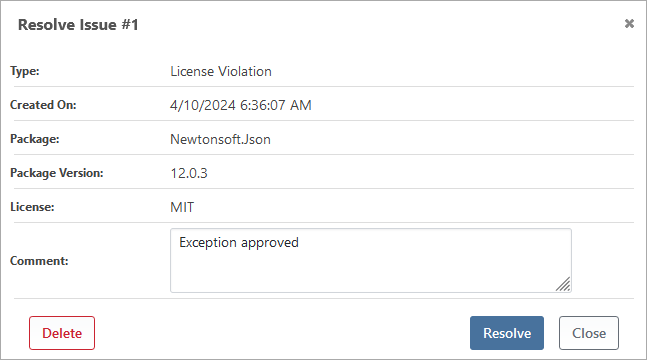
From here, select the issue and then select "Resolve".
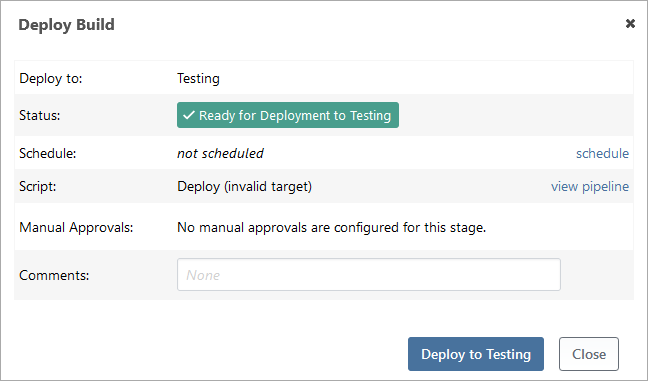
Navigating back to your BuildMaster instance, the pipeline is now unblocked.
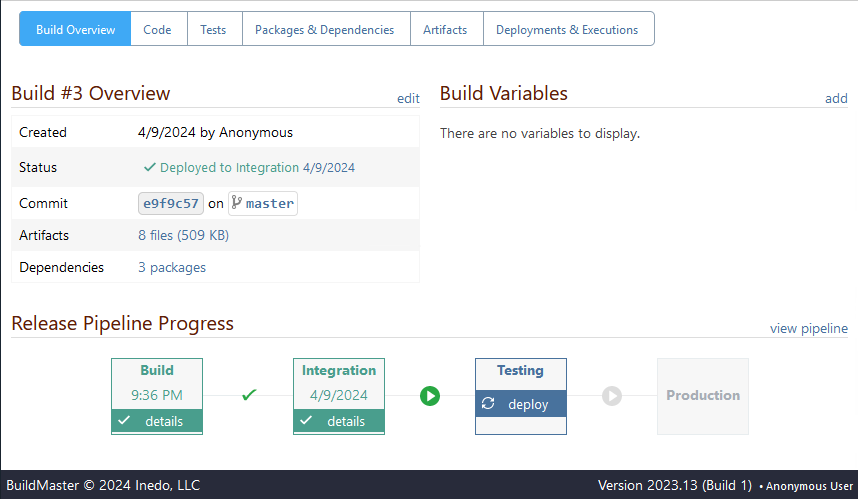
Select "deploy" and then select "Deploy to Testing".
Step 4: Deploy to Production
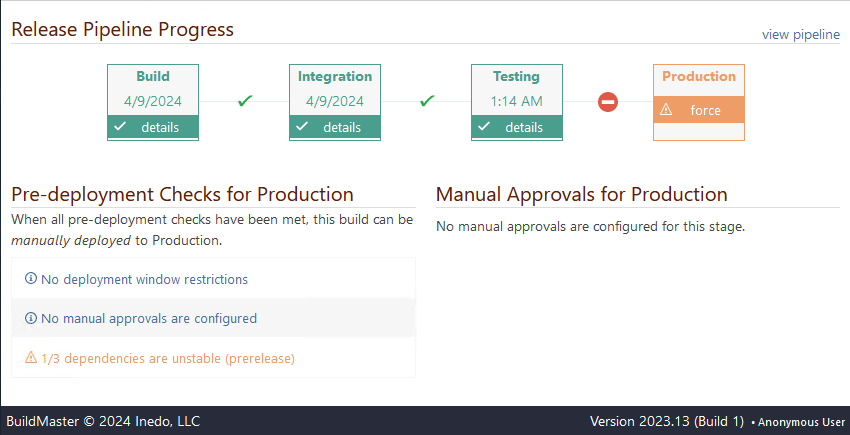
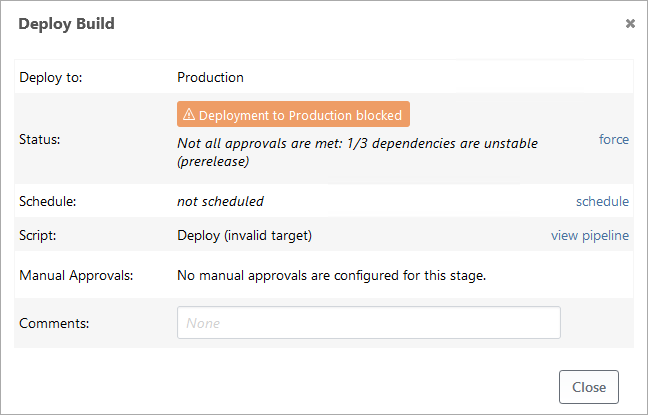
Now we see that the pipeline is now blocked as one of the dependencies is a prerelease package.
You can resolve the issue by using an acceptable release package, but for the purpose of demonstration, we will force deployment at this stage.
Step 5: (Optional) Force Deployment
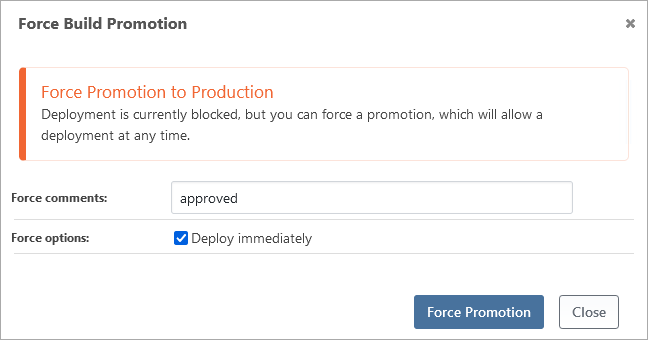
On occasions, you may wish to deploy, despite issues such as licenses or prerelease packages. In this case, you have the option of forcing deployment. In your pipeline, select "force".
Next, select "force" and then "Force Promotion" to deploy at the Production stage.
Your application will now deploy.